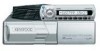
Kenwood C471FM Instruction Manual - Page 17
Accessories, Installation Procedure
 |
UPC - 019048152176
View all Kenwood C471FM manuals
Add to My Manuals
Save this manual to your list of manuals |
Page 17 highlights
Accessories External view ......... Number of items 1 2 .........1 3 4 .........4 5 6 .........1 .........4 .........1 .........2 7 .........1 2CAUTION The use of any accessories except for those provided might result in damage to the unit. Make sure only to use the accessories shipped with the unit, as shown above. 8 .........1 9 .........1 For the model of European Market. 2WARNING When drilling a hole in the car chassis to install the unit, check first that nothing is on the other side. 2CAUTION • If the fuse blows, first make sure the wires aren't touching to cause a short circuit, then replace the old fuse with one with the same rating. • Do not let unconnected wires or terminals touch metal on the car or anything else conducting electricity. To prevent a short circuit, do not remove the caps on the ends of the unconnected wires or the terminals. • After the unit is installed, check whether the brake lamps, blinkers, wipers, etc. on the car are working properly. • Insulate unconnected wires with vinyl tape or other similar material. • Some disc changers need conversion cords for connection. See the section on "Safety Precautions" for details. ■ Removing the transportation screws Remove all 3 transportation screws for protecting the internal mechanism before you start to install the unit. Transportation screws Installation Procedure NOTE 1. To prevent a short circuit, remove the key from the ignition and disconnect the - battery. After removing the transport screw, retain it carefully and attach it again before transporting the unit again. 2. Make the proper input and output wire connections for each unit. 3. Connect the wiring harness wires in the following order: ground, battery, ignition. 4. Install the unit in your car. 5. Reconnect the - battery. 6. Press the reset button. - 17 -
-
 1
1 -
2
-
3
-
4
-
5
-
6
-
7
-
8
-
9
-
10
-
11
-
 12
12 -
 13
13 -
 14
14 -
 15
15 -
 16
16 -
 17
17 -
 18
18 -
 19
19 -
 20
20 -
 21
21 -
 22
22 -
23
-
24
-
25
-
26
-
27
-
28
-
29
-
30
-
31
-
32
-
33
-
34
-
35
-
36
-
37
-
38
-
39
-
40
-
41
-
42
-
43
-
44
-
45
-
46
-
47
-
48
-
49
-
50
-
51
-
52
-
53
-
54
-
55
-
56
-
57
-
58
-
59
-
60
-
61
-
62
-
63
-
64
-
65
-
66
-
67
-
68
-
69
-
70
-
71
-
72
-
73
-
74
-
75
-
76
 |
 |
