Kenwood CA-GRL14SG Operation Manual - Page 2
Metal Mesh Speaker Grilles Installation Instructions
 |
View all Kenwood CA-GRL14SG manuals
Add to My Manuals
Save this manual to your list of manuals |
Page 2 highlights
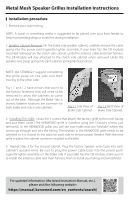
Metal Mesh Speaker Grilles Installation Instructions Installation procedure 1. Remove your outer fairing. NOTE: A towel or something similar is suggested to be placed over your front fender to help in preventing dings or scratches during installation. 2. Speaker Cabinet Removal: On the brake side speaker cabinet, carefully remove the cable going into the power port/cigarette lighter assembly. If your bike has the CB module mounted "sideways" on the clutch side cabinet, undo the antenna cable and main harness. The CB Module will stay attached to the clutch side cabinet when removed. Undo the speaker wire plugs going into each cabinet (pink/pink black wires). NOTE: We STRONGLY suggest completing the grille swap on one side and then moving to the other side! Fig 1.1 and 1.2 have arrows that point to the factory fasteners that will need to be removed to allow the cabinets to come out of the bike. Although the Brake Side is shown, fastener locations are common for both brake and clutch side cabinets. Fig 1.1 Side View of Brake Side Cabinet Fig 1.2 Back View of Brake Side Cabinet 3. Installing The Grille: Undo the 3 screws that attach the factory grille to the inner fairing and put them aside (The KENWOOD grille is installed using the 3 factory screws just removed). In the KENWOOD grille, you will see two holes and one "keyhole" where the screws go through and into the fairing. The keyhole in the KENWOOD grille needs to be oriented so it is closest to the radio on each side to ensure proper fitment. With the new grille in place, the cabinet can be re-installed to the bike. 4. Repeat Step 3 for the second cabinet. Plug the factory speaker wires back into each cabinet's speaker wires. Be sure to plug the power cable back into the power port/ cigarette lighter assembly on the brake side. If your bike has the CB module, make sure to re-install the antenna cable and main harness, then re-install your fairing and windshield. For updated information (the latest Instruction Manual, etc.), please visit the following website: https://manual.kenwood.com/en_contents/search/
-
 1
1 -
 2
2
 |
 |
