KitchenAid KDFE104HPS Owners Manual - Page 5
Start-Up/Quick Reference, Quick Steps
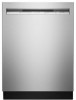 |
View all KitchenAid KDFE104HPS manuals
Add to My Manuals
Save this manual to your list of manuals |
Page 5 highlights
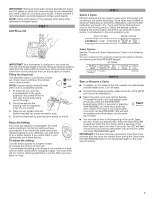
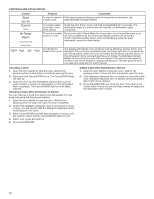
Start-Up/Quick Reference Clean EQ Wash System removable filters to maintain peak performance Cleaning the filters periodically helps to keep the dishwasher working at peak performance. The filters can be found at the bottom center of your dishwasher. See "Filtration System" section for information on removing and maintaining the filters. Drying - Rinse aid is essential You must use a drying agent such as a rinse aid for good drying performance. Rinse aid along with the Heat Dry and Extended Heat Dry option will provide best drying and avoid excessive moisture in dishwasher interior. Extended Heat Dry SLIDE For best drying use the Extended Heated Dry option. Express Wash - When you need fast results Efficient dishwashers run longer to save water and energy, just as driving a car slower saves on gas. When you need fast results, the Express Wash will clean your dishes using slightly more water and energy. Select the Heat Dry option to include automatic drying (adds approximately 38 to 45 minutes to the Express Wash cycle). ProWash™ cycle for optimal cleaning The most advanced and versatile cycle. ProWash™ cycle senses the soil amount and toughness of soil to adjust the cycle for optimal cleaning using only the amount of water and energy needed. The ProWash™ and Tough cycles are recommended for tough soil. No need to pre-rinse dishes; just scrape leftover food into the trash or disposal and load. Press Start/RESUME every time you add a dish IMPORTANT: If anyone opens the door (such as, to add a dish, even during the Delay hours), the Start/ RESUME button must be pressed each time. Push door firmly closed within 4 seconds of pressing Start/RESUME. If the door is not closed within 4 seconds, the Start/ RESUME button LED will flash, an audible tone will be heard, and the cycle will not start. Proper Detergent Dosing We recommend quality tablets and packs for convenience and improved performance. When using other forms of detergent, it is possible to use too much. This can lead to etching of your dishes. See "Add Detergent" in the Dishwasher Use section, to determine the amount of detergent needed based on soil level and water hardness. Quick Steps 1 Remove bulk food and load dishwasher. Scrape off excess food into garbage or food disposer. Load dishes so that water spray will reach every surface. 2 Add detergent and rinse aid. SLIDE SLIDE 3 Select a cycle and options (varies by model). 4 Start the dishwasher. To start and resume a cycle, press Start/RESUME and close the door within 4 seconds. If the door is not closed within 4 seconds, the Start/ RESUME LED will flash, an audible tone will sound, and the cycle will not start. 5 Unload dishwasher and clean the filter. See "Recommended Time Interval to Clean Your Filter" in the "Filtration System" section for the recommended cleaning schedule. 5
-
 1
1 -
 2
2 -
 3
3 -
 4
4 -
 5
5 -
 6
6 -
 7
7 -
 8
8 -
 9
9 -
 10
10 -
 11
11 -
12
-
13
-
14
-
15
-
16
-
17
-
18
-
19
-
20
-
21
-
22
-
23
-
24
-
25
-
26
-
27
-
28
-
29
-
30
-
31
-
32
-
33
-
34
-
35
-
36
-
37
-
38
-
39
-
40
-
41
-
42
-
43
-
44
-
45
-
46
-
47
-
48
-
49
-
50
-
51
-
52
-
53
-
54
-
55
-
56
-
57
-
58
-
59
 |
 |
