KitchenAid KRFF507HBS Owners Manual - Page 19
Remove Refrigerator Doors and Hinges, Freezer Door Handle Style 4
 |
View all KitchenAid KRFF507HBS manuals
Add to My Manuals
Save this manual to your list of manuals |
Page 19 highlights
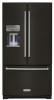
FREEZER DOOR HANDLES Freezer Door Handle Style 1 Freezer Door Handle Style 5 A. 3/32" Setscrew � Using a 3⁄32" or 1⁄8" hex key, loosen the two setscrews located on the side of each handle. Pull the handle straight out from the drawer. Make sure you keep the screws for reattaching the handles. � To replace the handles, reverse the directions. Freezer Door Handle Style 2 � To remove the handle, grasp the lower part of the handle firmly, slide the handle up and pull the handle straight out from the door. � To replace the handle, position the handle so that the large holes in the mounting clips are down and align the holes with the door studs. Rotate the handle so that the mounting clips are flat against the door and slide the handle down to engage. Remove Refrigerator Doors and Hinges WARNING A. 3/32" or 1/8" Setscrews � Using a 3⁄32" or 1⁄8" hex key, loosen the two setscrews located on the side of each handle. Pull the handle straight out from the drawer. Make sure you keep the screws for reattaching the handles. � To replace the handles, reverse the directions. Freezer Door Handle Style 3 Electrical Shock Hazard Disconnect power before removing doors. Failure to do so could result in death or electrical shock. 1. Unplug refrigerator or disconnect power. 2. Remove base grille. BASE GRILLE Style 1 A. Flat-Head Handle Screws � Remove screws and handle. � To replace the handles, reverse the directions. Freezer Door Handle Style 4 A. Flat-Head Screws B. Freezer Drawer Handle � Remove screws and handle. � To replace the handles, reverse the directions. � Using both hands, grasp the grille firmly and pull it toward you. Open the freezer drawer to access the brake feet. NOTE: To allow the refrigerator to roll easier, raise the brake feet by turning them counterclockwise. The front rollers will be touching the floor. 17-Dec-2020 11:40:23 EST | RELEASED 19 In some European factories the letter "W" of the part code mentioned herein will be automatically replaced by the number "4000" (e.g. "W12345678" becomes "400012345678")
-
 1
1 -
2
-
3
-
4
-
5
-
6
-
7
-
8
-
9
-
10
-
11
-
12
-
13
-
 14
14 -
 15
15 -
 16
16 -
 17
17 -
 18
18 -
 19
19 -
 20
20 -
 21
21 -
 22
22 -
 23
23 -
 24
24 -
25
-
26
-
27
-
28
-
29
-
30
-
31
-
32
-
33
-
34
-
35
-
36
-
37
-
38
-
39
-
40
-
41
-
42
-
43
-
44
-
45
-
46
-
47
-
48
-
49
-
50
-
51
-
52
-
53
-
54
-
55
-
56
-
57
-
58
-
59
 |
 |
