KitchenAid KSSO42QTB Installation Guide - Page 24
Install Overlay Series Custom Panels
 |
UPC - 883049038407
View all KitchenAid KSSO42QTB manuals
Add to My Manuals
Save this manual to your list of manuals |
Page 24 highlights
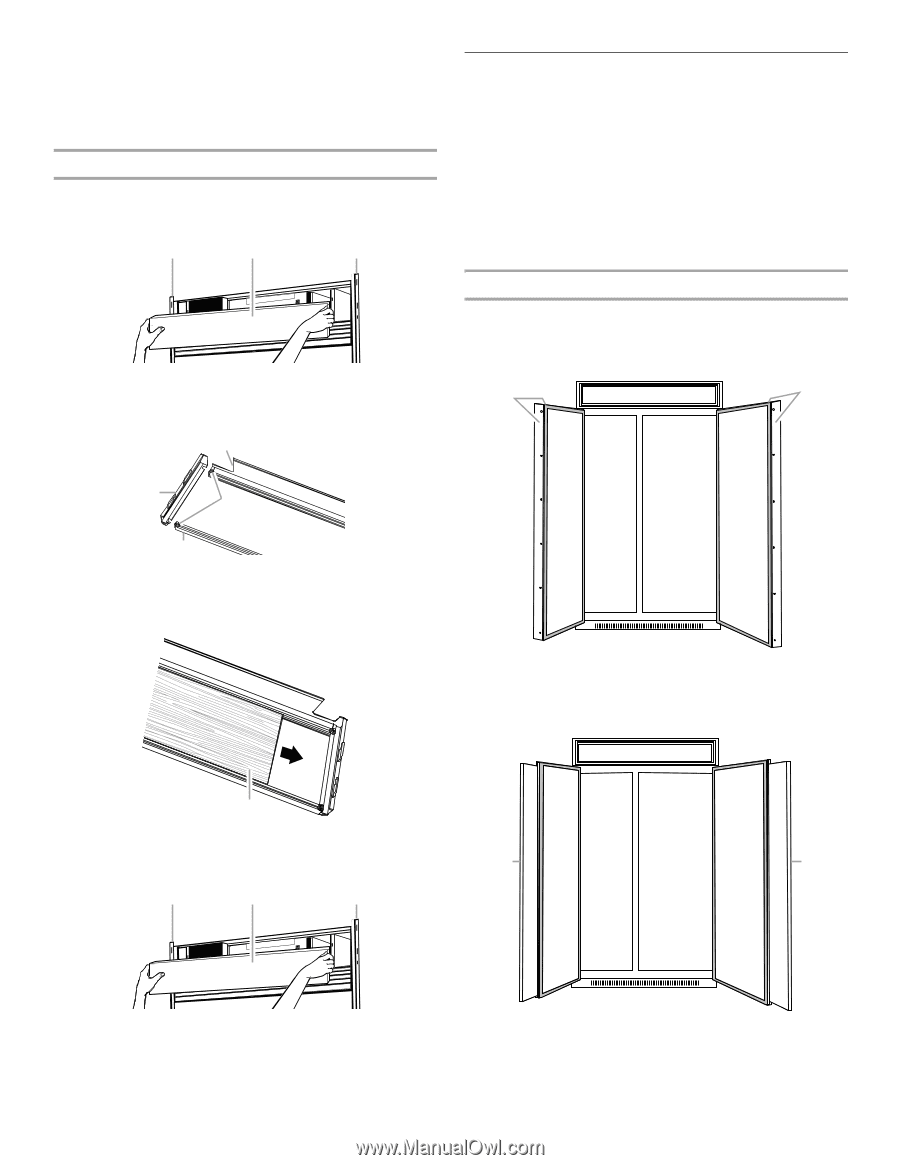
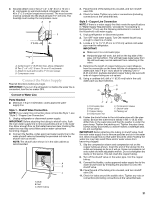
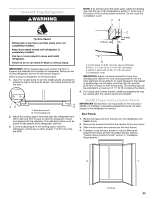
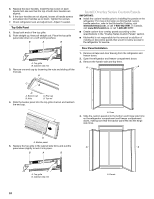
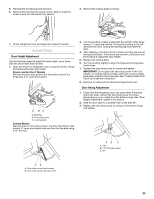
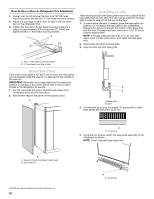
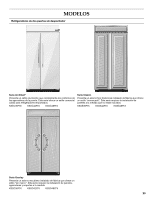
5. Replace the door handles. Install the top screw on each handle first. Be sure that the top of both door handles are aligned. 6. If the door handles are not aligned, loosen all handle screws and adjust door handles up or down. Tighten the screws. 7. Check refrigerator level and adjustment. Adjust if needed. Top Grille Panel 1. Grasp both ends of the top grille. 2. Push straight up, then pull straight out. Place the top grille panel-side down on a soft working surface. B A B A. Top grille B. Cabinet side trim 3. Remove one end cap by loosening the nuts and sliding off the end cap. A Install Overlay Series Custom Panels IMPORTANT: ■ Install the custom handles prior to installing the panels on the refrigerator. For more information on KitchenAid custom handle selection, refer to the KitchenAid Catalog, visit www.kitchenaid.com, or call 1-800-442-9991. In Canada, visit www.KitchenAid.ca, or call 1-800-807-6777. ■ Create custom door overlay panels according to the specifications in the "Overlay Series Custom Panels" section. ■ KitchenAid is not responsible for the removal or addition of molding or decorative panels that would not allow access to the refrigerator for service. Door Panel Installation 1. Remove all tape and door bracing from the refrigerator and freezer doors. 2. Open the refrigerator and freezer compartment doors. 3. Remove the handle-side and top trims. A A C B D A. Bottom rail B. Nuts C. End cap D. Top rail 4. Slide the backer panel into the top grille channel and reattach the end cap. A. Trims 4. Slide the custom panels into the bottom and hinge side trims on the refrigerator compartment and freezer compartment doors, making sure that the backer panel fits into the hinge side trims. A A. Backer panel 5. Replace the top grille in the cabinet side trims and pull the panel down slightly to lock it into place. A A B A B A. Top grille B. Cabinet side trim 24 A. Panels
-
 1
1 -
2
-
3
-
4
-
5
-
6
-
7
-
8
-
9
-
10
-
11
-
12
-
13
-
14
-
15
-
16
-
17
-
18
-
 19
19 -
 20
20 -
 21
21 -
 22
22 -
 23
23 -
 24
24 -
 25
25 -
 26
26 -
 27
27 -
 28
28 -
 29
29 -
30
-
31
-
32
-
33
-
34
-
35
-
36
-
37
-
38
-
39
-
40
-
41
-
42
-
43
-
44
-
45
-
46
-
47
-
48
-
49
-
50
-
51
-
52
-
53
-
54
-
55
-
56
-
57
-
58
-
59
-
60
-
61
-
62
-
63
-
64
-
65
-
66
-
67
-
68
-
69
-
70
-
71
-
72
-
73
-
74
-
75
-
76
-
77
-
78
-
79
-
80
 |
 |