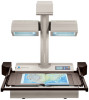
Konica Minolta PS5000C MKII PS5000C MKII User Manual - Page 58
Delete, Profile, White Balance, Color Correction, Exposure Bias, Sharpness, Black and White,
 |
View all Konica Minolta PS5000C MKII manuals
Add to My Manuals
Save this manual to your list of manuals |
Page 58 highlights
PS5000C MKII Operator's Manual 9. Scan: 10. Save: 11. Delete: 12. Profile: 13. White Balance: 14. Color Correction: 15. Exposure Bias: 16. Sharpness: 17. Black and White: 18. Adjustment: 19. Close: The "Scan" button is active for all document types ("Book", "Sheet", and "3D"). The "Right scan" button and "Left scan" button are active when "Single" or "Split" is selected in Book mode. Saves the current setting under the selected profile name. Enter a profile name and then click the "Save" button to save the settings under that profile name. Deletes the selected profile. Select the profile to be deleted and then click the "Delete" button to delete that profile. Profiles can be used to save the settings made in the "book scanner" screen, to load saved settings, and to delete saved settings. To save settings in a profile, enter the profile name in the text box under "Profile". To load a saved profile, select the profile name from the pull-down list. NOTE: A maximum of 256 profiles can be saved. The default settings profile cannot be deleted. Switches between automatic and manual white balance. If the colors do not match the original when using automatic white balance, uncheck the "Auto" option. When the "Auto" option is unchecked, the white balance is adjusted using the value determined with the setup adjustments. When the "Enable" checkbox is checked, the preset color correction will be performed. To embed the dedicated ICC profile when the image is saved using the application, uncheck "Enable". In this case, the image data will be saved with no color correction applied. Switches between automatic and manual exposure bias. If the image density does not match the original when using automatic exposure bias, uncheck the "Auto" option. You can then manually adjust the density by moving the slider between "Darken" and "Lighten". Note: The automatic exposure bias can be selected only during the "Book" mode. When the checkbox is checked, the sharpness of the image can be adjusted in 5 levels. This option is only active when the image mode is set to "Black and White". Remove the check mark under Diffusion Dither to convert the image to binary data. The threshold value used when converting an image to binary data can be set from "0" to "255". The scanner must be adjusted for setup and when the installation location is changed. See "2 Setup of the Scanner" in chapter 3 for additional information about scanner adjustment. Closes the book scanner screen. 3-32
-
 1
1 -
2
-
3
-
4
-
5
-
6
-
7
-
8
-
9
-
10
-
11
-
12
-
13
-
14
-
15
-
16
-
17
-
18
-
19
-
20
-
21
-
22
-
23
-
24
-
25
-
26
-
27
-
28
-
29
-
30
-
31
-
32
-
33
-
34
-
35
-
36
-
37
-
38
-
39
-
40
-
41
-
42
-
43
-
44
-
45
-
46
-
47
-
48
-
49
-
50
-
51
-
52
-
 53
53 -
 54
54 -
 55
55 -
 56
56 -
 57
57 -
 58
58 -
 59
59 -
 60
60 -
 61
61 -
 62
62 -
 63
63 -
64
-
65
-
66
-
67
-
68
-
69
-
70
-
71
-
72
-
73
-
74
-
75
-
76
-
77
-
78
-
79
-
80
-
81
-
82
-
83
-
84
-
85
-
86
-
87
-
88
-
89
-
90
-
91
-
92
-
93
-
94
 |
 |
