Konica Minolta bizhub 4750 bizhub 4750/4050 Network Fax Functions User Guide
Konica Minolta bizhub 4750 Manual
 |
View all Konica Minolta bizhub 4750 manuals
Add to My Manuals
Save this manual to your list of manuals |
Konica Minolta bizhub 4750 manual content summary:
- Konica Minolta bizhub 4750 | bizhub 4750/4050 Network Fax Functions User Guide - Page 1
User's Guide Network Fax Functions - Konica Minolta bizhub 4750 | bizhub 4750/4050 Network Fax Functions User Guide - Page 2
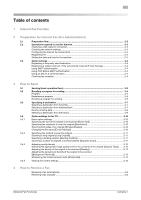
a destination from Address Book 3-7 Directly entering data ...3-8 Selecting a destination from the history 3-8 Option settings for fax TX ...3-10 Basic option settings ...3-10 Specifying the size of the original to be scanned ([Scan Size 3-10 Specifying the resolution to scan the original - Konica Minolta bizhub 4750 | bizhub 4750/4050 Network Fax Functions User Guide - Page 3
administrators 5-4 Printing or deleting a received fax ...5-4 Downloading a received fax...5-5 5.4 Stopping fax printing at night (Night RX 5-6 fax print settings (for administrators 5-8 Default print settings...5-8 Fixing the print paper size ([Print Paper Size 5-8 Fixing the print paper - Konica Minolta bizhub 4750 | bizhub 4750/4050 Network Fax Functions User Guide - Page 4
1 Internet Fax Function - Konica Minolta bizhub 4750 | bizhub 4750/4050 Network Fax Functions User Guide - Page 5
computers is used to transmit faxes. Therefore, you can send and receive faxes to/from distant locations without having to worry about the result column of the TX result screen or Activity Report, an E-mail may not reach the receiver side due to a problem on the Internet route."----" indicates that - Konica Minolta bizhub 4750 | bizhub 4750/4050 Network Fax Functions User Guide - Page 6
2 Preparation for Internet Fax (For Administrators) - Konica Minolta bizhub 4750 | bizhub 4750/4050 Network Fax Functions User Guide - Page 7
IP address is assigned to this machine. Setting up the environment to send and receive Internet fax Configuring the Internet fax environment % Enable the Internet fax received faxes. trouble of entering this information each time you send a fax. Using SMTP authentication % This machine supports - Konica Minolta bizhub 4750 | bizhub 4750/4050 Network Fax Functions User Guide - Page 8
] - [User Settings] - [Printer Settings] - [Print Reports] - [Configuration Page]. dReference If no IP address is assigned to this machine, you will need to configure the network. For details, refer to Chapter 4 "Initial Settings of This Machine" in [Quick Start Guide]. Configuring the Internet fax - Konica Minolta bizhub 4750 | bizhub 4750/4050 Network Fax Functions User Guide - Page 9
This Machine" in [User's Guide Applied Functions]. Using an SSL/TLS communication This machine supports SMTP over SSL and default.) For details on the setting procedure, refer to Chapter 2 "Configuring the Operating Environment of This Machine" in [User's Guide Applied Functions]. [Network Fax - Konica Minolta bizhub 4750 | bizhub 4750/4050 Network Fax Functions User Guide - Page 10
3 How to Send - Konica Minolta bizhub 4750 | bizhub 4750/4050 Network Fax Functions User Guide - Page 11
basic operation flow) 3 3 How to Send 3.1 Sending (basic operation flow) 1 Load the original. 2 Tap [Fax]. 3 Specify the destination E-mail address. % For details on how to specify a destination, refer to page 3-7. % Fax broadcasting can be performed by specifying multiple destinations. [Network - Konica Minolta bizhub 4750 | bizhub 4750/4050 Network Fax Functions User Guide - Page 12
received by reading the MDN message. Related setting - You can change the defaults of fax sending options to suit your environment. To configure settings: [Utility] - [User Settings] - [Scan/Fax Settings] - [Default Fax Settings] - If necessary, you can change the default of the Fax screen. To - Konica Minolta bizhub 4750 | bizhub 4750/4050 Network Fax Functions User Guide - Page 13
program, you must register the address book in advance. For details on how to register a destination, refer to Chapter 2 "Configuring the Operating Environment of This Machine" in [User's Guide Applied Functions]. 1 Tap [Fax]. 2 Tap [Application], then configure scan option settings. % The settings - Konica Minolta bizhub 4750 | bizhub 4750/4050 Network Fax Functions User Guide - Page 14
program name (using up to 72 bytes). Select the desired destination from Address Book or Group registered in this machine. Only one destination can be specified the Operating Environment of This Machine" in [User's Guide Applied Functions]. Recalling a program for sending 1 Load the original. 2 - Konica Minolta bizhub 4750 | bizhub 4750/4050 Network Fax Functions User Guide - Page 15
, and check the specified destination and settings if necessary. % To redo operations for specifying destinations or option settings, press the Reset key. Sending starts. [Network Fax Functions] 3-6 - Konica Minolta bizhub 4750 | bizhub 4750/4050 Network Fax Functions User Guide - Page 16
. dReference An Internet fax destination can only be registered using Web Connection. For details on the registration procedure, refer to Chapter 2 "Configuring the Operating Environment of This Machine" in [User's Guide Applied Functions]. Selecting a destination from Address Book Tapping [Addr - Konica Minolta bizhub 4750 | bizhub 4750/4050 Network Fax Functions User Guide - Page 17
, refer to Chapter 2 "Configuring the Operating Environment of This Machine" in [User's Guide Applied Functions]. Directly entering data Tap [Direct Input] - [Internet Fax], then enter the E-mail address as the destination. In [Receiver RX Ability], specify the specifications (compression type - Konica Minolta bizhub 4750 | bizhub 4750/4050 Network Fax Functions User Guide - Page 18
3.3 Specifying a destination 3 Tips If a registered destination is edited or the Main Power Switch is turned off and on, history information is deleted. [Network Fax Functions] 3-9 - Konica Minolta bizhub 4750 | bizhub 4750/4050 Network Fax Functions User Guide - Page 19
scanned Address]. If necessary, you can enter the message text of an E-mail (using up to 256 characters). If fixed message text phrases are registered in Web Connection, you can select the desired message text from those registered. The text area is blank by default. [Network Fax Functions] 3-10 - Konica Minolta bizhub 4750 | bizhub 4750/4050 Network Fax Functions User Guide - Page 20
Option settings for fax TX 3 Related setting The subject and message text of an E-mail can only be registered in Web Connection. For details, refer to Chapter 1 "Using Web Connection" in [User's Guide Applied Functions]. 3.4.2 Specifying the method to scan the original Scanning a long original - Konica Minolta bizhub 4750 | bizhub 4750/4050 Network Fax Functions User Guide - Page 21
, creating easy-to read images. Tap this button to scan an original, which consists of text and photos, at the optimum image quality level. This function Displays a list of specified destinations. • When you tap [Address Details], you can view detailed information of the selecting destination. - Konica Minolta bizhub 4750 | bizhub 4750/4050 Network Fax Functions User Guide - Page 22
4 How to Receive a Fax - Konica Minolta bizhub 4750 | bizhub 4750/4050 Network Fax Functions User Guide - Page 23
for fax reception status at a predetermined interval (default: 15 minutes). If any fax is Receiving a fax manually The user manually inquires the mail server for fax reception status. fax, use Web Connection. For details, refer to [E-mail RX (POP)] of Chapter 1 "Using Web Connection" in [User's Guide - Konica Minolta bizhub 4750 | bizhub 4750/4050 Network Fax Functions User Guide - Page 24
5 Receiving Options - Konica Minolta bizhub 4750 | bizhub 4750/4050 Network Fax Functions User Guide - Page 25
Position]) Reception information Reception information contains the date and time of fax reception, the number assigned according to the order of reception ( are required. - Select [Utility] - [Administrator Settings] - [Fax Settings] - [Header/Footer Position] - [Footer Position], then specify - Konica Minolta bizhub 4750 | bizhub 4750/4050 Network Fax Functions User Guide - Page 26
] - [Function Settings] - [Forward TX Setting] - [Enable Settings], then enable the Forward TX function (default: [OFF]). - Select [Utility] - [Administrator Settings] - [Fax Settings] - [Function Settings] - [Forward TX Setting] - [Forward Dest.], then register the forward destination. - Select - Konica Minolta bizhub 4750 | bizhub 4750/4050 Network Fax Functions User Guide - Page 27
the password to access the received fax (default: [OFF]). Printing or deleting a received fax A received fax can be printed or deleted by accessing the Memory RX folder. 1 Tap [Fax]. 2 Tap [Others] - [Memory RX]. 3 Enter the password to access the received fax, then tap [OK]. % If no password is - Konica Minolta bizhub 4750 | bizhub 4750/4050 Network Fax Functions User Guide - Page 28
the keyboard. http:/// 2 Log in with the account of a public user or registered user. % You can also log in with the administrator account to perform the same operation. 3 In the [Storage] tab, click [PC-Fax]. 4 Enter the password to access the received fax, then tap [OK - Konica Minolta bizhub 4750 | bizhub 4750/4050 Network Fax Functions User Guide - Page 29
required. - Select [Utility] - [Administrator Settings] - [Fax Settings] - [Function Settings] - [Nighttime RX Settings] - [Night Fax RX Print], then enable the Night RX function (default: [OFF]). - Select [Utility] - [Administrator Settings] - [Fax Settings] - [Function Settings] - [Nighttime RX - Konica Minolta bizhub 4750 | bizhub 4750/4050 Network Fax Functions User Guide - Page 30
original is printed on both sides of paper when multi-page fax is received. This can reduce the paper consumption. Operations required to use this function [Fax Settings] - [TX/RX Settings] - [Duplex Print (RX)], then en- able the Duplex Print (RX) function (default: [OFF]). [Network Fax Functions] - Konica Minolta bizhub 4750 | bizhub 4750/4050 Network Fax Functions User Guide - Page 31
to the following conditions depending on the page size of the fax. A standard-size fax, such as A4, is printed on the same standard size paper as the received fax while being slightly reduced in size (default: 96%). For faxes that are longer in the longitudinal direction than the standard size - Konica Minolta bizhub 4750 | bizhub 4750/4050 Network Fax Functions User Guide - Page 32
6 Printing a Fax Report - Konica Minolta bizhub 4750 | bizhub 4750/4050 Network Fax Functions User Guide - Page 33
are satisfied, or printed manually. Report name Activity Report TX Result Report Broadcast Report Internet Fax RX Error Report Print MDN ) is attached to the Internet fax. By default, reports are automatically printed. This list contains the details of [Fax Settings]. Tips The Activity Report - Konica Minolta bizhub 4750 | bizhub 4750/4050 Network Fax Functions User Guide - Page 34
7 Index - Konica Minolta bizhub 4750 | bizhub 4750/4050 Network Fax Functions User Guide - Page 35
Reception 4-2 Reception information 5-2 Report 6-2 Resolution 3-10 S Scan Size 3-10 Separate Scan 3-11 Settings 3-10 Sharpness 3-12 Simplex/Duplex 3-10 Specifying a destination 3-7 Address Book 3-7 Direct Input 3-8 Favorites 3-7 History 3-8 Subject 3-10 [Network Fax Functions] 7-2 - Konica Minolta bizhub 4750 | bizhub 4750/4050 Network Fax Functions User Guide - Page 36
http://konicaminolta.com A6F7-9565-00A © 2013 2013. 9
-
 1
1 -
 2
2 -
 3
3 -
 4
4 -
 5
5 -
 6
6 -
 7
7 -
8
-
9
-
10
-
11
-
12
-
13
-
14
-
15
-
16
-
17
-
18
-
19
-
20
-
21
-
22
-
23
-
24
-
25
-
26
-
27
-
28
-
29
-
30
-
31
-
32
-
33
-
34
-
35
-
36
 |
 |
User’s Guide Network Fax Functions