Konica Minolta bizhub C3110 bizhub C3110 PC-Fax Functions User Guide
Konica Minolta bizhub C3110 Manual
 |
View all Konica Minolta bizhub C3110 manuals
Add to My Manuals
Save this manual to your list of manuals |
Konica Minolta bizhub C3110 manual content summary:
- Konica Minolta bizhub C3110 | bizhub C3110 PC-Fax Functions User Guide - Page 1
User's Guide: PC-FAX Functions - Konica Minolta bizhub C3110 | bizhub C3110 PC-Fax Functions User Guide - Page 2
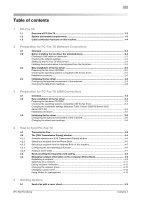
the default print settings...2-8 3 Preparation for PC-Fax TX (USB Connection) 3.1 Overview ...3-2 3.2 Easy installation of the fax driver 3-3 Preparing the fax driver CD-ROM...3-3 Checking the operating systems compatible with the fax driver 3-3 Changing the installation settings (Windows - Konica Minolta bizhub C3110 | bizhub C3110 PC-Fax Functions User Guide - Page 3
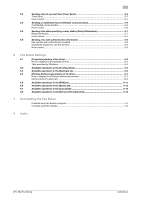
5-8 Operations required to use this function 5-8 How to send...5-9 6 Fax Driver Settings 6.1 [Properties] window of fax driver 6-2 How to display the [Properties] window 6-2 Tabs provided by Windows ...6-4 6.2 Available operations in the [Configure] tab 6-5 6.3 Available operations in - Konica Minolta bizhub C3110 | bizhub C3110 PC-Fax Functions User Guide - Page 4
1 PC-Fax TX - Konica Minolta bizhub C3110 | bizhub C3110 PC-Fax Functions User Guide - Page 5
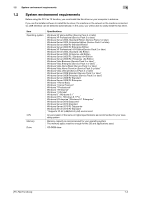
data of an original on a Windows computer as if it was printed on this machine. This is well suited for an environment where you handle a large number of data files because it is not necessary to prepare a paper original to send faxes. The fax destinations can be set using the Address Book already - Konica Minolta bizhub C3110 | bizhub C3110 PC-Fax Functions User Guide - Page 6
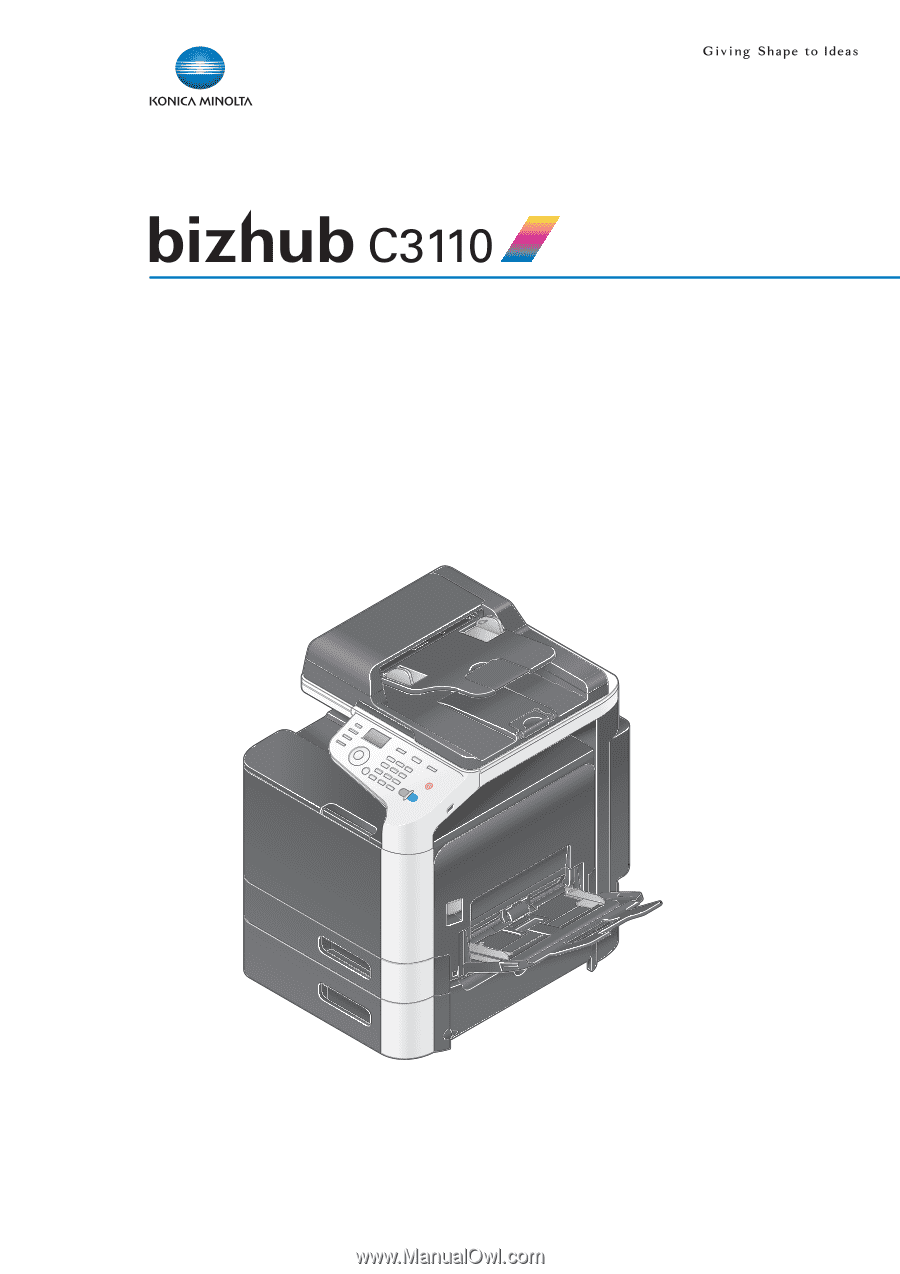
able to easily install the fax driver. Item Operating system CPU Memory Drive Specifications Windows XP Home Edition (Service Pack 3 or later) Windows XP Professional (Service Pack 3 or later) Windows Server 2003, Standard Edition (Service Pack 2 or later) Windows Server 2003, Enterprise Edition - Konica Minolta bizhub C3110 | bizhub C3110 PC-Fax Functions User Guide - Page 7
printer cables are connected to each port on this machine. 1 2 No. Port Description 1 Ethernet port Use the LAN cable to connect this machine to the network. This (LAN)(1000Base-T/100Base- machine supports /LPR and IPP) protocols and Web services are supported. 2 USB port Use a USB - Konica Minolta bizhub C3110 | bizhub C3110 PC-Fax Functions User Guide - Page 8
2 Preparation for PC-Fax TX (Network Connection) - Konica Minolta bizhub C3110 | bizhub C3110 PC-Fax Functions User Guide - Page 9
2.1 Overview 2 2 Preparation for PC-Fax TX (Network Connection) 2.1 Overview Before using the PC-Fax TX function, you must install the fax driver on your computer. This section explains how to prepare PC-Fax TX, using the installer supplied with this machine. [PC-FAX Functions] 2-2 - Konica Minolta bizhub C3110 | bizhub C3110 PC-Fax Functions User Guide - Page 10
Chapter 1 "Using Web Connection" in [User's Guide: Applied Functions]. Printing method Normal Printing (Port 9100) Internet Print (IPP) Secure Print (IPPS) Description Make sure that the RAW port number has been set. (Usually, you can use the default settings.) Check the IPP operating environment - Konica Minolta bizhub C3110 | bizhub C3110 PC-Fax Functions User Guide - Page 11
) is not supported in the IPv6 environment. Enabling device information to be obtained from the fax driver Disable the OpenAPI authentication function. (Usually, you can use the default settings.) If device information collection from the fax driver is enabled, the fax driver automatically collects - Konica Minolta bizhub C3110 | bizhub C3110 PC-Fax Functions User Guide - Page 12
this machine: The fax driver is included on the Driver & Utilities CD-ROM. CD-ROM Driver & Utilities CD-ROM User's Guide CD-ROM Description Contains Windows printer driver (PCL/PS/XPS/FAX), Mac OS printer driver, Linux printer driver, and TWAIN driver. It also contains the download page of the - Konica Minolta bizhub C3110 | bizhub C3110 PC-Fax Functions User Guide - Page 13
2.3 Easy installation of the fax driver 2 % For Windows Vista/7/8/8.1/Server 2008/Server 2008 R2/ Specify the Printer/MFP Except for the Above. Select (IP Address, Host Name...)], then manually specify the IP address and host name of this machine. 7 Select the check box of the fax driver, then - Konica Minolta bizhub C3110 | bizhub C3110 PC-Fax Functions User Guide - Page 14
2.3 Easy installation of the fax driver 2 Settings [Review] [Rename Printer] [Property] [Print Setting] [Print Test page] Description Displays the installed components for checking. Changes this machine name, if necessary. Sets the optional operating environment of this machine. For details, - Konica Minolta bizhub C3110 | bizhub C3110 PC-Fax Functions User Guide - Page 15
communication with this machine, manually set this information in [Device Option]. Select the item to change from the list, and set a value in [Setting]. 3 Click [OK]. Changing the default print settings You can change the default print settings of the fax driver, if necessary. For example - Konica Minolta bizhub C3110 | bizhub C3110 PC-Fax Functions User Guide - Page 16
3 Preparation for PC-Fax TX (USB Connection) - Konica Minolta bizhub C3110 | bizhub C3110 PC-Fax Functions User Guide - Page 17
3.1 Overview 3 3 Preparation for PC-Fax TX (USB Connection) 3.1 Overview Before using the PC-Fax TX function, you must install the fax driver on your computer. This section explains how to prepare PC-Fax TX, using the installer supplied with this machine. [PC-FAX Functions] 3-2 - Konica Minolta bizhub C3110 | bizhub C3110 PC-Fax Functions User Guide - Page 18
this machine: The fax driver is included on the Driver & Utilities CD-ROM. CD-ROM Driver & Utilities CD-ROM User's Guide CD-ROM Description Contains Windows printer driver (PCL/PS/XPS/FAX), Mac OS printer driver, Linux printer driver, and TWAIN driver. It also contains the download page of the - Konica Minolta bizhub C3110 | bizhub C3110 PC-Fax Functions User Guide - Page 19
to Step 3. % If the installer does not start, open the printer driver folder on the CD-ROM, double-click [Set- up.exe], then go to Step 4. % If the [User Account Control] window appears, click [Continue] or [Yes]. 3 Click [Printer/FAX]. 4 Read the license agreement, then click [AGREE]. 5 Check the - Konica Minolta bizhub C3110 | bizhub C3110 PC-Fax Functions User Guide - Page 20
box of the fax driver, then click [Next]. 9 Check the components to be installed, then click [Install]. 10 Change the printer name or print a test page, if necessary, then click [Finish]. Installation of the fax driver is then completed. Settings [Review] [Rename Printer] [Property] [Print Setting - Konica Minolta bizhub C3110 | bizhub C3110 PC-Fax Functions User Guide - Page 21
% If you are using Windows XP/Server 2003, set the option manually using [Device Option]. Select the item to change from the list, and set a value in [Setting]. 3 Click [OK]. Changing the default print settings You can change the default print settings of the fax driver, if necessary. For example - Konica Minolta bizhub C3110 | bizhub C3110 PC-Fax Functions User Guide - Page 22
4 How to Send PC-Fax TX - Konica Minolta bizhub C3110 | bizhub C3110 PC-Fax Functions User Guide - Page 23
information on how to change the default values of print settings, refer to page 2-8. % The fax driver provides Favorite Setting to enable quick selection of frequently used print settings. For details, refer to page 4-8. 5 Click [Print]. The [FAX Transmission Popup] window opens. For details on the - Konica Minolta bizhub C3110 | bizhub C3110 PC-Fax Functions User Guide - Page 24
page 4-5. % When you select a recipient from the Phone Book of the computer, click [Add From Phone Book...]. For details, refer to page 4-5. % Set the fax transmission function and add a cover page to the fax, if necessary. For details, refer to page 4-6. 7 Click [Add Recipients]. % When you send - Konica Minolta bizhub C3110 | bizhub C3110 PC-Fax Functions User Guide - Page 25
the ECM check box. ECM is an error correction mode defined by the ITU-T (International Telecommunication Union - Telecommunication Standardization Sector). Fax machines that support the ECM communicate, while confirming that there is no error in the sent data. This prevents image blurring caused by - Konica Minolta bizhub C3110 | bizhub C3110 PC-Fax Functions User Guide - Page 26
FAX Transmission Popup] window 4 Settings [FAX Cover Sheet] Description Select this check box to add a cover sheet to the fax when you send it. Click the [Settings] button to set (Address Book)" in [User's Guide: Fax Functions]. 1 In the [FAX Transmission Popup] window, select [Add from Address Book - Konica Minolta bizhub C3110 | bizhub C3110 PC-Fax Functions User Guide - Page 27
Popup] window. 4.2.4 Configuring the fax transmission function In the [FAX Transmission Popup] window, select [Fax Mode Setting Details...], and you can set up the Fax transmission functions. Settings [Print Recipient File] [Timer Send] Description Select this check box to send a fax and print - Konica Minolta bizhub C3110 | bizhub C3110 PC-Fax Functions User Guide - Page 28
number of the recipient folder (using up to 20 digits). You can also set this option using the [FAX] tab of the [Printing Preferences] window. When you use the F-code TX function, select this box and enter the password of the recipient folder (using up to 20 digits, including symbols # and *). You - Konica Minolta bizhub C3110 | bizhub C3110 PC-Fax Functions User Guide - Page 29
registered. Use names that can easily be identified. Assign an icon to the favorite settings, if necessary. Select this check box to share the favorite settings with other users. Enter a comment to the favorite setting, if necessary. The comment is displayed when you place the mouse cursor over the - Konica Minolta bizhub C3110 | bizhub C3110 PC-Fax Functions User Guide - Page 30
a recipient If you have registered the frequently calling recipients in the Phone Book, you can quickly call the recipient when sending a fax. Use the [FAX] tab of the fax driver to add recipients to a phone book. When you use the Phone Book for the first time, create a Phone Book file. When - Konica Minolta bizhub C3110 | bizhub C3110 PC-Fax Functions User Guide - Page 31
the ECM check box. ECM is an error correction mode defined by the ITU-T (International Telecommunication Union - Telecommunication Standardization Sector). Fax machines that support the ECM communicate, while confirming that there is no error in the sent data. This prevents image blurring caused by - Konica Minolta bizhub C3110 | bizhub C3110 PC-Fax Functions User Guide - Page 32
the desired one. - To create a Phone Book file, open the [Phone Book Entry...] window, then select [New] from the [File] menu. Also, you can save the file Book. Your operations are the same when you open the Phone Book to send a fax and when you open the Phone Book to add a recipient to it. Select a - Konica Minolta bizhub C3110 | bizhub C3110 PC-Fax Functions User Guide - Page 33
Tips If the recipient name and fax number, which are manually entered at the time of fax transmission, are registered using [ recipient that you wish to move to another group, and select the check box of the desired group number shown in the right-hand pane. Tips window. [PC-FAX Functions] 4-12 - Konica Minolta bizhub C3110 | bizhub C3110 PC-Fax Functions User Guide - Page 34
[Paste] to the desired folder. - You can enter a folder name using up to 40 characters. - You can create folders up to three hierarchy levels. [PC-FAX Functions] 4-13 - Konica Minolta bizhub C3110 | bizhub C3110 PC-Fax Functions User Guide - Page 35
5 Sending Options - Konica Minolta bizhub C3110 | bizhub C3110 PC-Fax Functions User Guide - Page 36
in the [FAX Cover Sheet Settings] window, which is opened when you click [Settings...]. Also, you can set it in the [FAX] tab of the fax driver. 1 Open the [FAX Transmission Popup] window, then select the [FAX Cover Sheet] check box. 2 Click [Settings...]. The [FAX Cover Sheet Settings] window opens - Konica Minolta bizhub C3110 | bizhub C3110 PC-Fax Functions User Guide - Page 37
you write the total number of fax pages on the cover sheet, select this check box, then select a number of fax pages including the cover sheet. When cover sheet, set a style. To add a title to the recipient, add it when you set the recipient name in the [FAX Transmission Popup] window. Enter the - Konica Minolta bizhub C3110 | bizhub C3110 PC-Fax Functions User Guide - Page 38
each entry). 7 To add an image, specify an image file in the [Image] tab. % You can place images such as company's logo and map on the cover sheet. BMP format can be specified. % Select the [Zoom] check box to zoom an image. % Set a position to add an image, using [X:] and [Y:] options. 8 Check - Konica Minolta bizhub C3110 | bizhub C3110 PC-Fax Functions User Guide - Page 39
time has already passed the transmission time, the fax is sent in the next day. How to send 1 In the [FAX Transmission Popup] window, select [Fax Mode Setting Details...]. The [Fax Mode Details] window opens. 2 Select the [Timer Send] check box, and set [Send Time]. % When you click [Reflect Current - Konica Minolta bizhub C3110 | bizhub C3110 PC-Fax Functions User Guide - Page 40
1 In the [FAX Transmission Popup] window, select [Fax Mode Setting Details...]. The [Fax Mode Details] window opens. 2 Specify the recipient's Confidential RX User Box. % [SUB Address]: Enter the registration number of the Confidential RX User Box. % [Sender ID]: Enter the communication password for - Konica Minolta bizhub C3110 | bizhub C3110 PC-Fax Functions User Guide - Page 41
Popup] window, select [Fax Mode Setting Details...]. The [Fax Mode Details] window opens. 2 Specify the recipient's relay folder. % [SUB Address]: Enter the registration number of the relay folder. % [Sender ID]: Enter the password for the relay distribution. 3 Click [OK]. [PC-FAX Functions - Konica Minolta bizhub C3110 | bizhub C3110 PC-Fax Functions User Guide - Page 42
use this function Open the [Configure] tab of the fax driver, and ensure that the user authentication or account track has been set correctly. 1 Open the [Properties] window of the fax driver. % For information on how to display the [Properties] window, refer to page 6-2. 2 In [Device Option] of the - Konica Minolta bizhub C3110 | bizhub C3110 PC-Fax Functions User Guide - Page 43
authentication is enabled, select [Recipient User], then enter the user name and password. % If access to this machine by public users (unregistered users) is allowed, you can select [Public User] and send a fax without entering the user name and password. 3 If account track is enabled, enter the - Konica Minolta bizhub C3110 | bizhub C3110 PC-Fax Functions User Guide - Page 44
6 Fax Driver Settings - Konica Minolta bizhub C3110 | bizhub C3110 PC-Fax Functions User Guide - Page 45
] window of fax driver 6 6 Fax Driver Settings 6.1 [Properties] window of fax driver How to display the [Properties] window The fax driver has two windows for configuring settings: the [Properties] window and the [Printing Preferences] window. This section describes the [Properties] window - Konica Minolta bizhub C3110 | bizhub C3110 PC-Fax Functions User Guide - Page 46
of fax driver 6 % In Windows Vista/Server 2008, click the Start menu, and select [Control Panel] - [Hardware and Sound] - [Printers]. When [Control Panel] is displayed in Classic View, double-click [Printers]. % In Windows XP/Server 2003, click the Start menu, then select [Printers and Faxes]. If - Konica Minolta bizhub C3110 | bizhub C3110 PC-Fax Functions User Guide - Page 47
] window appears. Tabs provided by Windows The [General], [Sharing], [Port], [Advanced], [Color Management], and [Security] tabs are provided by Windows. You can print a test page, configure printer sharing, configure printer ports, etc. For details, refer to the Windows manuals. [PC-FAX Functions - Konica Minolta bizhub C3110 | bizhub C3110 PC-Fax Functions User Guide - Page 48
box to automatically obtain the information of this machine. Set the communication method to get information from this machine. • [Device which Connect with Printer Port]: Information is obtained from the printing port specified in the [Port] tab in the fax driver. • [Specify IP Address or Printer - Konica Minolta bizhub C3110 | bizhub C3110 PC-Fax Functions User Guide - Page 49
change the default settings for how confirmation messages are displayed as well as the window for inputting authentication information. Settings [Display Constraint Message] [Verify Authentication settings before printing] [Popup Authentication Dialog when printing] [Reconfirm FAX number entered - Konica Minolta bizhub C3110 | bizhub C3110 PC-Fax Functions User Guide - Page 50
window of fax driver 6 6.4 [Printing Preferences] window of fax driver How to display the [Printing Preferences] window The fax driver has two windows for configuring settings: the [Properties] window and the [Printing Preferences] window. This section describes the [Printing Preferences] window - Konica Minolta bizhub C3110 | bizhub C3110 PC-Fax Functions User Guide - Page 51
of fax driver 6 % In Windows Vista/Server 2008, click the Start menu, and select [Control Panel] - [Hardware and Sound] - [Printers]. When [Control Panel] is displayed in Classic View, double-click [Printers]. % In Windows XP/Server 2003, click the Start menu, then select [Printers and Faxes]. If - Konica Minolta bizhub C3110 | bizhub C3110 PC-Fax Functions User Guide - Page 52
, right-click the icon of the installed printer, and click [Printing Preferences...]. The [Printing Preferences] window opens. The print settings changed here are registered as default values. To temporarily change settings when performing PC-FAX TX from the application software, click [Properties - Konica Minolta bizhub C3110 | bizhub C3110 PC-Fax Functions User Guide - Page 53
6.4 [Printing Preferences] window of fax driver 6 Settings [Help] [Default] Description Displays the help for each item in the window. Reverts the settings to their default values. [PC-FAX Functions] 6-10 - Konica Minolta bizhub C3110 | bizhub C3110 PC-Fax Functions User Guide - Page 54
F-code TX function, enter the password for the recipient folder (using up to 20 digits, including symbols # and *). You can also set this option in [Fax Mode Setting Details...] of the [FAX Transmission Popup] window. Select this check box to add a cover sheet to the fax when you send it. Click the - Konica Minolta bizhub C3110 | bizhub C3110 PC-Fax Functions User Guide - Page 55
the original created in application software. If the setting in the fax driver differs from that specified in the application software, correct the setting. When scanning a custom-sized original, select [Custom Size] and set its width and length. Select the fax paper size to use for sending. If the - Konica Minolta bizhub C3110 | bizhub C3110 PC-Fax Functions User Guide - Page 56
Layout] tab In the [Layout] tab, you can configure layout settings to send faxes. Settings [Combination] Description Select how the original pages are combined on specified N in 1 in [Combination], select this check box if you want to draw border lines between pages. In addition, select the type of - Konica Minolta bizhub C3110 | bizhub C3110 PC-Fax Functions User Guide - Page 57
6.8 Available operations in the [Version Information] tab 6 6.8 Available operations in the [Version Information] tab In the [Version Information] tab, you can check the fax driver version. [PC-FAX Functions] 6-14 - Konica Minolta bizhub C3110 | bizhub C3110 PC-Fax Functions User Guide - Page 58
7 Uninstalling the Fax Driver - Konica Minolta bizhub C3110 | bizhub C3110 PC-Fax Functions User Guide - Page 59
4 Check the contents of the [Readme] window, then click [Next]. 5 Select [Uninstall Printer Driver], then click [Next]. 6 Select the fax driver to uninstall, then click [Uninstall]. % Follow the subsequent on-screen instructions. 7 If a dialog box prompting you to restart the computer appears, click - Konica Minolta bizhub C3110 | bizhub C3110 PC-Fax Functions User Guide - Page 60
8 Index - Konica Minolta bizhub C3110 | bizhub C3110 PC-Fax Functions User Guide - Page 61
TX 5-6 Cover Sheet 5-2 F Favorite 4-8 Fax Driver Initial Settings (Network Connection 2-8 Initial Settings (USB Connection 3-6 Install (Network Connection 2-5 Install (USB Connection 3-3 Settings 6-2 System Environment 1-3 Uninstall 7-2 F-Code TX 4-6, 5-6, 5-7 P PC-Fax TX How to Send - Konica Minolta bizhub C3110 | bizhub C3110 PC-Fax Functions User Guide - Page 62
http://konicaminolta.com A6DT-9224-00A © 2014 2014. 2
-
 1
1 -
 2
2 -
 3
3 -
 4
4 -
 5
5 -
 6
6 -
 7
7 -
8
-
9
-
10
-
11
-
12
-
13
-
14
-
15
-
16
-
17
-
18
-
19
-
20
-
21
-
22
-
23
-
24
-
25
-
26
-
27
-
28
-
29
-
30
-
31
-
32
-
33
-
34
-
35
-
36
-
37
-
38
-
39
-
40
-
41
-
42
-
43
-
44
-
45
-
46
-
47
-
48
-
49
-
50
-
51
-
52
-
53
-
54
-
55
-
56
-
57
-
58
-
59
-
60
-
61
-
62
 |
 |
User's Guide: PC-FAX Functions