Konica Minolta fi-7180 fi-5900C Get Started Guide
Konica Minolta fi-7180 Manual
 |
View all Konica Minolta fi-7180 manuals
Add to My Manuals
Save this manual to your list of manuals |
Konica Minolta fi-7180 manual content summary:
- Konica Minolta fi-7180 | fi-5900C Get Started Guide - Page 1
P3PC-1422-02EN - Konica Minolta fi-7180 | fi-5900C Get Started Guide - Page 2
- Konica Minolta fi-7180 | fi-5900C Get Started Guide - Page 3
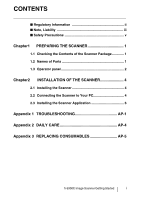
1 1.2 Names of Parts 1 1.3 Operator panel 2 Chapter2 INSTALLATION OF THE SCANNER 4 2.1 Installing the Scanner 4 2.2 Connecting the Scanner to Your PC 4 2.3 Installing the Scanner Application 6 Appendix 1 TROUBLESHOOTING AP-1 Appendix 2 DAILY CARE AP-4 Appendix 3 REPLACING CONSUMABLES AP - Konica Minolta fi-7180 | fi-5900C Get Started Guide - Page 4
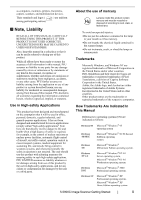
fi-5900C and basic operation methods. Before you start using fi-5900C be sure to thoroughly read this manual to ensure correct use. The "Operator's Guide" and, if not installed and used in accordance with the instruction manual, may cause harmful interference to radio communications. However, there - Konica Minolta fi-7180 | fi-5900C Get Started Guide - Page 5
any damage caused by errors or omissions or by statements of any kind in this manual, its updates or supplements, whether such errors are omissions or statements resulting from operating system, Microsoft® Windows® XP Home Edition operating system. fi-5900C Image Scanner Getting Started iii - Konica Minolta fi-7180 | fi-5900C Get Started Guide - Page 6
authorized FUJITSU Image Scanner service provider to make repairs to this product. Warning Indications Used In This Manual WARNING This indication alerts colored background show instructions users should follow. It may also include the drawing that shows the specific instruction. Warning Label The - Konica Minolta fi-7180 | fi-5900C Get Started Guide - Page 7
might cause equipment failure and other troubles or an electric shock. Use coming from the device or detect other problems such as smoke, strange smells or noises the scanner or an authorized FUJITSU scanner service provider. Wipe any dust from the power fi-5900C Image Scanner Getting Started v - Konica Minolta fi-7180 | fi-5900C Get Started Guide - Page 8
prevent it from falling. Install the scanner on a strong surface that will support the weight of the scanner and other devices. Do not block the ventilation excessive heat to build up inside the scanner, which can cause scanner trouble or even fire. Install the scanner in a well-ventilated location. - Konica Minolta fi-7180 | fi-5900C Get Started Guide - Page 9
your scanner dealer or an authorized FUJITSU scanner service provider. Handle the scanner and accessories with 14 Hopper side Sheet Guides used to make sure guides that the paper to power switch For switching the power support ON/OFF. 2 Power inlet For fi-5900C Image Scanner Getting Started 1 - Konica Minolta fi-7180 | fi-5900C Get Started Guide - Page 10
(Thick) button. (Normally no need to change from the default setting) Use this button to start linked applications (*About the settings, refer to the "fi-5900C Operator's Guide" on the Setup CD-ROM). Use this button to turn the power ON/ OFF. When the power is turned on, the button is illuminated - Konica Minolta fi-7180 | fi-5900C Get Started Guide - Page 11
. If this alarm occurs, turn the power off and then on again. If the alarm is indicated after turning on the power again, contact your service engineer. fi-5900C Image Scanner Getting Started 3 - Konica Minolta fi-7180 | fi-5900C Get Started Guide - Page 12
scanner's dimensions and required installation space, refer to the fi-5900C Operator's Guide, chapter "10. Scanner Specifications". ATTENTION • The scanner the USB or SCSI cable. Windows 95 and Windows NT 4.0 do not support USB interface. ■ Connecting the USB Interface 1. Connect the USB cable to - Konica Minolta fi-7180 | fi-5900C Get Started Guide - Page 13
card Find the recommended SCSI card information on the Fujitsu web site (FAQ). http://www.fujitsu.com/global/support/ computing/peripheral/scanners/scsi/ The SCSI ID is initially set to "5" at the factory. If the the other end of the cable to your PC. fi-5900C Image Scanner Getting Started 5 - Konica Minolta fi-7180 | fi-5900C Get Started Guide - Page 14
Install the appropriate scanner driver for the application you will use. The following applications also come with fi-5900C. They will provide you more convenient and advanced usage. • Error Recovery Guide The Error Recovery Guide is a software that displays troubleshooting information on screen if - Konica Minolta fi-7180 | fi-5900C Get Started Guide - Page 15
driver]. Guide Installation window appears. The Error Recovery Guide is a software that displays troubleshooting Guide, [Choose Setup Language] window appears. Select a language and follow the instructions in the window. Error Recovery Guide will automatically continue finishing its installation. fi - Konica Minolta fi-7180 | fi-5900C Get Started Guide - Page 16
ROM into a CD drive. ⇒ appears. 2. Click [INSTALL PRODUCTS] J [ScandAll21]. 10. Install the TWAIN driver following the instructions in the window. 11. When the [InstallShield Wizard Complete] window appears, click [Finish]. 3. Select a language used for installation on - Konica Minolta fi-7180 | fi-5900C Get Started Guide - Page 17
TWAIN driver], refer to the HINT "FUJITSU TWAIN32 Scanner Driver Help Fi-5900Cd" or "FUJITSU TWAIN32" on the dialog box appeared. If scanning is completed without trouble, the installation was performed successfully. For details on various types of scanning, refer to the "fi-5900C Operator's Guide - Konica Minolta fi-7180 | fi-5900C Get Started Guide - Page 18
ROM from its package, but do not insert the Setup CD-ROM into the CD driver yet. • Connect the scanner correctly to your PC. For details on how to ] to close the Wizard window. ■ Installing the FUJITSU ISIS Scanner Driver Windows XP screenshots are used in this HINT section as examples. The - Konica Minolta fi-7180 | fi-5900C Get Started Guide - Page 19
Guide is a software that displays troubleshooting Guide, the [Choose Setup Language] window appears. Select a language and follow the instructions in the Window. The Error Recovery Guide of the scanner driver is completed. ■ instructions in the window. fi-5900C Image Scanner Getting Started 11 - Konica Minolta fi-7180 | fi-5900C Get Started Guide - Page 20
then click [OK]. 12 Error Recovery Guide The Error Recovery Guide is a software that displays troubleshooting information on screen if any scanner error occurs. If you did not install the Error Recovery Guide when installing the scanner driver, install it following the procedure below. 1. Insert - Konica Minolta fi-7180 | fi-5900C Get Started Guide - Page 21
Guide]. 3. Select a language used for the installation in the "Choose Setup Language" window and click [OK]. Adobe Acrobat is required for displaying the HINT manuals Install the application following the instructions in the window. 5. with this scanner is not supported by Windows 95, Windows 98 - Konica Minolta fi-7180 | fi-5900C Get Started Guide - Page 22
free person-to-person support is not available for this is bundled product.) 5. Follow the instructions to install the software. driver, select "Fujitsu ISIS Drivers". • When uninstalling QuickScan ProTM, select "QuickScan 3.0". • When uninstalling Error Recovery Guide, select "Error Recovery Guide - Konica Minolta fi-7180 | fi-5900C Get Started Guide - Page 23
the uninstallation. ATTENTION Screen displays may vary slightly according to the operation system (OS) you are using. Follow the on screen instructions of the OS. Example: When the OS Windows 2000 • "Add or Remove Programs" - "Add/ Remove Applications" • [Changel/Remove] button - [Add/ Remove - Konica Minolta fi-7180 | fi-5900C Get Started Guide - Page 24
" in the fi-5900C Operator's Guide for removing the alarm or the error. Turn off and on the power button. If this does not eliminate the alarm state, contact the store where you purchased the scanner or an authorized FUJITSU scanner service provider. Clean the glass following the instructions in the - Konica Minolta fi-7180 | fi-5900C Get Started Guide - Page 25
image. Check this item Remedy Do the documents satisfy the "Document Quality" and the "Multifeed Detection Conditions" in the chapter 5 of the fi-5900C Operator's Guide? Are the Separator roller or the Pick rollers dirty? Are the Separator roller or the Pick rollers worn out? Is there any debris - Konica Minolta fi-7180 | fi-5900C Get Started Guide - Page 26
to the fi-5900C Operator's Guide "6.1 (Refer to fi-5900C Operator's Guide "7.2 Document Quality manual feeding. 3. Verify that the both rollers are installed properly. For details, refer to fi-5900C Operator's Guide Operator panel error Trouble occurred in the error LSI error Troubles occurred in the - Konica Minolta fi-7180 | fi-5900C Get Started Guide - Page 27
Materials Parts No. Remarks Cleaning sheet CA995010016 20 sheets/pack For the cleaning method, refer to "4 Daily Care in the fi-5900C Operator"s Guide. Cleaner F1 (or isopropyl alcohol) Cleaner F2 CA995010013 CA995010014 1 bottle Moisten a cloth with this fluid and wipe the scanner to - Konica Minolta fi-7180 | fi-5900C Get Started Guide - Page 28
the consumables. Refer to "Chapter 5 Replacing Consumables" fi-5900C Operator's Guide on the Setup CD-ROM. Pick roller Separator roller the store where you purchased the scanner or an authorized FUJITSU scanner service provider. The replacement cycles above are rough guidelines when scanning A4/ - Konica Minolta fi-7180 | fi-5900C Get Started Guide - Page 29
■ Pick roller ■ Separator roller Pick roller Separator roller ■ Brake roller Pad Cover Brake roller Cover fi-5900C Image Scanner Getting Started AP-6 - Konica Minolta fi-7180 | fi-5900C Get Started Guide - Page 30
fi-5900C Image Scanner Getting Started P3PC-1422-02EN Date of issuance: February, 2006 Issuance responsibility: PFU LIMITED z Copying of the contents of this manual in whole or in part and copying of the scanner application is forbidden under the copyright law. z The contents of this manual are
-
 1
1 -
 2
2 -
 3
3 -
 4
4 -
 5
5 -
 6
6 -
 7
7 -
8
-
9
-
10
-
11
-
12
-
13
-
14
-
15
-
16
-
17
-
18
-
19
-
20
-
21
-
22
-
23
-
24
-
25
-
26
-
27
-
28
-
29
-
30
 |
 |

P3PC-1422-02EN