Kyocera Ai4040 Printing System G Instruction Hand Book - Page 26
Installing the Printer Driver software
 |
View all Kyocera Ai4040 manuals
Add to My Manuals
Save this manual to your list of manuals |
Page 26 highlights
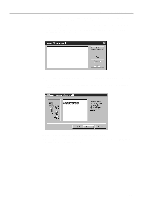
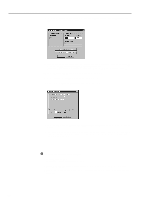
Client Configuration 2 Installing the Printer Driver software Carry out the following procedure to install the Printer Driver software included with this product. Printer Drivers are available for both PCL and PostScript printer languages and the installation procedure is the same for both of these drivers. * The following procedure assumes that the appropriate network settings have already been made in both the printer and the Server. 1. Start up Windows NT 4.0. * Quit all other applications that may be open. 2. Insert the Windows NT 4.0 Printer Driver Installer Disk into a floppy disk drive. 3. Click on My Computer and then double-click on the floppy disk drive in which the Installer Disk was inserted to open the window for that drive. 4. Double-click on the icon that is displayed in that window. 5. Type the location where the Printer Driver should be copied in the Unzip To Folder field. 6. Click on Unzip and the Printer Driver will be copied to the designated folder. Click on OK. 7. Click on Start in the Task Bar. 8. Point to Settings and click on Printers. The Printers folder will open. 9. Double-click on Add printer. 10. Make sure that My Computer is selected and click on Next. 11. Select an available port in the Available ports list and click on Next. 12. Click on Have Disk.... 13. Click on Browse.... 14. Use Look in to open the folder where the Printer Driver was copied. Then select "oemsetup" and click on Open. 15. Click on OK. 16. Make sure that the correct floppy disk drive name is displayed and click on Next. Then click on Next in each of the 3 successive windows. 17. Select No in regard to making a test print. 18. Click on Finish. * Make sure that the Printer Server software in the Server computer is running before carrying out the following procedure. 19. Use the right mouse button to click on the icon with the name of the installed Printer Driver and select Properties. 23
-
 1
1 -
2
-
3
-
4
-
5
-
6
-
7
-
8
-
9
-
10
-
11
-
12
-
13
-
14
-
15
-
16
-
17
-
18
-
19
-
20
-
 21
21 -
 22
22 -
 23
23 -
 24
24 -
 25
25 -
 26
26 -
 27
27 -
 28
28 -
 29
29 -
 30
30 -
 31
31 -
32
-
33
-
34
-
35
-
36
-
37
-
38
 |
 |
