Kyocera ECOSYS FS-3640MFP FS-3040MFP+/3140MFP+/3540MFP/3640MFP Driver Guide Re - Page 42
Application Based Printing, Adding an Association
 |
View all Kyocera ECOSYS FS-3640MFP manuals
Add to My Manuals
Save this manual to your list of manuals |
Page 42 highlights
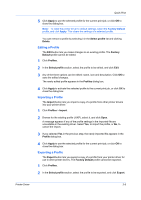
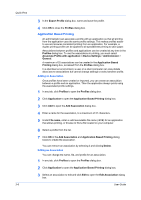
Quick Print 3-6 3 In the Export Profile dialog box, name and save the profile. 4 Click OK to close the Profiles dialog box. Application Based Printing An administrator can associate a profile with an application so that all printing from the application uses the same profile settings. This makes profiles easier to use and ensures consistent printing from an application. For example, a duplex printing profile can be applied to all spreadsheet printing to save paper. Associations between profiles and applications can be created at any time in the Profiles dialog box. To use the associations in printing, you must select Associate Profile with application in Device Settings > Administrator > General. A maximum of 25 associations can be created in the Application Based Printing dialog box, accessed from the Profiles dialog box. In a client/server environment, a user on a client computer can view details about server associations but cannot change settings or select another profile. Adding an Association Once profiles have been created or imported, you can create an association between a profile and an application. Then the application always prints using the associated profile settings. 1 In any tab, click Profiles to open the Profiles dialog box. 2 Click Application to open the Application Based Printing dialog box. 3 Click Add to open the Add Association dialog box. 4 Enter a name for the association, to a maximum of 31 characters. 5 Under File name, enter a valid executable file name (.EXE) for an application that allows printing, or browse to find a file located on your computer. 6 Select a profile from the list. 7 Click OK in the Add Association and Application Based Printing dialog boxes to create the association. You can remove an association by selecting it and clicking Delete. Editing an Association You can change the name, file, and profile for an association. 1 In any tab, click Profiles to open the Profiles dialog box. 2 Click Application to open the Application Based Printing dialog box. 3 Select an association to edit and click Edit to open the Edit Association dialog box. User Guide
-
 1
1 -
2
-
3
-
4
-
5
-
6
-
7
-
8
-
9
-
10
-
11
-
12
-
13
-
14
-
15
-
16
-
17
-
18
-
19
-
20
-
21
-
22
-
23
-
24
-
25
-
26
-
27
-
28
-
29
-
30
-
31
-
32
-
33
-
34
-
35
-
36
-
 37
37 -
 38
38 -
 39
39 -
 40
40 -
 41
41 -
 42
42 -
 43
43 -
 44
44 -
 45
45 -
 46
46 -
 47
47 -
48
-
49
-
50
-
51
-
52
-
53
-
54
-
55
-
56
-
57
-
58
-
59
-
60
-
61
-
62
-
63
-
64
-
65
-
66
-
67
-
68
-
69
-
70
-
71
-
72
-
73
-
74
-
75
-
76
-
77
-
78
-
79
-
80
-
81
-
82
-
83
-
84
-
85
-
86
-
87
-
88
-
89
-
90
 |
 |