Kyocera FS 4000DN FS-2000D/3900DN/4000DN Installation Guide Rev-1.1
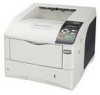
Kyocera FS 4000DN - B/W Laser Printer Manual
 |
View all Kyocera FS 4000DN manuals
Add to My Manuals
Save this manual to your list of manuals |
Kyocera FS 4000DN manual content summary:
- Kyocera FS 4000DN | FS-2000D/3900DN/4000DN Installation Guide Rev-1.1 - Page 1
INSTALLATION GUIDE GUIDE D'INSTALLATION GUÍA DE INSTALACIÓN INSTALLATIONSANLEITUNG GUIDA ALL'INSTALLAZIONE FS-2000D FS-3900DN FS-4000DN - Kyocera FS 4000DN | FS-2000D/3900DN/4000DN Installation Guide Rev-1.1 - Page 2
Printer B Toner Container C Waste Toner Box D Power Cord E CD-ROMs F Manuals and Other Printed Matter G Plastic Waste Bag H Language Label Sheet I Rear Cover * When carrying the printer de toner C Bac de récupération de toner D Cordon d'alimentation E CD-ROM F Manuels et autres supports imprimés - Kyocera FS 4000DN | FS-2000D/3900DN/4000DN Installation Guide Rev-1.1 - Page 3
dalla scatola di imballaggio. Controllare l'elenco dei componenti forniti per accertarsi che non manchi nulla. A Stampante B Contenitore toner C Vaschetta recupero toner D Cavo di alimentazione E CD-ROM F Manuali e altro materiale cartaceo G Sacchetto di plastica per smaltimento cartucce H Foglio - Kyocera FS 4000DN | FS-2000D/3900DN/4000DN Installation Guide Rev-1.1 - Page 4
, resulting in fire. Environment Temperature: 10 to 32.5°C (50 to 90.5°F) Humidity: 15 to 80%RH * Do not install the printer where temperature or humidity is outside the recommended range. Print quality may suffer and there will be an increased chance of paper jams. Attaching the - Kyocera FS 4000DN | FS-2000D/3900DN/4000DN Installation Guide Rev-1.1 - Page 5
300mm 11 13/16" Menu 300mm 11 13/16" 100mm 3 15/16" 200mm 7 7/8" 600mm 23 5/8" Spazio franco Accertarsi che il luogo di installazione soddisfi i seguenti requisiti. * Accertarsi che intorno alla stampante vi sia spazio sufficiente. Un utilizzo prolungato senza uno spazio franco sufficiente può - Kyocera FS 4000DN | FS-2000D/3900DN/4000DN Installation Guide Rev-1.1 - Page 6
cover into the hole in the printer. 2. Insert the protrusion at the left of the rear cover into the hole in the printer. The rear cover is fixed. é. Instalación de la cubierta posterior Monte la cubierta posterior en la parte trasera de la impresora de la forma siguiente. 1. Encaje el saliente - Kyocera FS 4000DN | FS-2000D/3900DN/4000DN Installation Guide Rev-1.1 - Page 7
Installazione del pannello posteriore Installare il pannello posteriore sul retro della stampante come descritto di seguito. 1. Inserire l'aletta sulla destra del pannello posteriore nell'apertura della stampante. 2. Inserire l'aletta sulla sinistra del pannello posteriore nell'apertura della - Kyocera FS 4000DN | FS-2000D/3900DN/4000DN Installation Guide Rev-1.1 - Page 8
Box Before you can use the printer for the first time, you must prepare it by installing the toner container and waste toner box. 1. Open the top cover and remove the fixing tape. 2. Take the toner container from the bag. 3. Shake the new toner container at least 10 times as shown in the figure - Kyocera FS 4000DN | FS-2000D/3900DN/4000DN Installation Guide Rev-1.1 - Page 9
la prima volta, occorre prima installare il contenitore toner e la vaschetta di recupero del toner. 1. Aprire il coperchio superiore. Rimuovere il nastro di fissaggio. 2. Estrarre il contenitore toner dalla confezione. 3. Agitare il nuovo contenitore toner per almeno 10 volte come illustrato nella - Kyocera FS 4000DN | FS-2000D/3900DN/4000DN Installation Guide Rev-1.1 - Page 10
5. Install the toner container into the printer. 6. Push on the PUSH HERE marks on the toner container until the container clicks into place. * To remove the toner container: Push the lock lever to the right and gently lift the toner container. 5. Installez la cartouche de toner dans l'imprimante - Kyocera FS 4000DN | FS-2000D/3900DN/4000DN Installation Guide Rev-1.1 - Page 11
Installare il contenitore toner nella stampante. 6. Premere sul contenitore toner nelle aree contrassegnate con PUSH HERE finché il contenitore non scatta in posizione. * Per rimuovere il contenitore toner: Spingere la leva di blocco verso destra e sollevare delicatamente la cartuccia toner. 11 - Kyocera FS 4000DN | FS-2000D/3900DN/4000DN Installation Guide Rev-1.1 - Page 12
7. Close the top cover. 8. Open the cap of the waste toner box. 9. Open the left cover. 7. Refermez le capot supérieur. 8. Ouvrez le capuchon du bac de récupération de toner. 9. Ouvrez le capot gauche. 7. Cierre la cubierta superior. 8. Abra la tapa de la caja del tóner. 9. Abra la cubierta - Kyocera FS 4000DN | FS-2000D/3900DN/4000DN Installation Guide Rev-1.1 - Page 13
7. Chiudere il coperchio superiore. 8. Aprire il cappuccio della vaschetta di recupero del toner. 9. Aprire il coperchio sinistro. 13 - Kyocera FS 4000DN | FS-2000D/3900DN/4000DN Installation Guide Rev-1.1 - Page 14
Close the left cover. * To remove the Waste Toner Box: While holding the waste toner box, press the lock lever and then gently remove the waste toner Pour retirer le bac de récupération de toner : Tout en maintenant le bac de récupération de toner, appuyez sur le levier de verrouillage, puis retirez - Kyocera FS 4000DN | FS-2000D/3900DN/4000DN Installation Guide Rev-1.1 - Page 15
10. Inserire la nuova vaschetta di recupero del toner, come illustrato nella figura, bloccandola in posizione. 11. Chiudere il coperchio sinistro. * Per rimuovere la vaschetta di recupero del toner: Mantenendo la vaschetta di recupero del toner, premere la leva di blocco e rimuovere con cautela il - Kyocera FS 4000DN | FS-2000D/3900DN/4000DN Installation Guide Rev-1.1 - Page 16
de papier dans la cassette La cassette peut contenir du papier au format A6 (FS-2000D : A5) à A4/Letter et Legal et 500 feuilles environ. 1. Ouvrez de papel en la bandeja La bandeja de papel admite papel de tamaño A6 (FS-2000D: A5), A4/Letter y Legal y tiene capacidad para 500 hojas aproximadamente. - Kyocera FS 4000DN | FS-2000D/3900DN/4000DN Installation Guide Rev-1.1 - Page 17
Legal A4 Letter B5 A5 A6 Aggiunta di carta al cassetto carta Il cassetto carta gestisce carta di formato da A6 (FS-2000D: A5) ad A4/Letter e Legal e può contenere circa 500 fogli. 1. Estrarre il cassetto carta. * I formati carta standard sono indicati sulla parte interna del cassetto carta. 17 - Kyocera FS 4000DN | FS-2000D/3900DN/4000DN Installation Guide Rev-1.1 - Page 18
in the paper size window. 3. Pull the release lever on the left side guide and slide to the desired paper size. 4. If you are going to set apparaisse dans la fenêtre correspondante. 3. Tirez le levier d'ouverture du guide gauche et faites-le glisser jusqu'au format papier souhaité. 4. Si vous - Kyocera FS 4000DN | FS-2000D/3900DN/4000DN Installation Guide Rev-1.1 - Page 19
il formato utilizzato venga visualizzato nella relativa finestra. 3. Tirare la leva di rilascio posta sulla guida di sinistra e far scorrere le guide fino al formato carta desiderato. 4. Per utilizzare un tipo di carta più lungo del formato A4, estrarre l'estensione dei cassetti carta spingendo - Kyocera FS 4000DN | FS-2000D/3900DN/4000DN Installation Guide Rev-1.1 - Page 20
or skewed printing. 5. Tirez le levier de déverrouillage et faites glisser la butée du papier jusqu'au format papier souhaité. 6. Pour le modèle FS-2000D uniquement : appuyez sur la plaque inférieure jusqu'à ce qu'elle s'enclenche. 7. Aérez le papier, puis égalisez la pile sur une surface plane - Kyocera FS 4000DN | FS-2000D/3900DN/4000DN Installation Guide Rev-1.1 - Page 21
5. Tirare la leva di rilascio e far scorrere il fermo della carta fino al formato carta desiderato. 6. Solo per il modello FS-2000D, spingere la piastra inferiore verso il basso fino a quando non si blocca. 7. Smazzare la carta, quindi battere la pila su una superficie piana per - Kyocera FS 4000DN | FS-2000D/3900DN/4000DN Installation Guide Rev-1.1 - Page 22
the load limit marks (T T) on the paper guides. 10. Insert the paper cassette into the slot in the printer. Push it straight in as far as it papier au-delà des repères de chargement maximal (T T) indiqués sur les guides papier. 10. Réinsérez la cassette dans l'imprimante et enfoncez-la complè - Kyocera FS 4000DN | FS-2000D/3900DN/4000DN Installation Guide Rev-1.1 - Page 23
la pila dei fogli di carta sotto i fermagli. * La quantità di carta caricata non deve superare i contrassegni di limite caricamento (T T) riportati sulle guide carta. 10. Inserire il cassetto carta nel relativo allogiamento della stampante spingendolo con decisione fino a che non si blocca. 23 - Kyocera FS 4000DN | FS-2000D/3900DN/4000DN Installation Guide Rev-1.1 - Page 24
with IEEE 1284 standards. For optimum performance, install the printer close to the PC. The connection cable should be shielded and no longer than 3 meters (10 feet) long. The cable is sold separately. Connecting the Parallel Cable 1. Connect the printer to your PC. 2. Connect the power cord to - Kyocera FS 4000DN | FS-2000D/3900DN/4000DN Installation Guide Rev-1.1 - Page 25
Utilizzo dell'interfaccia parallela * Utilizzare un cavo per stampante parallela conforme agli standard IEEE1284. Per ottenere prestazioni ottimali, installare la stampante vicino al PC. Si consiglia di utilizzare un cavo di connessione schermato, di lunghezza non superiore a 3 metri. Il cavo viene - Kyocera FS 4000DN | FS-2000D/3900DN/4000DN Installation Guide Rev-1.1 - Page 26
LS-2000D FS-3900DN FS-4000DN LS-3900DN Menu Menu 3. Turn the power switch to on ( | ). * The printer will begin replenishing the toner; this will take approximately 15 minutes. 4. Wait until the message display indicates > MSG language. The default message language is English. > MSG language - Kyocera FS 4000DN | FS-2000D/3900DN/4000DN Installation Guide Rev-1.1 - Page 27
-2000D LS-2000D FS-3900DN FS-4000DN LS-3900DN Menu Menu 3. Accendere il sistema posizionando l'interruttore di alimentazione su ( | ). * La stampante inizia la procedura di rifornimento toner; l'operazione dura all'incirca 15 minuti. 4. Attendere finché non viene visualizzato il messaggio > MSG - Kyocera FS 4000DN | FS-2000D/3900DN/4000DN Installation Guide Rev-1.1 - Page 28
If the Welcome to the Found New Hardware Wizard dialog box displays, select Cancel. 2. Insert the CD-ROM (Software Library) supplied with the printer into the optical drive of the PC. The installation program launches and the License Agreement displays. * If the installation program fails to launch - Kyocera FS 4000DN | FS-2000D/3900DN/4000DN Installation Guide Rev-1.1 - Page 29
Caricamento del software 1. Accendere il PC e avviare Windows. * Se viene visualizzata la finestra di dialogo Installazione guidata nuovo hardware, selezionare Annulla. 2. Inserire il CD-ROM (Software Library) fornito con la stampante nell'unità ottica del PC. Viene avviato il programma di - Kyocera FS 4000DN | FS-2000D/3900DN/4000DN Installation Guide Rev-1.1 - Page 30
dialog box displays. * When the test page prints correctly, printer setup is complete. For details on using the printer, refer to the Operation Guide. 4. Sélectionnez Installer les driver KX, puis suivez les instructions à l'écran pour effectuer l'installation du logiciel. * Lorsque la fen - Kyocera FS 4000DN | FS-2000D/3900DN/4000DN Installation Guide Rev-1.1 - Page 31
4. Selezionare Installa i KX Driver e seguire le istruzioni visualizzate sullo schermo per completare l'installazione del software. * Quando viene visualizzata la finestra Selezionare la porta della stampante, selezionare LPT1 nell'elenco - Kyocera FS 4000DN | FS-2000D/3900DN/4000DN Installation Guide Rev-1.1 - Page 32
no longer than 5 meters (16 feet) long. The cable is sold separately. Connecting the USB Cable 1. Connect the printer to your PC. 2. Connect the power cord to the printer and the other end into a power outlet. Utilisation de l'interface USB * Utilisez un câble USB muni d'une fiche rectangulaire - Kyocera FS 4000DN | FS-2000D/3900DN/4000DN Installation Guide Rev-1.1 - Page 33
Utilizzo dell'interfaccia USB * Utilizzare un cavo USB dotato di uno spinotto rettangolare di tipo A e uno spinotto quadrato di tipo B. Si consiglia di utilizzare un cavo USB schermato, di lunghezza non superiore a 5 metri. Il cavo viene venduto separatamente. Collegamento del cavo USB 1. Collegare - Kyocera FS 4000DN | FS-2000D/3900DN/4000DN Installation Guide Rev-1.1 - Page 34
LS-2000D FS-3900DN FS-4000DN FS-3900DN Menu Menu 3. Turn the power switch to on ( | ). * The printer will begin replenishing the toner; this will take approximately 15 minutes. 4. Wait until the message display indicates > MSG language. The default message language is English. > MSG language - Kyocera FS 4000DN | FS-2000D/3900DN/4000DN Installation Guide Rev-1.1 - Page 35
-2000D LS-2000D FS-3900DN FS-4000DN LS-3900DN Menu Menu 3. Accendere il sistema posizionando l'interruttore di alimentazione su ( | ). * La stampante inizia la procedura di rifornimento toner; l'operazione dura all'incirca 15 minuti. 4. Attendere finché non viene visualizzato il messaggio > MSG - Kyocera FS 4000DN | FS-2000D/3900DN/4000DN Installation Guide Rev-1.1 - Page 36
If the Welcome to the Found New Hardware Wizard dialog box displays, select Cancel. 2. Insert the CD-ROM (Software Library) supplied with the printer into the optical drive of the PC. The installation program launches and the License Agreement displays. * If the installation program fails to launch - Kyocera FS 4000DN | FS-2000D/3900DN/4000DN Installation Guide Rev-1.1 - Page 37
Caricamento del software 1. Accendere il PC e avviare Windows. * Se viene visualizzata la finestra di dialogo Installazione guidata nuovo hardware, selezionare Annulla. 2. Inserire il CD-ROM (Software Library) fornito con la stampante nell'unità ottica del PC. Viene avviato il programma di - Kyocera FS 4000DN | FS-2000D/3900DN/4000DN Installation Guide Rev-1.1 - Page 38
dialog box displays. * When the test page prints correctly, printer setup is complete. For details on using the printer, refer to the Operation Guide. 4. Sélectionnez Installer les driver KX, puis suivez les instructions à l'écran pour effectuer l'installation du logiciel. * Lorsque la fen - Kyocera FS 4000DN | FS-2000D/3900DN/4000DN Installation Guide Rev-1.1 - Page 39
4. Selezionare Installa i KX Driver e seguire le istruzioni visualizzate sullo schermo per completare l'installazione del software. * Quando viene visualizzata la finestra Selezionare la porta della stampante, selezionare una porta USB ( - Kyocera FS 4000DN | FS-2000D/3900DN/4000DN Installation Guide Rev-1.1 - Page 40
your network device. 2. Connect the power cord to the printer and the other end into a power outlet. Utilisation de l'interface réseau * La fonction réseau est activée dès l'installation de la carte d'interface réseau en option sur la FS-2000D. * Utilisez un câble Ethernet (10BASE-T ou 100BASE-TX - Kyocera FS 4000DN | FS-2000D/3900DN/4000DN Installation Guide Rev-1.1 - Page 41
Utilizzo dell'interfaccia di rete * Installando la scheda di interfaccia di rete opzionale sulla FS-2000D viene abilitata la funzione di rete. * Utilizzare un cavo Ethernet (10BASE-T o 100BASE-TX) come cavo di rete. ll cavo viene venduto separatamente. * Utilizzare cavi - Kyocera FS 4000DN | FS-2000D/3900DN/4000DN Installation Guide Rev-1.1 - Page 42
LS-2000D FS-3900DN FS-4000DN LS-3900DN Menu Menu 3. Turn the power switch to on ( | ). * The printer will begin replenishing the toner; this will take approximately 15 minutes. 4. Wait until the message display indicates > MSG language. The default message language is English. > MSG language - Kyocera FS 4000DN | FS-2000D/3900DN/4000DN Installation Guide Rev-1.1 - Page 43
-2000D LS-2000D FS-3900DN FS-4000DN LS-3900DN Menu Menu 3. Accendere il sistema posizionando l'interruttore di alimentazione su ( | ). * La stampante inizia la procedura di rifornimento toner; l'operazione dura all'incirca 15 minuti. 4. Attendere finché non viene visualizzato il messaggio > MSG - Kyocera FS 4000DN | FS-2000D/3900DN/4000DN Installation Guide Rev-1.1 - Page 44
FS-2000D LS-2000D FS-3900DN FS-4000DN LS-3900DN FS-2000D LS-2000D FS-3900DN FS-4000DN LS-3900DN Menu Menu Menu Menu Setting Network Parameters 1. Press . 2. Press S or T repeatedly until Interface > appears. 3. If the current interface is other than Network, press . A - Kyocera FS 4000DN | FS-2000D/3900DN/4000DN Installation Guide Rev-1.1 - Page 45
LS-2000D FS-3900DN FS-4000DN LS-3900DN FS-2000D LS-2000D FS-3900DN FS-4000DN LS-3900DN Menu Menu Menu Menu Impostazione dei parametri di rete 1. Premere . 2. Premere ripetutamente il tasto S o T fino a visualizzare Interfaccia>. 3. Se l'interfaccia visualizzata è diversa da Rete, - Kyocera FS 4000DN | FS-2000D/3900DN/4000DN Installation Guide Rev-1.1 - Page 46
LS-2000D FS-3900DN FS-4000DN LS-3900DN Menu Menu 8. Press X, and press S or T to move >>DHCP and press . 9. Press S or T to select On or Off and press . >>DHCP ? Off * When - Kyocera FS 4000DN | FS-2000D/3900DN/4000DN Installation Guide Rev-1.1 - Page 47
-2000D LS-2000D FS-3900DN FS-4000DN LS-3900DN Menu Menu 8. Premere X, quindi premere S o T per passare a >>DHCP e premere . 9. Premere S o T per selezionare ON o OFF e premere . >>DHCP ? OFF * Se si utilizza un server DHCP - Kyocera FS 4000DN | FS-2000D/3900DN/4000DN Installation Guide Rev-1.1 - Page 48
FS-2000D LS-2000D FS-3900DN FS-4000DN LS-3900DN Menu Menu 11. Press S or T to increase or decrease, respectively, the value at the blinking cursor. 12. Use X or W to move the cursor - Kyocera FS 4000DN | FS-2000D/3900DN/4000DN Installation Guide Rev-1.1 - Page 49
LS-2000D FS-3900DN FS-4000DN LS-3900DN Menu Menu 11. Premere S o T per aumentare o diminuire, rispettivamente, il valore nella posizione del cursore lampeggiante. 12. Utilizzare i tasti X o W per spostare il cursore a destra e a - Kyocera FS 4000DN | FS-2000D/3900DN/4000DN Installation Guide Rev-1.1 - Page 50
Loading Software 1. Switch on the PC and activate Windows. 2. Insert the CD-ROM (Software Library) supplied with the printer into the optical drive of the PC. The installation program launches and the License Agreement displays. * If the installation program fails to launch, use Windows - Kyocera FS 4000DN | FS-2000D/3900DN/4000DN Installation Guide Rev-1.1 - Page 51
Caricamento del software 1. Accendere il PC e avviare Windows. 2. Inserire il CD-ROM (Software Library) fornito con la stampante nell'unità ottica del PC. Viene avviato il programma di installazione e visualizzata la schermata Accordo di licenza. * Se il programma di installazione non viene avviato - Kyocera FS 4000DN | FS-2000D/3900DN/4000DN Installation Guide Rev-1.1 - Page 52
dialog box displays. * When the test page prints correctly, printer setup is complete. For details on using the printer, refer to the Operation Guide. 4. Sélectionnez Installer les driver KX, puis suivez les instructions à l'écran pour effectuer l'installation du logiciel. * Lorsque la fen - Kyocera FS 4000DN | FS-2000D/3900DN/4000DN Installation Guide Rev-1.1 - Page 53
4. Selezionare Installa i KX Driver e seguire le istruzioni visualizzate sullo schermo per completare l'installazione del software. * Quando viene visualizzata la finestra Selezionare la porta della stampante, selezionare porta nell'elenco a - Kyocera FS 4000DN | FS-2000D/3900DN/4000DN Installation Guide Rev-1.1 - Page 54
- Kyocera FS 4000DN | FS-2000D/3900DN/4000DN Installation Guide Rev-1.1 - Page 55
- Kyocera FS 4000DN | FS-2000D/3900DN/4000DN Installation Guide Rev-1.1 - Page 56
©2006 KYOCERA MITA Corporation All rights reserved. Rev. 1.1 2006.12 Printed in China 302HW56011
-
 1
1 -
 2
2 -
 3
3 -
 4
4 -
 5
5 -
 6
6 -
 7
7 -
8
-
9
-
10
-
11
-
12
-
13
-
14
-
15
-
16
-
17
-
18
-
19
-
20
-
21
-
22
-
23
-
24
-
25
-
26
-
27
-
28
-
29
-
30
-
31
-
32
-
33
-
34
-
35
-
36
-
37
-
38
-
39
-
40
-
41
-
42
-
43
-
44
-
45
-
46
-
47
-
48
-
49
-
50
-
51
-
52
-
53
-
54
-
55
-
56
 |
 |

INSTALLATION GUIDE
GUIDE D’INSTALLATION
GUÍA DE INSTALACIÓN
INSTALLATIONSANLEITUNG
GUIDA ALL’INSTALLAZIONE
FS-2000D
FS-3900DN
FS-4000DN