Kyocera FS1750 Kyocera Extended Driver 4.0 User Guide Rev-2.1 - Page 113
Selecting and Creating Custom Colors (Color Models Only), Add to Custom Colors
 |
View all Kyocera FS1750 manuals
Add to My Manuals
Save this manual to your list of manuals |
Page 113 highlights
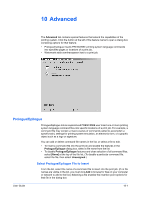
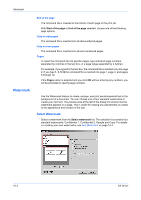
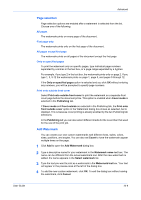
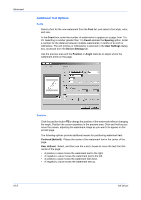
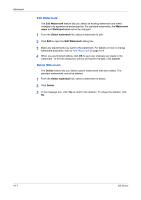
Advanced Angle Click the angle button to change the angle of the watermark. Position the cursor anywhere in the preview area. Click and hold as you move the mouse, rotating the watermark image to as you want it to appear on the printed page The method of rotation is determined by selecting or clearing the Rotate around center check box at the far right of the dialog box. Select the check box to rotate text around its center; clear the check box to rotate text around its left end. You must select User defined in both Angle and Position to enable the Rotate around center option. The following options provide additional means for positioning watermark text: Diagonal [default]: Places the watermark at the default angle of 52 degrees. User defined: Select to change the angle from the default value. Enter the number for the angle you want. An angle is measured in degrees, ranging from 0 to 360. Selecting and Creating Custom Colors (Color Models Only) 1 To use a predefined color for the watermark text, select one from the Color list. 1 2 For more colors, select Custom at the bottom of the list. Click the [...] button to open the Color dialog box. 2 3 Click one of the Basic colors and click OK; or click Define Custom Colors to open the color spectrum panel. 3 User Guide 4 In the color spectrum, click and drag the pointer to different areas of the spectrum to adjust the hue and saturation levels. The corresponding numeric values appear in the Hue, Sat, and RGB (Red, Green, Blue) text boxes. Click and drag the slider at the right side of the color spectrum to adjust the luminosity (relative lightness or darkness) of a color. The corresponding numeric value appears in the Lum and RGB text boxes. 4 5 You can also create a specific color by typing numbers in the Hue, Sat, Lum or RGB text boxes. 5 6 Click Add to Custom Colors to save the new color to the Custom colors at the bottom left of the Color dialog box. 6 7 Click OK to save any new custom colors and close the Color dialog box. To close the dialog box without saving any new colors, click Cancel. 7 10-6
-
 1
1 -
2
-
3
-
4
-
5
-
6
-
7
-
8
-
9
-
10
-
11
-
12
-
13
-
14
-
15
-
16
-
17
-
18
-
19
-
20
-
21
-
22
-
23
-
24
-
25
-
26
-
27
-
28
-
29
-
30
-
31
-
32
-
33
-
34
-
35
-
36
-
37
-
38
-
39
-
40
-
41
-
42
-
43
-
44
-
45
-
46
-
47
-
48
-
49
-
50
-
51
-
52
-
53
-
54
-
55
-
56
-
57
-
58
-
59
-
60
-
61
-
62
-
63
-
64
-
65
-
66
-
67
-
68
-
69
-
70
-
71
-
72
-
73
-
74
-
75
-
76
-
77
-
78
-
79
-
80
-
81
-
82
-
83
-
84
-
85
-
86
-
87
-
88
-
89
-
90
-
91
-
92
-
93
-
94
-
95
-
96
-
97
-
98
-
99
-
100
-
101
-
102
-
103
-
104
-
105
-
106
-
107
-
 108
108 -
 109
109 -
 110
110 -
 111
111 -
 112
112 -
 113
113 -
 114
114 -
 115
115 -
 116
116 -
 117
117 -
 118
118 -
119
-
120
-
121
-
122
-
123
-
124
-
125
-
126
-
127
 |
 |