Kyocera KM-1650 IB-23 User's Manual in PDF Format - Page 47
Setting Up Remote Printer Mode, Sending Jobs to the Print Queue
 |
View all Kyocera KM-1650 manuals
Add to My Manuals
Save this manual to your list of manuals |
Page 47 highlights
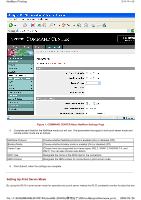
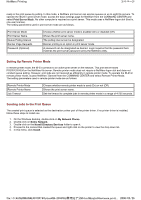
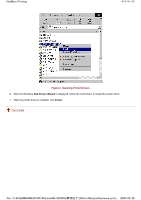
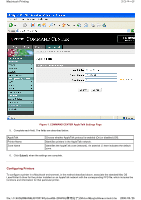
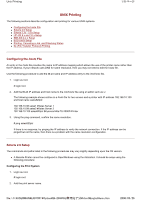
NetWare Printing 3/4 ページ ready in the print queue by polling. In this mode, a NetWare print server can service queues on up to eight file servers. To operate the IB-23 in print server mode, access the basic settings page for NetWare from the COMMAND CENTER and select Print Server Mode. No other computer is required as a print server. This mode uses a NetWare logon slot (that is, one user license). The setting parameters used in print server mode are as follows. Print Server Mode Print Server Name Queue Polling Interval Banner Page Requests Password (Optional) Choose whether print server mode is enabled (On) or disabled (Off). Shows the print server name. The polling interval can be designated. Banner printing is an option in print server mode. A password can be designated as desired. Login requires that the password here matches the print server password set by the NetWare utility. Setting Up Remote Printer Mode In remote printer mode, the IB-23 connects to an active print server on the network. This print server starts PSERVER.NLM on the NetWare file server. Remote printer mode does not require a NetWare logon slot and does not conduct queue polling. However, print jobs are not received as efficiently in remote printer mode. To operate the IB-23 in remote printer mode, access NetWare: General from the COMMAND CENTER and select Remote Printer Mode. The setting parameters used in remote printer mode are as follows. Remote Printer Mode Remote Printer Name Job Timeout Choose whether remote printer mode is used (On) or not (Off). Shows the print server name. Set the timeout to complete jobs in remote printer mode in a range of 4-255 seconds. Sending Jobs to the Print Queue The created print queue is selected as the destination printer port of the printer driver. If no printer driver is installed, follow these steps to install one. 1. On the Windows desktop, double-click on My Network Places. 2. Double-click on Entire Network. 3. Double-click on the Novell Directory Services folder to open it. 4. Proceed to the context that created the queue and right-click on the printer to view the drop down list. 5. In this menu, click Install. file://F:\USERMAN\EXPORT\Option\IB-23\P6 English\netware_printi... 2006/05/26
-
 1
1 -
2
-
3
-
4
-
5
-
6
-
7
-
8
-
9
-
10
-
11
-
12
-
13
-
14
-
15
-
16
-
17
-
18
-
19
-
20
-
21
-
22
-
23
-
24
-
25
-
26
-
27
-
28
-
29
-
30
-
31
-
32
-
33
-
34
-
35
-
36
-
37
-
38
-
39
-
40
-
41
-
 42
42 -
 43
43 -
 44
44 -
 45
45 -
 46
46 -
 47
47 -
 48
48 -
 49
49 -
 50
50 -
 51
51 -
 52
52 -
53
-
54
-
55
-
56
-
57
-
58
-
59
-
60
-
61
-
62
-
63
-
64
-
65
-
66
-
67
-
68
-
69
-
70
-
71
-
72
-
73
-
74
-
75
-
76
-
77
-
78
-
79
-
80
-
81
-
82
-
83
-
84
-
85
-
86
-
87
-
88
-
89
-
90
-
91
-
92
-
93
-
94
-
95
-
96
-
97
-
98
-
99
-
100
-
101
-
102
-
103
-
104
 |
 |