Kyocera TASKalfa 500ci Scan To SMB (PC) Setup Guide Rev-3 - Page 3
Introduction, Flow of Processes for Data Transmission, Operations on the computer] - scan to folder
 |
View all Kyocera TASKalfa 500ci manuals
Add to My Manuals
Save this manual to your list of manuals |
Page 3 highlights
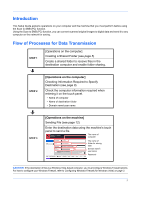
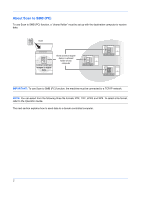
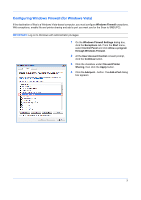
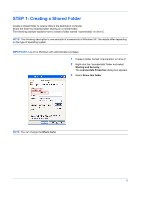
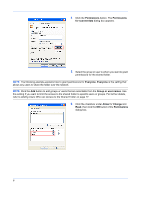
Introduction This Setup Guide explains operations on your computer and the machine that you must perform before using the Scan to SMB (PC) function. Using the Scan to SMB (PC) function, you can convert scanned original images to digital data and send it to any computer on the network for saving. Flow of Processes for Data Transmission STEP 1 [Operations on the computer] Creating a Shared Folder (see page 5) Create a shared folder to receive files in the destination computer and enable folder sharing. STEP 2 [Operations on the computer] Checking Information Required to Specify Destination (see page 8) Check the computer information required when entering it on the touch panel. • Name of computer • Name of destination folder • Domain name\user name STEP 3 [Operations on the machine] Sending File (see page 12) Enter the destination data using the machine's touch panel to send a file. Ready to send. Place original. Folder Path Entry SMB Host Name pc4050 FTP Path scannerdata Login User Name abcdnet\ james.smith Login Password Specify the folder on the destination computer. Add to Addr Book Status Next Dest. Cancel Destination The name of 1 computer Connection Test OK 10/10/2008 10:10 The name of folder for storing data Domain name\ user name Password CAUTION: If the destination of files is a Windows Vista-based computer, you must configure Windows Firewall options. For how to configure your Windows Firewall, refer to Configuring Windows Firewall (for Windows Vista) on page 3. 1
-
 1
1 -
 2
2 -
 3
3 -
 4
4 -
 5
5 -
 6
6 -
 7
7 -
 8
8 -
 9
9 -
10
-
11
-
12
-
13
-
14
-
15
-
16
-
17
-
18
-
19
-
20
-
21
-
22
-
23
 |
 |