LG DLG0452G Owner's Manual
LG DLG0452G Manual
 |
View all LG DLG0452G manuals
Add to My Manuals
Save this manual to your list of manuals |
LG DLG0452G manual content summary:
- LG DLG0452G | Owner's Manual - Page 1
SERVICE Owner's Manual Electrial and Gas Dryer DLE0442W/DLG0452W DLE0442S/DLG0452S DLE0442G/DLG0452G DLE5944WM/DLG5955WM DLE6942W/DLG6952W Thank you for buying a LG Dryer. Please read your manual carefully, as it provides instructions on safe Installation, Use and Maintenance. Record the Model - LG DLG0452G | Owner's Manual - Page 2
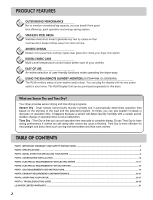
INSTALLATION ...13 PART5. ELECTRICAL REQUIREMENTS FOR ELECTRIC DRYER ...14-17 PART6. ELECTRICAL REQUIREMENTS FOR GAS DRYERS ...18 PART7. GAS REQUIREMENTS AND INSTRUCTIONS ...19 PART8. EXHAUST REQUIREMENTS AND MAINTENANCE...20-21 PART9. OPERATING YOUR DRYER ...22-27 PART10. TROUBLESHOOTING GUIDE - LG DLG0452G | Owner's Manual - Page 3
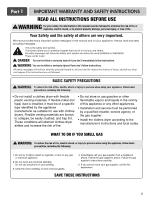
vapors and liquids in the vicinity of this appliance or any other appliances. • Installation and service must be performed by a qualified installer, service agency, or the gas supplier. • Install the clothes dryer according to the manufacturer's instructions and local codes. WHAT TO DO IF YOU SMELL - LG DLG0452G | Owner's Manual - Page 4
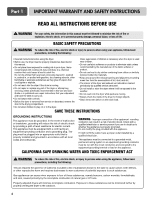
service personnel. • Do not install or store the dryer where it will be exposed to the weather. • Do not reach into the dryer while parts are moving. • Always check the inside of the dryer for foreign objects • Clean lint screen before or after each load. SAVE THESE INSTRUCTIONS GROUNDING - LG DLG0452G | Owner's Manual - Page 5
grounded. • Install and store the dryer where it will not be exposed to temperatures below freezing or exposed to the weather. All repairs and servicing must be performed by an authorized servicer unless specifically recommended in this Owner's Guide. Use only authorized factory parts. Failure to - LG DLG0452G | Owner's Manual - Page 6
in electrical shock or injury • Refer to the installation instructions in this manual for specific electrical requirements for your model. Failure to follow these instructions can create electrical shock and/or a fire hazard. • This dryer must be plugged into a properly grounded outlet. Electrical - LG DLG0452G | Owner's Manual - Page 7
WARRANTY SERVICE The warranty for your dryer is located at the end of this manual. Warranty Service is available by contacting your nearest LG Service Center. If this product is installed and operated according to the instructions in this manual, LG will repair or replace any parts defective - LG DLG0452G | Owner's Manual - Page 8
Part 2 SPECIFICATIONS ■ Type : Electric and Gas Dryer ■ Rating : Please refer to the rating label regarding detailed information. ■ Size : 27 x 30 x 42.75(inch) ■ Capacity : IEC 7.3cu.ft. (22.5 lb) ■ Weight : 126 Ibs (57.2 kg) Specifications are subject to change by manufacturer. ■ - LG DLG0452G | Owner's Manual - Page 9
these instructions can result in death or fire. • Clean old ducts before installing this dryer Note Vent end will face to the outside home and improper taping and unstable installation of vent will cause undesirable drying performance. In addition to the following warnings, please refer to manual - LG DLG0452G | Owner's Manual - Page 10
Part 3 INITIAL STEPS FOR INSTALLING YOUR DRYER STEP 4 Connection of Gas Supply (Gas dryer only). In addition to the following, please refer to manual section on Gas Requirements and Instructions. 1 2 3 4 5 1. New stainless steel flexible connector. Use this type of connector only if allowed - LG DLG0452G | Owner's Manual - Page 11
Gas Dryers Close the door to the dryer drum/drying compartment and, after completing all steps in this manual for proper installation of this dryer, start the dryer on a heat setting, as described more fully in the operating instructions that accompany the dryer. After the dryer starts, the igniter - LG DLG0452G | Owner's Manual - Page 12
will comply with these standards, please contact a service and installation professional for assistance. The following instructions apply to any installation of the dryer in a manufactured or mobile home: 1) The gas dryer must be permanently attached to the floor. 2) The electrical connection - LG DLG0452G | Owner's Manual - Page 13
Part 4 ACCESSORIES INSTALLATION Pedestal Installation Instructions 1 4 2 1) Shut off Gas 2) Unplug Power Cord 3) Disconnect Gas Line from Dryer 4) Pull away and loosen vent clamp. Disconnect venting. 5 6 3 7 13 - LG DLG0452G | Owner's Manual - Page 14
to check your home's wiring and fuses to ensure that your home has adequate electrical power to operate the dryer. 120V/ 208V, 60 Hertz, 3-Wire Installation 120V/ 240V, 60 Hertz, 3-Wire Installation Instructions for Grounding of your Electric Dryer: a) Please note that the wiring diagram is - LG DLG0452G | Owner's Manual - Page 15
FOR ELECTRIC DRYERS Review the following options to determine the appropriate electrical connection for your home: 4-wire receptacle (NEMA type14-30R) Use the instructions at this section if your home has a 4-wire receptacle (NEMA type 14-30R) and you will be using a UL listed, 120/240 - LG DLG0452G | Owner's Manual - Page 16
Part 5 ELECTRICAL REQUIREMENTS FOR ELECTRIC DRYERS 3-wire connection : Direct wire Important : Grounding through the neutral conductor is prohibited for (1) new branch-circuit installations, (2) mobile homes right position. 16 1. Connect neutral wire(white) of power cord to center terminal block - LG DLG0452G | Owner's Manual - Page 17
Part 5 ELECTRICAL REQUIREMENTS FOR ELECTRIC DRYERS Option 2: 3-Wire Connection with a Power Supply Cord lf your local codes or ordinances permit the connection of a frame-grounding conductor to the neutral wire, use these instructions instructions under this section. 1. Connect neutral wire(white) - LG DLG0452G | Owner's Manual - Page 18
check your home's wiring and fuses to ensure that your home has adequate electrical power to operate the dryer. Electrical Requirements for Your Dryer: a) Please note that the wiring diagram is provided inside the dryer control hood. Label all wires prior to disconnection when servicing the dryer - LG DLG0452G | Owner's Manual - Page 19
Gas (2,500 Btu/ft3 (93.1 MJ/m3)) service must be provided at 10 + 1.5 in. water column pressure. 2. Do not attempt to connect Dryer to Liquified Petroleum (LP Gas) Gas service without a qualified professional. 3. Isolate the dryer from the gas supply piping system by closing its individual manual - LG DLG0452G | Owner's Manual - Page 20
may be used between the dryer and wall connection only. The use of this ducting will affect drying time. Failure to follow these instructions can result in fi re or death. 5. DO NOT use sheet metal screws or other fasteners which extend into the duct that could catch lint and reduce the effi ciency - LG DLG0452G | Owner's Manual - Page 21
better drying performance. 3. Check the diagram is provided inside the dryer control hood. Label all wires prior to disconnection when servicing the dryer, because wiring errors can cause serious injury to you and your dryer. Cleaning the Lint Screen 1. Clean the lint filter either before drying - LG DLG0452G | Owner's Manual - Page 22
shock, or injury to person, read this entire manual, including the Important Safety Instructions, before operating this dryer. Status/Clean Filter/ Wrinkle Care Indicator 10 9 8 1 2 3 4 56 7 Custom Program 1 Power Button • Use this button for power on or off. WARNING! Explosion Hazard - LG DLG0452G | Owner's Manual - Page 23
YOUR DRYER 2 Option Button 1. More Time / Less Time • Press MORE TIME or LESS TIME until the desired drying time is set. Note Time change button is available only with Manual Dry, Time Dry and Rack Dry programs. 2. Anti Bacterial This option reduces bacteria under high temperature during the cycle - LG DLG0452G | Owner's Manual - Page 24
Part 9 OPERATING YOUR DRYER 3 Dry Level • Use this button to set dry level • First, select sensor dry cycle. • Select dry level to adjust how much you want to dry the load. As the cycle runs, the control senses the dryness of the load and adjusts the time automatically based on the selected dryness - LG DLG0452G | Owner's Manual - Page 25
power is on, Clean Filter flashes until start/pause is selected. WARNING! For better drying performance and safety, clean lint filter every single use. 10 Estimated Time Remaining • The Display shows the estimated time remaining. In addition to this, if the dryer has some problem, it displays error - LG DLG0452G | Owner's Manual - Page 26
Part 9 OPERATING YOUR DRYER ❁ Starting your dryer 1. Before use • Clean lint screen before or after each cycle. • Place laundry into dryer and shut door. See Loading. • Turn the knob to select the drying cycle you want. The preset setting for Sensor Dry Cycles or Manual Cycles will glow. The - LG DLG0452G | Owner's Manual - Page 27
Part 9 OPERATING YOUR DRYER Maintenance Clean lint filter Clean the lint filter after each use and check it before use. Not cleaning or emptying the filter will increase drying time and energy consumption, therefore dryer life expectancy could be shortened after all. ■ Clean the door and its - LG DLG0452G | Owner's Manual - Page 28
Part 10 TROUBLESHOOTING GUIDE Troubleshooting Tips Save time and money! Review the charts on the following pages first and you may not need to call for service. 1.Problem:My Dryer Won 't Start Question What to Do • Is the dryer plugged in? • Is the fuse blown, or is the circuit breaker tripped? - LG DLG0452G | Owner's Manual - Page 29
Part 10 TROUBLESHOOTING GUIDE 4.Problem:There is Lint on my Clothes Question What to Do • Is your lint filter full? Please refer to the manual section on cleaning the lint filter, and please confirm that the lint filter is clean. It is important that the lint filter is clean before each new load - LG DLG0452G | Owner's Manual - Page 30
for your garment? To avoid shrinkage, please carefully follow the care and use instructions for your garment, because some fabrics will naturally shrink when washed. Other fabrics can be washed but will shrink when dried in a dryer. • PLM problem See the Owner's Manual of RLM & PLC modem. 30 - LG DLG0452G | Owner's Manual - Page 31
LG DRYER LIMITED WARRANTY - USA 31 - LG DLG0452G | Owner's Manual - Page 32
24 horas al día, 7 días a la semana MANUAL DEL PROPIETARIO Secadora de Eléctrica y Gas DLE0442W/DLG0452W DLE0442S/DLG0452S DLE0442G/DLG0452G DLE5944WM/DLG5955WM DLE6942W/DLG6952W Gracias por comprar una Secadora LG. Por favor lea su manual correctamente, ya que contiene informaciòn importante de una - LG DLG0452G | Owner's Manual - Page 33
ELÉCTRICOS PARA SECADORAS A GAS...18 PARTE 7. REQUERIMIENTOS E INSTRUCCIONES SOBRE EL GAS...19 PARTE 8. REQUERIMIENTOS Y MANTENIMIENTO SOBRE EL ESCAPE 20-21 PARTE 9. USANDO SU SECADORA...22-27 PARTE 10. GUÍA PARA LA SOLUCIÓN DE PROBLEMAS...28-30 GARANTÍA LIMITADA DE LA SECADORA LG...31 2 - LG DLG0452G | Owner's Manual - Page 34
es muy importante. Hemos incluido muchos mensajes de seguridad importantes en este manual y en el aparato. Lea y cumpla en todos los casos estos llevadas a cabo por parte de un instalador cualificado, agencia de servicio, o el suministrador del servicio de gas. • Instale la secadora según las - LG DLG0452G | Owner's Manual - Page 35
Parte 1 GARANTÍA E INSTRUCCIONES DE SEGURIDAD IMPORTANTES LEA TODAS LAS INSTRUCCIONES ANTES DE UTILIZAR ADVERTENCIA Por su seguridad, la información de este manual SECADORA Y DEL ESCAPE PERIÓDICAMENTE. • NO INSTALE NI ALMACENE LA SECADORA EN UN LUGAR EN del gas natural o de combustibles del LP Las - LG DLG0452G | Owner's Manual - Page 36
Parte 1 GARANTÍA E INSTRUCCIONES DE SEGURIDAD IMPORTANTES LEA TODAS LAS INSTRUCCIONES ANTES DE UTILIZAR ADVERTENCIA Por su seguridad, la información de este manual manual. Puede ocurrir una descarga eléctrica si la secadora no dispone de una toma a tierra correcta. • Instale secadoras de gas SE DEBEN - LG DLG0452G | Owner's Manual - Page 37
Parte 1 GARANTÍA E INSTRUCCIONES DE SEGURIDAD IMPORTANTES LEA TODAS LAS INSTRUCCIONES ANTES DE UTILIZAR ADVERTENCIA Por su seguridad, la información de este manual o lesiones. • Consulte las instrucciones de instalación de este manual para los requisitos eléctricos específicos de su modelo. No - LG DLG0452G | Owner's Manual - Page 38
IMPORTANTES BÚSQUEDA DE ASISTENCIA SOBRE LA GARANTÍA Encontrará la garantía de su secadora en la parte final de este manual. El servicio de garantía está disponible contactando con su Centro de Servicio LG más próximo. Si este producto se instala y se opera siguiendo las instrucciones de este - LG DLG0452G | Owner's Manual - Page 39
Parte 2 ESPECIFICACIONES ■ Nombre : Secadora Eléctrica y de Gas ■ Suministro de Energìa : Favor de consultar la etiqueta de medición referente a la información detallada ■ Tamaño : 27 x 30 x 42.75(inch) ■ Capacidad de la Secadora : IEC 7.3cu.ft. (22.5 lb) ■ Peso : 126 Ibs (57.2 kg) Las - LG DLG0452G | Owner's Manual - Page 40
manual sobre Requerimientos y Mantenimientodel Escape. IMPORTANTE: Para reducir el riesgo de incendio, combustión y acumulación de gas, extraiga la seguridad de la parte inferior, izquierda o derecha según desee. (La ventilación del lado derecho no está disponible en la secadora a gas). , , es el - LG DLG0452G | Owner's Manual - Page 41
una conexión a gas LP (Petróleo Licuado), refiérase a la sección de este manual sobre Requerimientos e Instrucciones del Gas. 10 A cuatro por cien (4%) de reducción en el quemador, que es el rango indicado por el BTU en la placa de modelo/rango de serie. ADVERTENCIA! • Use un cordón de alimentaci - LG DLG0452G | Owner's Manual - Page 42
de detergente y agua, con un paño húmedo para remover de la parte interior del tambor de la secadora /compartimiento de secado cualquier polvo o sucio a Gas Cierre la puerta al tambor / compartimiento de secado de la secadora y después de haber completado todos los pasos de este manual para - LG DLG0452G | Owner's Manual - Page 43
una casa prefabricada o móvil 1) Las secadoras a gas deben estar fijas al piso permanentemente. 2) La eléctrica es suministrada en la sección del manual Requerimientos Eléctricos para la Secadora Eléctrica libre de 1 pulgada a los lados y en la parte posterior de la secadora. 10) Favor notar que los - LG DLG0452G | Owner's Manual - Page 44
Parte 4 INSTALACIÒN DE ACCESORIOS Instalacion de la secadora (Cinta de tipo doble-cara) 1 4 2 5 B. Desinstalación de una secadora a gas: 1. Cierre el gas 2. Desenchufe el cable de alimentación. 3. Desconecte la línea de gas de la secadora. 4. Deje a un lado y afloje la brida de ventilación. - LG DLG0452G | Owner's Manual - Page 45
Parte 5 REQUERIMIENTOS ELÉCTRICOS PARA SECADORAS ELÉCTRICAS Las siguientes son instrucciones adicionales sobre las conexiones y requerimientos eléctricos para las secadoras eléctricas. Advertencia Importante: - LG DLG0452G | Owner's Manual - Page 46
Luego, ponga el final de esas puntas debajo del tornillo de la terminal (la parte de la punta con forma de gancho mostrandose derecho) y una el cable con a los tornillos del mismo color. El color del cable indicada en el manual está conectado al tornillo del mismo color del bloque. De lo contrario, - LG DLG0452G | Owner's Manual - Page 47
secadora en una casa móvil, debe usar una conexión de 4-alambres. Luego, ponga el final de esas puntas debajo del tornillo de la terminal (la parte de la punta con forma de gancho mostrandose derecho) y una el cable con el tornillo fuertemente. 1. Conecte un cable neutral (blanco) al cordón de - LG DLG0452G | Owner's Manual - Page 48
Parte 5 REQUERIMIENTOS ELÉCTRICOS PARA SECADORAS ELÉCTRICAS Opción 2 Conexión de 3-alambres con un Cordón de Alimentación. Si los códigos y ordenanzas locales permiten la conexión de - LG DLG0452G | Owner's Manual - Page 49
Parte 6 REQUERIMIENTOS ELÉCTRICOS PARA SECADORAS A GAS 120 Voltios, 60 Hertz, con Enchufe de 3-Clavijas con Conexión a Tierra Las siguientes son instrucciones adicionales sobre las conexiones y requerimientos eléctricos para las secadoras a gas especificaciones requeridas por este manual, o si no - LG DLG0452G | Owner's Manual - Page 50
10 + 1.5 pulgadas. 2. No intente conectar la Secadora al Servicio de Gas Petròleo Lìquido (LP Gas) sin personal calificado. 3. Aísle la secadora del sistema de tuberías del suministro de gas cerrando la válvula individual de cierre manual, durante las pruebas de presión del sistema de suministro de - LG DLG0452G | Owner's Manual - Page 51
Parte como un ático, pared, techo, sótano, chimenea, salidas de gas, o espacio oculto de un edificio. Para reducir el riesgo de álico flexible no deberá superar los 2,4 m (8 ft) 8. En Canadá, sólo se deberán usar conductos Dryer Transition Duct" (Directriz para conductos de transición de - LG DLG0452G | Owner's Manual - Page 52
Parte 8 REQUERIMIENTOS Y MANTENIMIENTO SOBRE EL ESCAPE Mantenimiento del Escape y la Secadora ADVERTENCIA! Desconecte la energía eléctrica de la secadora antes de efectuar limpieza o mantenimiento. 1. Después - LG DLG0452G | Owner's Manual - Page 53
Parte 9 USANDO SU SECADORA Las siguientes son las instrucciones para encender y utilizar su nueva secadora. Por favor refiérase a las secciones especificas de este manual choque eléctrico, o lesiones personales lea este manual completamente, incluyendo las Instrucciones de Seguridad Importantes, - LG DLG0452G | Owner's Manual - Page 54
Parte 9 USANDO SU SECADORA 2 Botón de cambio de tiempo 1. MORE TIME, LESS TIME • Pulse MORE TIME o LESS TIME hasta ajustar el tiempo de secado deseado. Nota El botón de cambio del tiempo está disponible sólo con secado manual terminado el secado. 5. Rack Dry[Secado con Parrilla] El perchero de - LG DLG0452G | Owner's Manual - Page 55
del tiempo que se extiende a partir del 20 a 60 minutos. Características Predeterminadas del Ciclo Manual Seco Manualmente Carga de Ciclos Tipo TEMP. TIEMPO FIJADO EN FABRICA* (MINUTOS) SPEED DRY [Secado Rápido] High[Alto] 25 Cargas Pequeñas FRESHEN UP [Fresco] Quita Arrugas Medium HIgh - LG DLG0452G | Owner's Manual - Page 56
Parte 9 USANDO SU SECADORA 82 Selección de ciclo • Marcando con la perilla, seleccione el ciclo deseado basándose en los tipos de colada y las condiciones existentes. 1. Ciclo de Sensor Dry de los Ciclos Sensor Dry[sensor de secado] y Manual. Los Ciclos de Sensor Dry[sensor de secado] le - LG DLG0452G | Owner's Manual - Page 57
la puerta. Consulte el apartado de carga. • illegible parts - cannot read properly - please re-send 2. Carga usar un ciclo de secado por sensor • Seleccione DRY LEVEL para ajustar el nivel de sequedad que desea por sensor • Seleccione un ciclo de secado manual. • Pulse MORE TIME o LESS TIME hasta - LG DLG0452G | Owner's Manual - Page 58
Parte 9 USANDO SU SECADORA 5. Pausar o reiniciar. Para pausar la secadora en cualquier momento Abra la puerta o pulse START/PAUSE una vez. Para reiniciar la secadora Cierre - LG DLG0452G | Owner's Manual - Page 59
Parte 10 GUÍA PARA LA SOLUCIÓN DE PROBLEMAS Consejos para la solución de problemas Ahorre tiempo y dinero! Primero revise las tablas en las siguientes p áginas y quizás no necesite llamar a servicio. 28 - LG DLG0452G | Owner's Manual - Page 60
Parte 10 GUÍA PARA LA SOLUCIÓN DE PROBLEMAS 29 - LG DLG0452G | Owner's Manual - Page 61
Parte 10 GUÍA PARA LA SOLUCIÓN DE PROBLEMAS 30 - LG DLG0452G | Owner's Manual - Page 62
GARANTÍA LIMITADA DE LA SECADORA LG-USA 31
-
 1
1 -
 2
2 -
 3
3 -
 4
4 -
 5
5 -
 6
6 -
 7
7 -
8
-
9
-
10
-
11
-
12
-
13
-
14
-
15
-
16
-
17
-
18
-
19
-
20
-
21
-
22
-
23
-
24
-
25
-
26
-
27
-
28
-
29
-
30
-
31
-
32
-
33
-
34
-
35
-
36
-
37
-
38
-
39
-
40
-
41
-
42
-
43
-
44
-
45
-
46
-
47
-
48
-
49
-
50
-
51
-
52
-
53
-
54
-
55
-
56
-
57
-
58
-
59
-
60
-
61
-
62
 |
 |
P/No.: 3828EL4001H
DLE0442W/DLG0452W
DLE0442S/DLG0452S
DLE0442G/DLG0452G
DLE5944WM/DLG5955WM
DLE6942W/DLG6952W
Thank you for buying a LG Dryer.
Please read your manual carefully, as it provides instructions
on safe Installation, Use and Maintenance.
Record the Model and Serial Numbers, and retain the
manual for future reference.
For more information, visit our website at http://us.lge.com
1-800-243-0000
24 HOURS A DAY, 7 DAYS A WEEK FOR LG CUSTOMER SERVICE
Owner's Manual
Electrial and Gas Dryer