LG DLG5966W User Guide
LG DLG5966W - 27in Gas Dryer Manual
 |
UPC - 048231009164
View all LG DLG5966W manuals
Add to My Manuals
Save this manual to your list of manuals |
LG DLG5966W manual content summary:
- LG DLG5966W | User Guide - Page 1
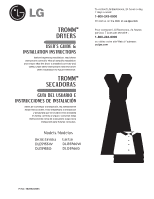
T RO M MTM DRYERS USER'S GUIDE & INSTALLATION INSTRUCTIONS Before beginning installation, read these instructions carefully. This wll simplify installation and ensure that the dryer is installed correctly and safely. Leave these instructions near the dryer after installation for future reference. T - LG DLG5966W | User Guide - Page 2
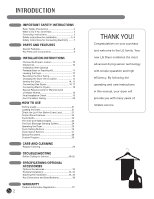
28 CARE AND CLEANING Regular Cleaning 29 TROUBLESHOOTING Before Calling for Service 30-32 SPECIFICATIONS/OPTIONAL ACCESSORIES Optional Accessories 32 Pedestal Installation 33, 34 Stacking Kit Installation 35, 36 Key Dimensions and Specifications 36 WARRANTY Product Information Registration - LG DLG5966W | User Guide - Page 3
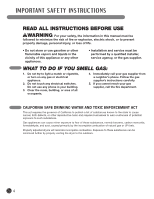
vapors that could ignite or explode. • Do not reach into the dryer if the drum or any other part is moving. • Do not repair or replace any part of the dryer or attempt any servicing unless specifically recommended in this Use and Care Guide or in published user-repair instructions that you understand - LG DLG5966W | User Guide - Page 4
other appliances. • Installation and service must be performed by a qualified installer, service agency, or the gas supplier. WHAT TO DO IF YOU SMELL GAS: 1. Do not try to light a match or cigarette, or turn on any gas or electrical appliance. 2. Do not touch any electrical switches. Do not use - LG DLG5966W | User Guide - Page 5
grounded. • Install and store the dryer where it will not be exposed to temperatures below freezing or exposed to the weather. • All repairs and servicing must be performed by an authorized servicer unless specifically recommended in this Owner's Guide. Use only authorized factory parts. Failure to - LG DLG5966W | User Guide - Page 6
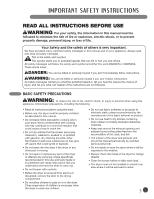
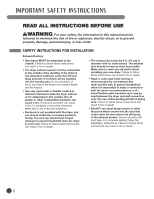
For your safety, the information in this manual must be followed to minimize the risk of fire or explosion, electric shock, or to prevent property damage, personal injury, or loss of life. SAFETY INSTRUCTIONS FOR INSTALLATION Exhaust/Ducting: • Gas dryers MUST be exhausted to the outside. Failure - LG DLG5966W | User Guide - Page 7
in electrical shock or injury. • Refer to the installation instructions in this manual for specific electrical requirements for your model. Failure to follow these instructions can create an electrical shock hazard and/or a fire hazard. • This dryer must be plugged into a properly grounded outlet - LG DLG5966W | User Guide - Page 8
with a yellow light that illuminates when the dryer door is open and turns off when the door is closed. 4 FLOWSENSE™ DUCT/FILTER BLOCKAGE SENSING SYSTEM The FlowSense™ duct/filter blockage sensing system detects and alerts you to blockages in the filter and ductwork that reduce exhaust flow from the - LG DLG5966W | User Guide - Page 9
referenced in this manual. 1 FRONT-MOUNT LINT FILTER Front-mounted lint filter allows for easy access and cleaning after every load. 2 LEVELING FEET Four leveling feet (two in the front, and two in the back) adjust to improve dryer stability on uneven floors. 3 DRYING RACK Use the drying rack with - LG DLG5966W | User Guide - Page 10
INSTALLATION INSTRUCTIONS IMPORTANT: Read all installation instructions completely before installing and operating your dryer! It is important that you review this entire manual before installing and using your dryer. Detailed instructions concerning electrical connections, gas connections, and - LG DLG5966W | User Guide - Page 11
optional pedestal base or stacking kit, please refer to Optional Accessories in this manual or to the instructions for your pedestal or stacking kit before proceeding with the installation. Required Dimensions for Installation With Pedestal Required Dimensions for Installation With Stacking Kit 30 - LG DLG5966W | User Guide - Page 12
INSTALLATION INSTRUCTIONS LEVELING THE DRYER To ensure that the dryer provides optimal drying performance, it must be level. To minimize vibration, noise, and unwanted movement, the floor must be a perfectly level, solid surface. NOTE: Adjust the leveling feet only as far as necessary to level the - LG DLG5966W | User Guide - Page 13
INSTALLATION INSTRUCTIONS CHANGING THE DRYER VENT LOCATION Your new dryer is shipped to vent to the rear. It can also be configured to vent to the bottom or side (right-side venting is not available on gas models). An adapter kit, part number 383EEL9001B, may be purchased from your LG retailer. - LG DLG5966W | User Guide - Page 14
. In special installations when it is impossible to make a connection with the above recommendations, a UL-listed flexible metal transition duct may be used between the dryer and wall connection only. The use of this ducting will affect drying time. Failure to follow these instructions can result in - LG DLG5966W | User Guide - Page 15
INSTALLATION INSTRUCTIONS VENTING THE DRYER (cont.) Ductwork Wall Cap Type Number of 90° Elbows Max. Length of 4-In. Dia. Rigid Metal Duct Max. Length of 4-In. Dia. Flexible Metal Duct 0 Recommended 1 2 3 4" 4" (10.2 cm) (10.2 cm) 4 Use Only for Short 0 Run Installations 1 2 3 - LG DLG5966W | User Guide - Page 16
Supply line requirements: Your laundry room must have a rigid gas supply line to your dryer. In the United States, an individual manual shutoff valve MUST be installed within at least 6 ft. (1.8 m) of the dryer, in accordance with the National Fuel Gas Code ANSI Z223.1. A 1/8-in. NPT pipe plug must - LG DLG5966W | User Guide - Page 17
INSTALLATION INSTRUCTIONS CONNECTING GAS DRYERS (cont.) wWARNING: To reduce the risk of fire, electric shock, or injury to persons when using this appliance, follow basic precautions, including the following: • Installation and service must be performed by a qualified installer, service agency, or - LG DLG5966W | User Guide - Page 18
TO 110-, 115-, OR 120-VOLT CIRCUIT. Heating elements are available for field installation in dryers which are to be connected to an electrical service of a different voltage than that listed on the rating plate. Failure to follow these instructions can result in fire, explosion, or death. • If branch - LG DLG5966W | User Guide - Page 19
installation of the dryer and it is in its final location, confirm proper operation with the following tests. Testing Dryer Heating GAS MODELS Close the dryer door, press the ON/OFF switch to turn the dryer on, and start the dryer on a heat setting. When the dryer starts, the igniter should ignite - LG DLG5966W | User Guide - Page 20
ductwork clean of lint build-up and free of restrictions allows clothes to dry faster, reduces energy use, and helps prevent fires. When the dryer is first installed, the duct condition test must be performed. This alerts you to any existing problems before the dryer is used. The dryer also saves this - LG DLG5966W | User Guide - Page 21
The CHECK FILTER indicator will light before each load to remind you to make sure the lint filter is clean before starting a new load. It will also come on during a load if the lint filter is clogged to let you know that the lint filter needs to be cleaned; a clogged lint filter will increase drying - LG DLG5966W | User Guide - Page 22
the standard presets will be shown in the display. On MANUAL DRY cycles, these settings can be adjusted using the cycle settings buttons anytime before starting the cycle. 3 START/PAUSE BUTTON Press this button to START the selected cycle. If the dryer is running, use this button to PAUSE the cycle - LG DLG5966W | User Guide - Page 23
Ultra sheer or lacy Ultra Low 34 Delicate garments Adjustable MANUAL DRY For small loads Speed Dry with short Off drying times For removing Freshen Up light wrinkles Off from clothing For items that require heat-free Air Dry drying such as Off plastics or rubber For general - LG DLG5966W | User Guide - Page 24
settings while the dryer is operating. 4 LINT FILTER INDICATOR The dryer automatically detects reduced air flow caused by a full lint filter. The CHECK FILTER indicator will light before each load as a reminder to check the lint filter before starting each load. If the lint filter becomes clogged - LG DLG5966W | User Guide - Page 25
the cycle. The display will change, and the dryer will display the estimated (SENSOR DRY) or set time (MANUAL DRY) remaining and start tumbling. To pause the cycle at any time, for example to clean the lint filter or to remove a garment, open the dryer door or press PAUSE. To resume the cycle where - LG DLG5966W | User Guide - Page 26
DRY LEVEL button until the indicator light for the desired setting is lit. • This option is only available with SENSOR DRY cycles. • The dryer will automatically adjust the cycle time. Selecting VERY DRY or MORE DRY the Cycle Guide for details. TIME DRY Allows you to manually select the drying time, - LG DLG5966W | User Guide - Page 27
display. 4 Press the START/PAUSE button to start the cycle. The dryer will start automatically. WRINKLE CARE dry, such as gym shoes or stuffed animals. NOTE: NEVER use the rack with a tumble dry cycle. To Install the Drying Rack 1 With the dryer door open, slide the rack into the dryer drum. 2 Make - LG DLG5966W | User Guide - Page 28
option to prevent unwanted use of the dryer or to keep cycle settings from being changed while the dryer is operating. Press and hold the RACK DRY button for 3 seconds to activate Program: 1 Turn on the dryer. 2 Press the CUSTOM PROGRAM button. 3 Press the START/PAUSE button to start the cycle. 28 - LG DLG5966W | User Guide - Page 29
airflow or drying performance occurs, immediately check ductwork for obstructions and blockages. Contact a qualified technician or service provider. 3 Wash the lint filter in warm, soapy water and allow to dry thoroughly before reinstalling. NOTE: NEVER operate the dryer without the lint filter in - LG DLG5966W | User Guide - Page 30
increase fuse capacity. If the problem is a circuit overload, have it corrected by a qualified electrician. • Confirm that the house gas shutoff and the dryer gas shutoff are both fully open. • Confirm and follow the instructions provided with your fabric softener. • Make sure to use your dryer to dry - LG DLG5966W | User Guide - Page 31
• Pause the drying cycle and clean the lint filter. • Install a shorter or straighter duct run. See the Installation Instructions. • Ductwork should be checked/cleaned soon. Dryer can be used in this condition, but drying times may be longer. 4 bars are displayed in FLOW SENSE indicator • Ductwork - LG DLG5966W | User Guide - Page 32
TROUBLESHOOTING BEFORE CALLING FOR SERVICE (cont.) Problem Possible Causes Ductwork is clean and properly installed as described in the installation instructions, but the FLOW SENSE display shows 4 bars. • Dryer is being used for the first time, or after an extended power outage. Solutions • - LG DLG5966W | User Guide - Page 33
serious injury. • If appliances are already installed, disconnect them from all power, water, or gas lines and from draining or venting connections. Failure to do so can result in electrical shock, fire, explosion, or death. For dryer For washer/combo 1 Make sure the leveling feet of the appliance - LG DLG5966W | User Guide - Page 34
ACCESSORIES PEDESTAL INSTALLATION (cont.) 3 Make sure the side surface of the appliance is clean and dry. Remove paper backing from the tape on the bracket. 4 Position the bracket as shown. The bent part of the bracket should rest along the edge of the pedestal, and the holes in the bottom part of - LG DLG5966W | User Guide - Page 35
installed, disconnect them from all power, water, or gas lines and from draining or venting connections. Failure to do so can result in electrical shock, fire, explosion, or death. 1 Make sure the surface of the washer is clean and dry. Remove paper backing from the tape on one of the stacking kit - LG DLG5966W | User Guide - Page 36
rail stoppers. Install the two remaining screws to secure the front rail to the side rails. S P E C I F I C AT I O N S KEY DIMENSIONS AND SPECIFICATIONS The appearance and specifications listed in this guide may vary due to constant product improvements. TROMM™ Dryer Models DLE5955W, DLG5955G - LG DLG5966W | User Guide - Page 37
. If the product is installed outside the normal service area, any cost of transportation involved in the repair of the product or replacement of a defective part shall be borne by you (the owner). To obtain Product or Customer Service Assistance: Please call 1-888-LG-CANADA (888-542-2623) and - LG DLG5966W | User Guide - Page 38
huele gas 40 Instalaciones con la base pedestal o kit de apilado opcionales 47 Nivelaci LG. Su nueva Secadora LG combina la tecnología de sensor de secado más avanzada con un funcionamiento sencillo y muy eficiente. Al seguir las instrucciones de funcionamiento y mantenimiento de este manual - LG DLG5966W | User Guide - Page 39
de los demás son de suma importancia. En este manual y en su electrodoméstico figuran muchos mensajes importantes de parte interior de la secadora y el conducto de ventilación se deberán limpiar periódicamente, y la misma deberá ser realizada por personal calificado del servicio. • No instale - LG DLG5966W | User Guide - Page 40
USAR wADVERTENCIA Por su seguridad, se debe seguir la información indicada en este manual para minimizar el riesgo de incendio o explosión, descarga eléctrica, o ído y hollín, generado principalmente por la combustión parcial del gas natural o los combustibles LP (petróleo líquido). Las secadoras - LG DLG5966W | User Guide - Page 41
que se den otras recomendaciones específicas en el Manual del Usuario. Utilice sólo piezas de fábrica autorizadas. Si no se cumple con esta advertencia se podrán producir heridas graves, incendios, descargas eléctricas o muerte. • Instale y almacene la secadora en un lugar no expuesto a temperaturas - LG DLG5966W | User Guide - Page 42
seguir la información indicada en este manual para minimizar el riesgo de incendio Conducto de escape/Tubería: • Las secadoras a gas DEBEN tener un conducto de ventilación al exterior ón al exterior. La acumulación de pelusa en cualquier parte de la casa puede crear riesgos de salud e incendio - LG DLG5966W | User Guide - Page 43
eléctricas o heridas. • Consulte las instrucciones de instalación de este manual para obtener los requisitos eléctricos específicos de su modelo. Si El cable de corriente se puede cortar debido a cualquier movimiento de su parte central, resultando en una descarga eléctrica. • Repare o reemplace de - LG DLG5966W | User Guide - Page 44
PIEZAS Y CARACTERÍSTICAS CARACTERÍSTICAS ESPECIALES 1 PANEL DE CONTROL FÁCIL PARA USAR Gire la perilla selectora de ciclos al ciclo de secado deseado. Añada los ajustes de ciclo o programe las opciones con el toque de un botón. 2 PUERTA REVERSIBLE DE FÁCIL ACCESO La amplia puerta provee acceso para - LG DLG5966W | User Guide - Page 45
los cuales se hace referencia en este manual. 1 FILTRO DE PELUSA MONTADO AL FRENTE de secado con la opción de ciclo RACK DRY (estante de secado). El estante de secado gas) Accesorios incluidos 3 Estante de secado Ubicación de la toma de gas (Modelos a gas) Salida del conducto de escape Parte - LG DLG5966W | User Guide - Page 46
manual antes de instalar y usar su secadora. Se proporcionan instrucciones detalladas pertinentes a las conexiones eléctricas, de gas y los requisitos de escape en las siguientes páginas. ESCOJA EL LUGAR ADECUADO • Almacene e instale (2,5 cm) a los lados y parte trasera para minimizar la vibración y - LG DLG5966W | User Guide - Page 47
pedestal o un kit de apilado opcionales, consulte la sección de Accesorios opcionales incluida en este manual o las instrucciones de su pedestal o kit y otros productos LG, llame a su distribuidor LG local, o visite nuestro sitio Web en us.lge.com. Pedestal (Adquirido por separado) Kit de apilado ( - LG DLG5966W | User Guide - Page 48
de que su secadora no se mece de esquina a esquina. Si está instalando la secadora sobre el accesorio de pedestal opcional, deberá usar las patas niveladoras del pedestal para nivelarla. Las patas niveladoras de la secadora deberán estar completamente retraídas. Patas niveladoras 1 Coloque la - LG DLG5966W | User Guide - Page 49
También puede configurarse para ventilar en la parte inferior o lateralmente (no está disponible la ventilación del lado derecho en los modelos a gas). Puede adquirirse el kit adaptador, número de pieza 383EEL9001B, de su distribuidor LG. Este kit contiene los componentes de conducto necesarios para - LG DLG5966W | User Guide - Page 50
la secadora en un área cerrada o no ventilada, tal como un desván, pared, cielo raso, espacio entre el cimiento y la tierra, chimenea, conducto de gas o espacios ocultos de un edificio. Si no se siguen estas instrucciones se podrá producir incendio o muerte. • Para reducir el riesgo de incendio, NO - LG DLG5966W | User Guide - Page 51
INSTRUCCIONES PARA LA INSTALACIÓN CONEXIÓN DEL CONDUCTO DE VENTILACIÓN DE LA SECADORA (cont.) Sistema de conducto Tipo de tapa de pared Número de Codos de 90° Long. máx. de conducto metálico flexible de diám. 4" Long. máx. de conducto metálico flexible de diám. 4" Recomendado 0 1 65 pies ( - LG DLG5966W | User Guide - Page 52
. • Requisitos de la línea de suministro: Su cuarto de lavado debe tener una línea rígida de suministro de gas para la secadora. En los EE. UU., se debe instalar una válvula de corte manual individual a una distancia de por lo menos 6 pies (1,8 m) de la secadora, de acuerdo con el Código Nacional de - LG DLG5966W | User Guide - Page 53
en su cuarto de lavado sea el adecuado para la secadora. La secadora está lista para la conexión de gas natural de 3/8 pulgadas NPT. 2 Quite la tapa de envío de la conexión de gas localizada de la parte trasera de la secadora. Asegúrese de no dañar la rosca del conector de - LG DLG5966W | User Guide - Page 54
ón en una vivienda móvil o prefabricada debe realizarse de conformidad con los Estándares de seguridad y construcción de viviendas prefabricadas, Título 24 CFR, Parte 32-80 o estándar CAN/CSA0Z240 MH y con los códigos y regulaciones locales. • Se requiere una conexión de 4 hilos en todas las - LG DLG5966W | User Guide - Page 55
al tornillo del mismo color. El color del cable que figura en el manual se conecta el tornillo del mismo color en el bloque. De otro modo se la cubierta de acceso al bloque terminal localizado en la parte superior trasera de la secadora. Instale un protector de tensión listado por UL en el orificio - LG DLG5966W | User Guide - Page 56
tornillo del mismo color. El color del cable que figura en el manual se conecta el tornillo del mismo color en el bloque. De otro modo Quite la cubierta de acceso al bloque terminal localizado en la parte superior trasera de la secadora. Instale un protector de tensión listado por UL en el orificio - LG DLG5966W | User Guide - Page 57
al tornillo del mismo color. El color del cable que figura en el manual se conecta el tornillo del mismo color en el bloque. De otro modo la cubierta de acceso al bloque terminal localizado en la parte superior trasera de la secadora. Instale un protector de tensión listado por UL en el orificio - LG DLG5966W | User Guide - Page 58
al tornillo del mismo color. El color del cable que figura en el manual se conecta el tornillo del mismo color en el bloque. De otro modo la cubierta de acceso al bloque terminal localizado en la parte superior trasera de la secadora. Instale un protector de tensión listado por UL en el orificio - LG DLG5966W | User Guide - Page 59
un técnico de mantenimiento e instalación para obtener ayuda. • Una secadora de gas debería fijarse permanentemente sobre el piso. • La conexión eléctrica de un espacio libre de 1 pulgadas (2,5 cm) a los lados y la parte trasera de la secadora. • Tenga en cuenta que los materiales de ventilación - LG DLG5966W | User Guide - Page 60
estado del conducto: 1 Presione y sostenga los botones DAMP DRY BEEP y TEMP CONTROL al mismo tiempo. Al sostener estos botones que se encuentra en el modo de evaluación del estado del conducto. 3 Presione START/PAUSE. La secadora evaluará durante aproximadamente 2 minutos. Si no aparecen barras en - LG DLG5966W | User Guide - Page 61
y cordones para prevenir que estos artículos se enganchen o enreden en otras prendas. REVISE EL FILTRO DE PELUSA ANTES DE CADA USO El Indicador del CHECK FILTER (control del filtro) se encenderá antes de cada carga, recordándole que se debe asegurar que el filtro de pelusa esté limpio antes de - LG DLG5966W | User Guide - Page 62
(MANUAL DRY) se pueden programar estos ajustes usando los botones de ajuste de ciclos en cualquier momento antes de iniciar el ciclo. 3 BOTÓN DE INICIO/PAUSA (START/PAUSE) Apriete este botón para iniciar el ciclo seleccionado. Si la secadora está funcionando, utilice este botón para hacer una PAUSA - LG DLG5966W | User Guide - Page 63
Apagado Sin calor Alta Ajustable 30 Ajustable 40 Ajustable Ciclos de secado con sensor (sensor dry) Ciclos de secado manual (manual dry) Los ciclos de secado por sensor utilizan el sistema exclusivo de sensor doble de LG para detectar y comparar el nivel de humedad en las prendas y en el aire - LG DLG5966W | User Guide - Page 64
. El indicador de CHECK FILTER (control del fltro) se encenderá, permitiéndole saber que el filtro se debe limpiar de inmediato para una máxima eficiencia. Siempre limpie el filtro de pelusa antes de cada ciclo. 5 INDICADOR DEL SISTEMA DE SENSOR DE BLOQUEO DE CONDUCTO FLOW SENSE™ El sistema de - LG DLG5966W | User Guide - Page 65
en todos los ciclos. 5 Apriete el botón de inicio/pausa (START/ PAUSE) para iniciar el ciclo. La pantalla cambiará, y la secadora mostrará el secado con sensor (SENSOR DRY) estimado o el tiempo programado de secado manual (MANUAL DRY) restante e iniciará el giro. Para detener el ciclo en cualquier - LG DLG5966W | User Guide - Page 66
cambiarse. Los ciclos de secado manual tienen ajustes predeterminados, pero pueden bajo (ULTRA LOW) a calor alto (HIGH HEAT). Esto permite el cuidado preciso de sus telas para eliminar arrugas. Presione el botón tiempo de secado (TIME DRY) hasta que la luz indicadora del ajuste deseado se encienda. - LG DLG5966W | User Guide - Page 67
la pantalla un mensaje de confirmación. 4 Apriete el botón inicio/pausa (START/PAUSE) para iniciar el ciclo. La secadora iniciará automáticamente. CUIDADO : No use este ciclo con telas delicadas. BIP DE SECADO HÚMEDO (DAMP DRY BEEP) Con esta opción, la secadora hará sonar la alarma cuando la carga - LG DLG5966W | User Guide - Page 68
secadora se encuentra en funcionamiento. Apriete y mantenga apretado el botón de estante de secado (RACK DRY) por 3 segundos para activar o desactivar el seguro infantil (CHILD LOCK). Se mostrará seguro el botón CUSTOM PROGRAM. 3 Apriete el botón inicio/pausa (START/PAUSE) para iniciar el ciclo. - LG DLG5966W | User Guide - Page 69
de lana metálica; pueden raspar o dañar la superficie. Limpie siempre el filtro de pelusa antes de cada ciclo o cuando el indicador CHECK FILTER se encenderá durante una carga. Para limpiarlo, tire del filtro de pelusa verticalmente. Luego: 1 Con los dedos, enrolle cualquier pelusa para retirarla - LG DLG5966W | User Guide - Page 70
de secado menos prolongado; o use los ciclos secado con sensor (SENSOR DRY). • Estos materiales pueden causar acumulación de estática. Intente usar un á dependiendo del ajuste de calor, tipo de calor utilizado (eléctrico, natural, o gas LP), el tamaño de la carga, el tipo de tela, el nivel de humedad - LG DLG5966W | User Guide - Page 71
CHECK FILTER está encendida durante el ciclo de secado 2 barras aparecen en el indicador del FLOW SENSE o sin calor y/o la opción estante de secado (RACK DRY). • Pause el ciclo de secado y limpie el filtro de de la tubería por acumulación de pelusa. • Instale un conducto más corto o más derecho. Lea - LG DLG5966W | User Guide - Page 72
• Instale un conducto LG con los pedestales de 35,5 centímetros (14 pulgadas) de alto correspondientes. Proveen un cajón de almacenamiento para brindar mayor comodidad. Pedestal 14" Color WDP3W WDP3B WDP3S WDP3N WDP3R WDP3G Blanco Negro Titanio Azul Marino Rojo Cereza Gris Perla 72 Kit - LG DLG5966W | User Guide - Page 73
electrodomésticos son muy pesados. Se requiere de dos o más personas para instalar del pedestal. Si esto no se cumple se podrán sufrir daños en la espalda u instalados, desconéctelos de cualquier fuente de alimentación, tuberías de gas o agua y de las conexiones de drenaje o ventilación. Si no - LG DLG5966W | User Guide - Page 74
pedestal, y los orificios en la parte inferior de la abrazadera deberán alinearse con los orificios en el pedestal. 5 Instale los 2 tornillos para conectar firmemente la abrazadera al pedestal los electrodomésticos a todas las tuberías de agua o gas o a la fuente de poder o conexiones de ventilación - LG DLG5966W | User Guide - Page 75
en la espalda u otras heridas. • No utilizar el kit de apilado con un secadora a gas en condiciones potencialmente inestables tales como una casa rodante. una de las abrazaderas laterales del kit de apilado. 2 Haga coincidir la abrazadera lateral del lado de la parte superior de la lavadora como se - LG DLG5966W | User Guide - Page 76
. Instale los dos tornillos restantes para asegurar el riel frontal a los laterales. DIMENSIONES Y ESPECIFICACIONES CLAVE El aspecto y las especificaciones enumeradas en esta guía podrían variar debido a mejoras constantes del producto. Secadora TROMM™ Dryer Modelos DLE5955W, DLE5955G, DLG5966W - LG DLG5966W | User Guide - Page 77
1-800-243-0000 y escoja la opción adecuada para ubicar a su Centro de Mantenimiento Autorizado LG más cercano. O visite nuestro sitio Web en: http://www.lgservice.com. ESTA GARANTÍA REEMPLAZA y número de serie figuran en la placa de clasificación en la parte interna de la puerta del frente. 77 - LG DLG5966W | User Guide - Page 78
NOTES • NOTAS 78 - LG DLG5966W | User Guide - Page 79
NOTES • NOTAS 79 - LG DLG5966W | User Guide - Page 80
P/No. 3828EL3003S
-
 1
1 -
 2
2 -
 3
3 -
 4
4 -
 5
5 -
 6
6 -
 7
7 -
8
-
9
-
10
-
11
-
12
-
13
-
14
-
15
-
16
-
17
-
18
-
19
-
20
-
21
-
22
-
23
-
24
-
25
-
26
-
27
-
28
-
29
-
30
-
31
-
32
-
33
-
34
-
35
-
36
-
37
-
38
-
39
-
40
-
41
-
42
-
43
-
44
-
45
-
46
-
47
-
48
-
49
-
50
-
51
-
52
-
53
-
54
-
55
-
56
-
57
-
58
-
59
-
60
-
61
-
62
-
63
-
64
-
65
-
66
-
67
-
68
-
69
-
70
-
71
-
72
-
73
-
74
-
75
-
76
-
77
-
78
-
79
-
80
 |
 |
P/No. 3828EL3003S
Before beginning installation, read these
instructions carefully. This wll simplify installation
and ensure that the dryer is installed correctly and
safely. Leave these instructions near the dryer
after installation for future reference.
TROMM
TROMM
DRYERS
DRYERS
To contact LG Electronics, 24 hours a day,
7 days a week:
1-800-243-0000
Or visit us on the Web at:
us.lge.com
Pour contacter LG Electronics, 24 heures
par jour, 7 jours par semaine :
1-800-243-0000
ou visitez notre site Web à l’adresse :
us.lge.com
TM
TM
USER’S GUIDE &
USER’S GUIDE &
INSTALLATION INSTRUCTIONS
INSTALLATION INSTRUCTIONS
Antes de comenzar la instalación, lea atentamente
estas instrucciones. Esto simplificará la instalación
y asegurará que la secadora está instalada
en forma correcta y segura. Conserve estas
instrucciones cerca de la secadora luego de la
instalación para futuras consultas.
Models/Modelos
TROMM
TROMM
SECADORAS
SECADORAS
TM
TM
GUÍA DEL USUARIO E
GUÍA DEL USUARIO E
INSTRUCCIONES DE INSTALACIÓN
INSTRUCCIONES DE INSTALACIÓN
Electric/Eléctrica
DLE5955W
DLE5955G
Gas/Gas
DLG5966W
DLG5966G