LG HBLG1203R Owners Manual - Page 14
Type C}, See Fig, 6
 |
View all LG HBLG1203R manuals
Add to My Manuals
Save this manual to your list of manuals |
Page 14 highlights
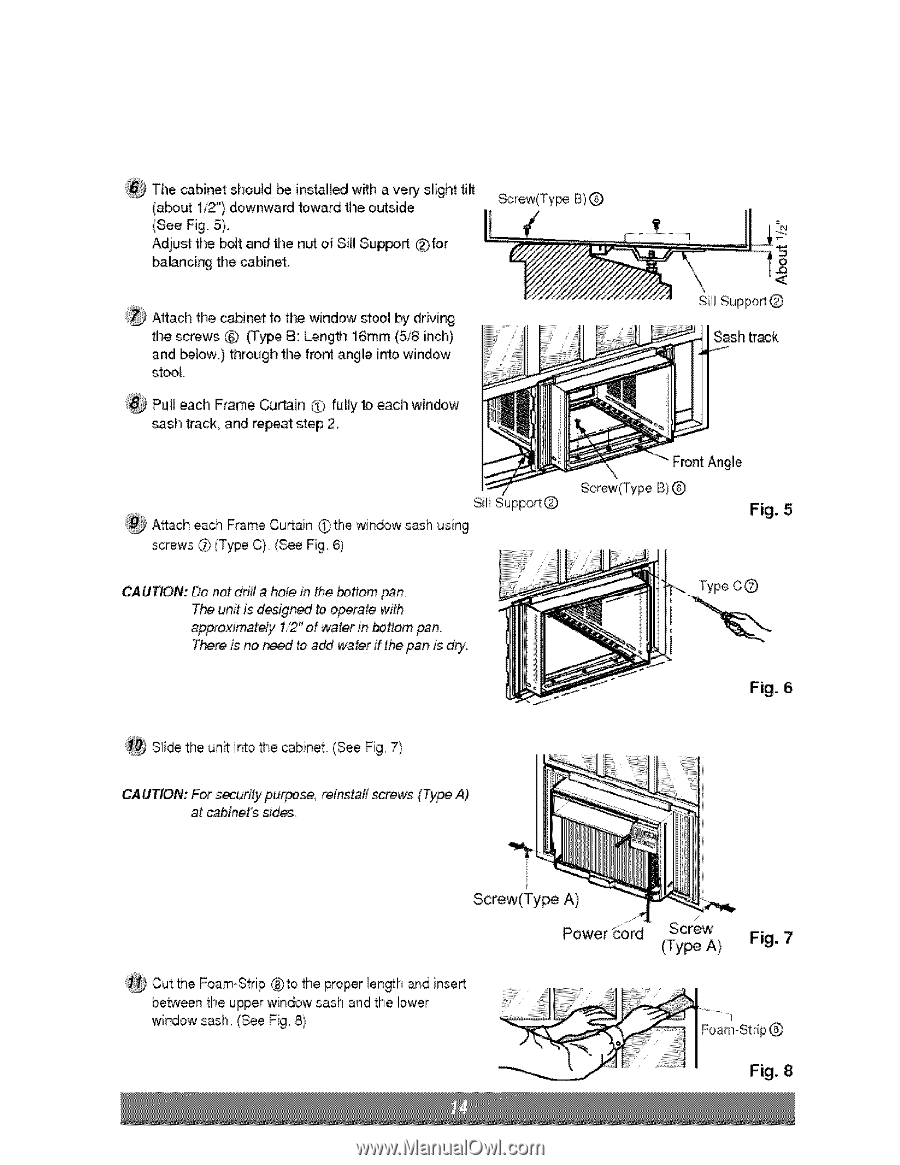
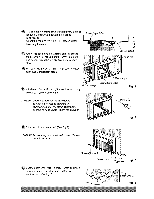
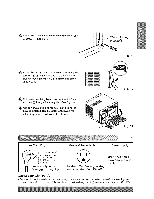
The cabinet should be installed with a ve_ sl!ighttilt (abo_ 1/2") downward toward the outside (See Fig. 5). Adjust the bolt and the n_ of Sill Su_rt Qfor balanci_ timecabinet. Screw(Ty_ B) @ '_ Attach the, cabinet to tt_ window stoo_ by drivi_ the scows (_ (Type 8: Lengfl_ 16ram (5/8 inch) and _bw,) through the fron_ angle into 'window stool ::_ Pu!_each Frame Curtain 0 fully to,each windiow _sh track and re.at step 2 Sil_ Suppo_@ Sash #_k Sill Support@ Attach each Frame Curt_n • the window s_h using (Type C}, (See Fig, 6) scriews @} Front Angle Screw(Type B) @ Fig, 5 CAUTtON: Do not drill a hole in the _ttom _n. The un# is desigr'_ to operate with I/2" of water in _t_om _n. There is no,_ to add water ff the _n is dry. _ec® Fig. 6 Sli@ the un_ into #_e cabinet (See Fig, 7) CAUTION: ,Farsecurity purpose, reinstall _rews (Type A), at cabi_t_ sides Screw(Type A) Cutthe FoarmStrip @to the proper _engt:hand insert betw_n the upper window sash and the lower window sash, (See Fig, 8) Screw (Type A) Fig. 7 Fig, 8
-
 1
1 -
2
-
3
-
4
-
5
-
6
-
7
-
8
-
 9
9 -
 10
10 -
 11
11 -
 12
12 -
 13
13 -
 14
14 -
 15
15 -
 16
16 -
 17
17
 |
 |