LG IPS226V-PN Owner's Manual - Page 8
Connecting with the PC - gaming
 |
View all LG IPS226V-PN manuals
Add to My Manuals
Save this manual to your list of manuals |
Page 8 highlights
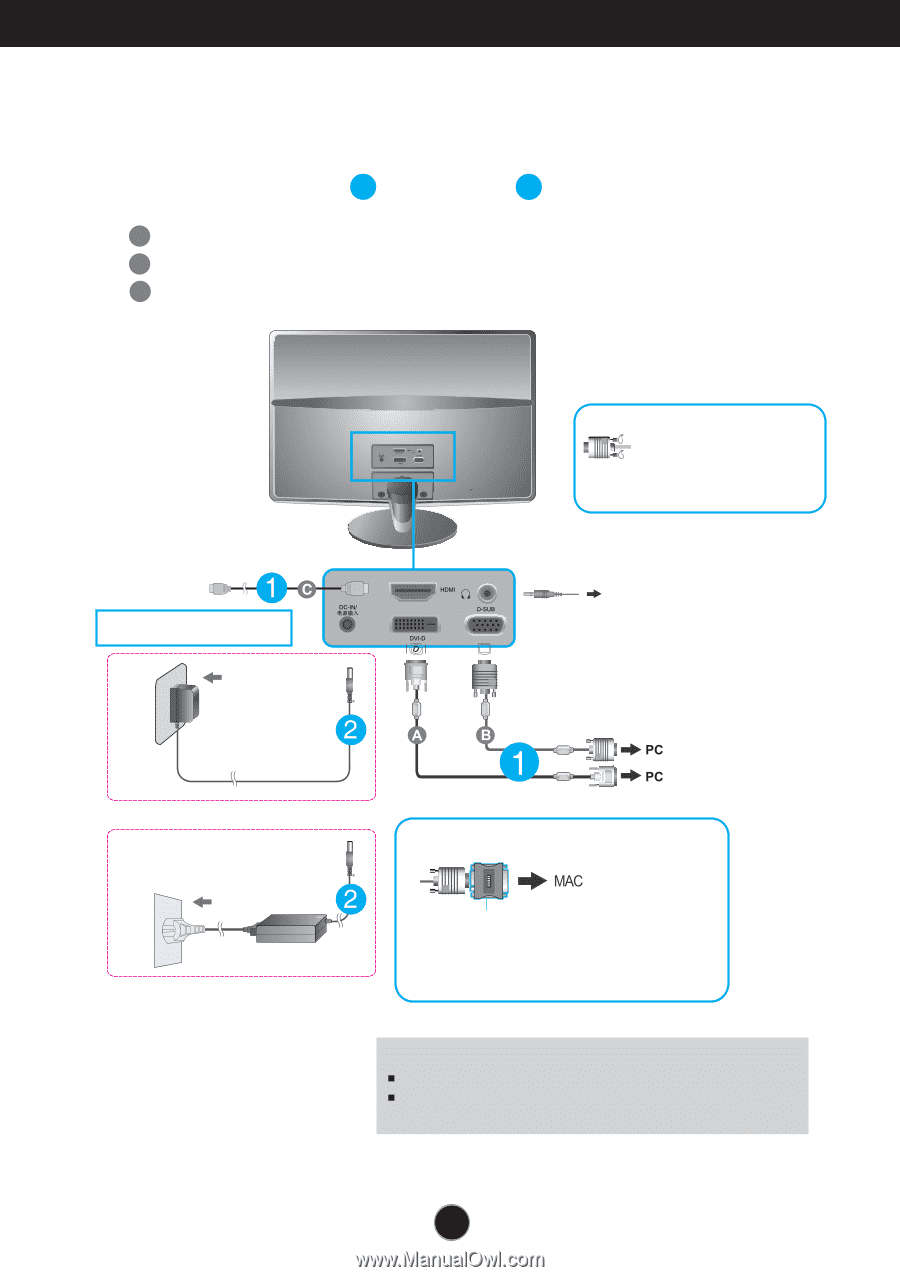
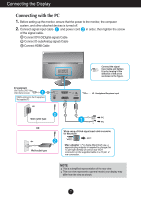
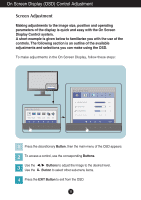
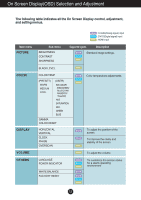
Connecting the Display Connecting with the PC 1. Before setting up the monitor, ensure that the power to the monitor, the computer system, and other attached devices is turned off. 2. Connect signal input cable 1 and power cord 2 in order, then tighten the screw of the signal cable. A Connect DVI-D(Digital signal) Cable B Connect D-sub(Analog signal) Cable C Connect HDMI Cable AV equipment (Set-Top Box, DVD, Video, Video Game Console) * HDMI is optimized on the AV equipment. * Not supported PC Connect the signal input cable and tighten it up by turning in the direction of the arrow as shown in the figure. Headphone/Earphone Input Wall-outlet type OR Wall-outlet type When using a D-Sub signal input cable connector for Macintosh Mac adapter : For Apple Macintosh use, a separate plug adapter is needed to change the 15 pin high density (3 row) D-sub VGA connector on the supplied cable to a 15 pin 2 row connector. NOTE This is a simplified representation of the rear view. This rear view represents a general model; your display may differ from the view as shown. 7
-
 1
1 -
2
-
 3
3 -
 4
4 -
 5
5 -
 6
6 -
 7
7 -
 8
8 -
 9
9 -
 10
10 -
 11
11 -
 12
12 -
 13
13 -
14
-
15
-
16
-
17
-
18
-
19
-
20
-
21
-
22
-
23
-
24
-
25
-
26
-
27
-
28
-
29
-
30
-
31
-
32
 |
 |