LG LMV1762ST INSTALLATION
LG LMV1762ST Manual
 |
View all LG LMV1762ST manuals
Add to My Manuals
Save this manual to your list of manuals |
LG LMV1762ST manual content summary:
- LG LMV1762ST | INSTALLATION - Page 1
Website: http://www.lg.com MICROWAVE OVEN INSTALLATION INSTRUCTIONS PLEASE READ AND SAVE THESE INSTALLATION INSTRUCTIONS. MFL06206505 - LG LMV1762ST | INSTALLATION - Page 2
by model. BE SURE TO READ THE FOLLOWING SAFETY INSTRUCTIONS: Model Number Plate or Figure 1 Mounting Plate Mounting Plate Figure 2 wW A R N I N G For Your Safety • This oven should not be installed or located by anyone except properly qualified service personnel. • You will need TWO people to - LG LMV1762ST | INSTALLATION - Page 3
the upper cabinet and rear wall structures can support 150 lbs., plus the weight of any areas, such as windows, doors, and strong heating vents. - BE SURE you have enough space. installation. (Use templates included with installation instructions) wCAUTION Figure 4 • Before you begin installing - LG LMV1762ST | INSTALLATION - Page 4
of these parts. Damper/duct connector (for roof venting or wall venting installation) Not supporting the Microwave Oven ) WARNING - TO REDUCE THE RISK OF FIRE AND ELECTRIC SHOCK, INSTALL One rear wall template- Not Actual Size (1 piece mounting plate only) NOTE: You need to install at least one - LG LMV1762ST | INSTALLATION - Page 5
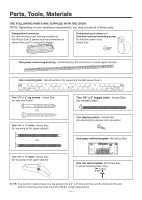
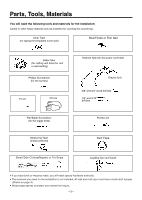
Parts, Tools, Materials You will need the following tools and materials for the installation: Carton or other heavy material such as a blanket for covering the counter top. Clear Tape (for taping the templates to the wall) Stud Finder or Thin Nail Saber Saw (for cutting vent holes for roof or - LG LMV1762ST | INSTALLATION - Page 6
, 60 Hz., AC only) with a 15 or 20A fused electrical supply. IMPORTANT: If you do not have the proper wall outlet, you MUST have one installed by a qualified electrician. 2. You will cut the hole for the power supply cord (shown in Figure 5) later when you prepare the wall and upper cabinet - LG LMV1762ST | INSTALLATION - Page 7
-the-roof Figure 7 REMEMBER AS YOU INSTALL THE VENTING: Keep the length of the size of the ductwork the same. Do not install two elbows together. Oven Use duct tape installation, you should check outside hood opening and operation. When you install the oven, please refer to the Installation Manual - LG LMV1762ST | INSTALLATION - Page 8
The Venting System Standard Fittings NOTE: If the existing duct is round, you must use a rectangular-to-round adapter, with a rectangular 3" extension duct installed between the damper assembly and the adapter to prevent the exhaust damper's sticking. Duct Length The total length of the duct system - LG LMV1762ST | INSTALLATION - Page 9
shock. 1. Remove any shipping materials and parts from inside the microwave oven. Set them aside , protective covering 3. Locate the exhaust adaptor, grease filters and hardware packet. 4. At this point, remove proper vent selection. •Improper installation can cause problems such as: 1. Inability - LG LMV1762ST | INSTALLATION - Page 10
top locking tabs and in the lower locking tabs. Take care to assure the damper hinge is installed so that it is at the top and that the damper swings freely. See Figure 20. Knockouts Parts B Parts B Figure 15 Blower Unit Exhaust Ports Exhaust Ports Figure 16 Figure 17 Figure 18 Blower Unit - LG LMV1762ST | INSTALLATION - Page 11
3: Prepare The Venting Blower ROOM-VENTING (Recirculating) INSTALLATION: 1. Remove one or two blower unit mounting screw (s). See Figure 25. Blower Unit Blower Plate Mounting Screw Blower Plate Back Plate Parts B Blower Unit Mounting Screw Figure 21 Figure 22 Blower Unit Figure 23 Figure - LG LMV1762ST | INSTALLATION - Page 12
wW A R N I N G To avoid personal injury or property damage, do not attempt to install this microwave oven if you cannot find a wall stud. Consult a carpenter or contractor. Measure And Track/Tape Up The Templates 1. Using a plumb line and (metal) measuring tape, find and mark the vertical center - LG LMV1762ST | INSTALLATION - Page 13
more, you will need 2"x 2" filler blocks (not included) to provide additional support for the bolts. See Figure 28. Mark the center of each filler block upper cabinet template. Wall-Venting: Cut out the shaded area marked F on the REAR WALL TEMPLATE. Room-Venting: go to STEP 5, INSTALL THE MOUNTING - LG LMV1762ST | INSTALLATION - Page 14
Install The Mounting Plate The Oven Must Be Connected To At Least One Wall Stud. 1. Center the rear wall template in the space by lining up the plumb line on wall with centerline on template.Then securely tape or tack the rear wall template Line B A Support Tab C Support Tab Figure 30 Mounting - LG LMV1762ST | INSTALLATION - Page 15
or counter. ● Do not lift or support the product by the bottom center surface. Install the power supply cord clamp, using a screw as shown in Figure 35, to the inside of the cabinet. 3 2 6. Grasp the filter filter screen. See Figure 36. 7. Plug in the power supply cord. 8. Read your Owner's Manual - LG LMV1762ST | INSTALLATION - Page 16
Printed in China
-
 1
1 -
 2
2 -
 3
3 -
 4
4 -
 5
5 -
 6
6 -
 7
7 -
8
-
9
-
10
-
11
-
12
-
13
-
14
-
15
-
16
 |
 |

Website: http://
www
.lg.com
MICROWAVE OVEN
INSTALLATION INSTRUCTIONS
PLEASE READ AND SAVE THESE INSTALLATION INSTRUCTIONS.
MFL0620650
5