LG LW1010ER User Guide - Page 15
Screw, Type - installation manual
 |
View all LG LW1010ER manuals
Add to My Manuals
Save this manual to your list of manuals |
Page 15 highlights
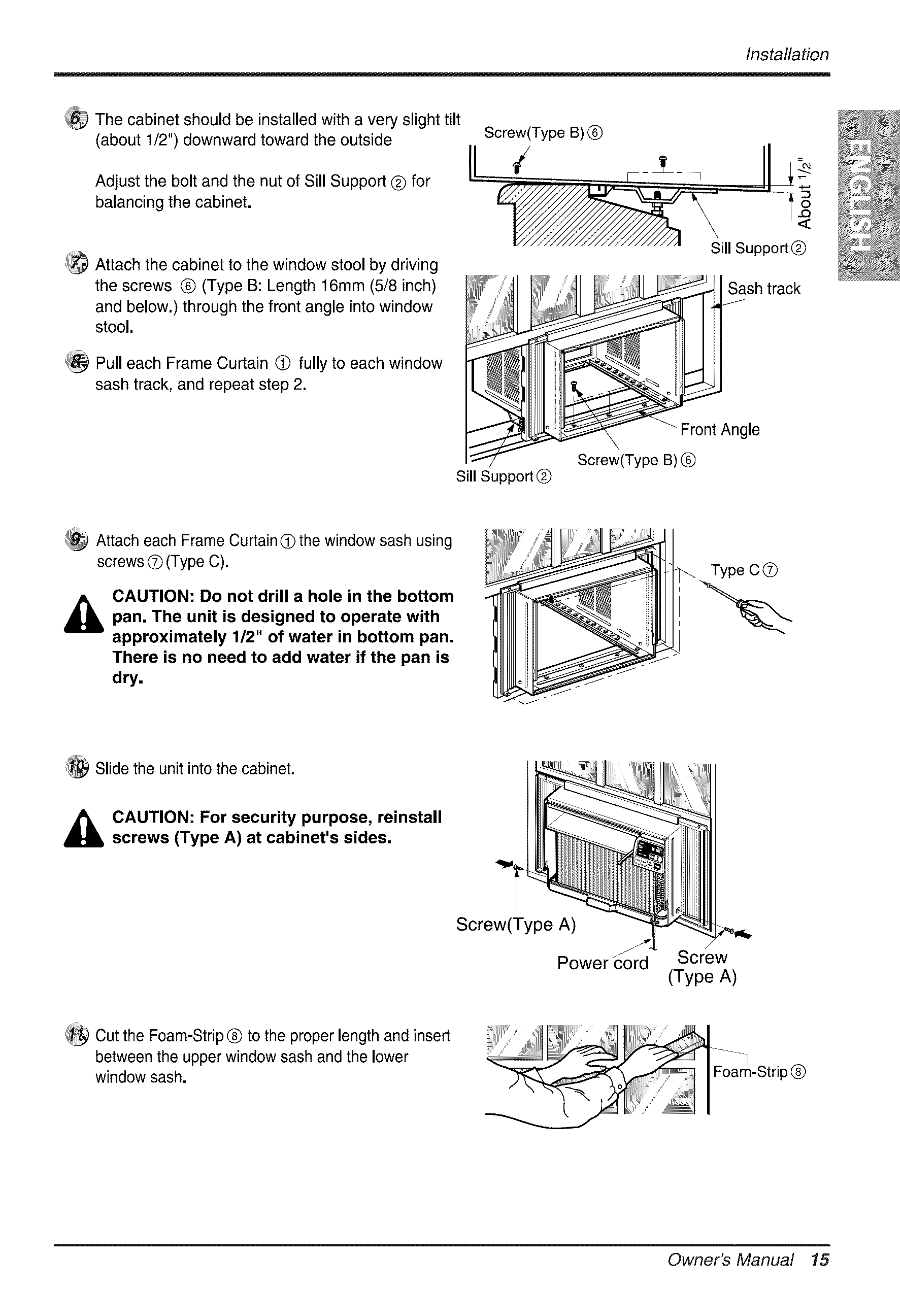
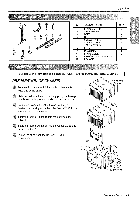
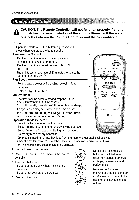
Installation The cabinet should be installed with a very slight tilt (about 1/2") downward toward the outside Screw(Type B) _) Adjust the bolt and the nut of Sill Support @ for balancing the cabinet. Attach the cabinet to the window stool by driving the screws @ (Type B: Length 16mm (5/8 inch) and below.) through the front angle into window stool. '_ Pull each Frame Curtain Q fully to each window sash track, and repeat step 2. Sill Support(_ iii sh track Sill Support (_) _ Front Angle Screw(Type B) @ Attach each Frame Curtain(_ the window sash using screws O (Type C). CAUTION: Do not drill a hole in the bottom pan. The unit is designed to operate with approximately 112" of water in bottom pan. There is no need to add water if the pan is dry. J a Slide the unit into the cabinet. _lb CscArUewTIsON(T: ypFeor As)eacturcitaybinpeut'rsposseid,esr.einstall Screw(Type A) Cut the Foam-Strip® to the proper length and insert between the upper window sash and the lower window sash. Screw (Type A) Owner's Manual 15
-
 1
1 -
2
-
3
-
4
-
5
-
6
-
7
-
8
-
9
-
 10
10 -
 11
11 -
 12
12 -
 13
13 -
 14
14 -
 15
15 -
 16
16 -
 17
17 -
 18
18 -
 19
19 -
 20
20 -
21
-
22
-
23
-
24
-
25
-
26
-
27
-
28
-
29
-
30
-
31
-
32
-
33
-
34
-
35
-
36
-
37
-
38
-
39
-
40
-
41
-
42
-
43
-
44
-
45
-
46
-
47
-
48
-
49
-
50
-
51
-
52
 |
 |