LG WT1701CV Owners Manual - Page 10
Warning - warranty
 |
View all LG WT1701CV manuals
Add to My Manuals
Save this manual to your list of manuals |
Page 10 highlights
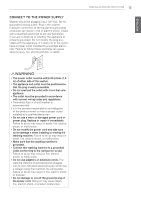
10 INSTALLATION INSTRUCTIONS CONNECTING THE WATER LINES yy LG recommends the use of LG hoses. Any leaking, property damage, or damage to the washing machine caused by an improper installation or by the use of Non-LG hoses is not covered under the terms of the LG warranty and is the sole responsibility of the customer and/or an installer. yy Water supply pressure must be between 14.5 psi and 116 psi (100~800 kPa). If the water supply pressure is more than 116 psi, a pressure reducing valve must be installed. yy Periodically check the hose for cracks, leaks, and wear, and replace the hose if necessary. yy Make sure that the water lines are not stretched, pinched, crushed, or kinked. yy The washer should never be installed or stored in a location subject to freezing temperatures. Damage to the water lines and internal mechanisms of the washer can result. If the washer was exposed to freezing temperatures prior to installation, allow it to stand at room temperature for several hours before use and check for leaks prior to operation. Rubber Seal Rubber Seal 2. Connect the water supply hoses to the HOT and COLD water faucets tightly by hand and then tighten another 2/3 turn with pliers. WARNING yyDo not overtighten. Damage to the coupling can result. 3. Always run a gallon or two of water through each inlet hose to flush dirt, scale and other debris out of the water lines. Doing so will help prevent future problems with clogged filter screens, and will also allow you to verify which hose is hot and which is cold. Hot water inlet Cold water inlet Water Hose (to water inlet on washer) Water Hose (to tap) 1. Inspect the threaded fitting on each hose and make sure there is a rubber seal in place in both ends. Water Faucet WARNING yyDo not reuse old hoses. Only use new hoses when you install the washing machine. Old hoses could leak or burst causing flooding and property damage. WARNING yyDo not overtighten the hoses. Overtightening can damage the valves resulting in leaking and property damage. 4. Attach the hot water line to the hot water inlet on the back of the washer. Attach the cold water line to the cold water inlet on the back of the washer. Tighten the fittings securely. Turn ON both faucets all the way and check for leaks at both ends of the hoses. NOTE: Be careful not to cross-thread the hose fittings. This will damage the valve and could result in property damage from leaks.
-
 1
1 -
2
-
3
-
4
-
 5
5 -
 6
6 -
 7
7 -
 8
8 -
 9
9 -
 10
10 -
 11
11 -
 12
12 -
 13
13 -
 14
14 -
 15
15 -
16
-
17
-
18
-
19
-
20
-
21
-
22
-
23
-
24
-
25
-
26
-
27
-
28
-
29
-
30
-
31
-
32
-
33
-
34
-
35
-
36
-
37
-
38
-
39
-
40
-
41
-
42
-
43
-
44
-
45
-
46
-
47
-
48
-
49
-
50
-
51
-
52
-
53
-
54
-
55
-
56
-
57
-
58
-
59
-
60
-
61
-
62
-
63
-
64
-
65
-
66
-
67
-
68
-
69
-
70
-
71
-
72
-
73
-
74
-
75
-
76
-
77
-
78
-
79
-
80
 |
 |
