Lenovo 18665GU Hardware Maintenance Manual
Lenovo 18665GU - ThinkPad X41 Tablet 1866 Manual
 |
UPC - 882861005758
View all Lenovo 18665GU manuals
Add to My Manuals
Save this manual to your list of manuals |
Lenovo 18665GU manual content summary:
- Lenovo 18665GU | Hardware Maintenance Manual - Page 1
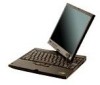
ThinkPad Computer Hardware Maintenance Manual September 2005 This manual supports: ThinkPad X41 (MT 1864, 1865, 2525, 2526, 2527, 2528) - Lenovo 18665GU | Hardware Maintenance Manual - Page 2
supports, be sure to read the general information under "Notices" on page 140. First Edition (September 2005) © Copyright Lenovo 2005. Portions © Copyright International Business Machines Corporation 2005. All rights reserved. U.S. GOVERNMENT USERS - RESTRICTED RIGHTS: Our products and/or services - Lenovo 18665GU | Hardware Maintenance Manual - Page 3
information 31 Service Web site 31 Restoring the preloaded system 31 Recovering the hard disk to original contents . . . 34 Passwords 37 Power management 39 Checkout guide 42 Testing the computer 42 Detecting system information with PC-Doctor. . . 45 Power system checkout 45 ThinkPad X41 49 - Lenovo 18665GU | Hardware Maintenance Manual - Page 4
problems 71 FRU replacement notices 72 Screw notices 72 Retaining serial numbers 73 Removing and replacing a FRU 76 1010 Battery antenna cable 114 Locations 115 Front view for X41 series 115 Rear view for X41 series 116 Bottom view for X41 series 117 Front View for X4 UltraBase Dock - Lenovo 18665GU | Hardware Maintenance Manual - Page 5
computers. v The product-specific section includes service, reference, and product-specific parts information. Important This manual is intended for trained service personnel who are familiar with ThinkPad products. Use this manual along with the advanced diagnostic tests to troubleshoot problems - Lenovo 18665GU | Hardware Maintenance Manual - Page 6
2 MT1864/1865/2525/2526/2527/2528 - Lenovo 18665GU | Hardware Maintenance Manual - Page 7
FRUs listed in this manual. Use the following strategy to prevent unnecessary expense for replacing and servicing FRUs: v If you are instructed to replace a FRU but the replacement does not correct the problem, reinstall the original FRU before you continue. v Some computers have both a processor - Lenovo 18665GU | Hardware Maintenance Manual - Page 8
symptom is listed in the Symptom-to-FRU Index for the computer you are servicing. Strategy for replacing FRUs for CTO, CMV, and GAV Product Model Variant (CMV) This is a unique configuration that has been negotiated between IBM and the customer. A unique 4-digit MT and 3-digit model is provided to - Lenovo 18665GU | Hardware Maintenance Manual - Page 9
service There are three information resources to identify which FRUs are used to support CTO, CMV, and GAV products. These sources are PEW, eSupport ). v PEW can be accessed at the following Web site: http://w3-3.ibm.com/pc/entitle Click on MACHINE LOOKUP, followed by WARRANTY INFORMATION. Input the - Lenovo 18665GU | Hardware Maintenance Manual - Page 10
Important service information v eSupport can be used to view the list of key commodities built in a particular machine serial (this is the same record found in PEW). v eSupport can be accessed at the following Web site: http://www.lenovo.com/think/ support v To view the key commodities, click on - Lenovo 18665GU | Hardware Maintenance Manual - Page 11
Important service information Important information about replacing RoHS compliant FRUs RoHS, The also be RoHS compliant. Lenovo plans to transition to RoHS compliance well before the implementation date and expects its suppliers to be ready to support Lenovo's requirements and schedule. Products - Lenovo 18665GU | Hardware Maintenance Manual - Page 12
service the order. Related web URLs are: v IBM Information for Suppliers website: http://www-03.ibm.com/procurement/proweb.nsf/ ContentDocsByTitle/United+States~ and write Not compatible Safety notices: multilingual translations In this manual, safety notices appear in English with a page number - Lenovo 18665GU | Hardware Maintenance Manual - Page 13
replacement, make sure all screws, springs, and other small parts are in place and are not left loose inside the computer. Verify this by shaking the computer and listening for rattling sounds. Metallic parts or metal flakes can cause electrical shorts. Avant de remettre l'ordinateur sous tension - Lenovo 18665GU | Hardware Maintenance Manual - Page 14
und Cadmium enthalten. Sie darf nur durch die Verkaufsstelle oder den IBM Kundendienst ausgetauscht werden. Sie darf nicht zerlegt, wiederaufgeladen, kurzgeschlossen, oder Feuer oder Wasser ausgesetzt werden. Die Batterie kann schwere Verbrennungen oder Verätzungen verursachen. Bei der Entsorgung - Lenovo 18665GU | Hardware Maintenance Manual - Page 15
(continuation of safety notice 2) Safety notices Alcune batterie di riserva contengono una piccola quantità di nichel e cadmio. Non smontarle, ricaricarle, gettarle nel fuoco o nell'acqua né cortocircuitarle. Smaltirle secondo la normativa in vigore (DPR - Lenovo 18665GU | Hardware Maintenance Manual - Page 16
, veillez à n'utiliser que les modèles cités dans la liste de pièces détachées adéquate. En effet, une batterie inappropriée risque de prendre feu ou d'exploser. Akkus enthalten geringe Mengen von Nickel. Sie dürfen nicht zerlegt, wiederaufgeladen, kurzgeschlossen, oder Feuer oder Wasser ausgesetzt - Lenovo 18665GU | Hardware Maintenance Manual - Page 17
Safety notices (continuation of safety notice 3) La batteria contiene piccole quantità di nichel. Non smontarla, gettarla nel fuoco o nell'acqua né cortocircuitarla. Smaltirla secondo la normativa in vigore (DPR 915/82, successive disposizioni e disposizioni locali). Quando si sostituisce la - Lenovo 18665GU | Hardware Maintenance Manual - Page 18
der zur richtigen Polung angebrachte Verbindungsstecker entfernt werden. Bei der Entsorgung die örtlichen Bestimmungen für Sondermüll beachten. Beim Ersetzen der Batterie nur Batterien des Typs verwenden, der in der Ersatzteilliste aufgeführt ist. Der Einsatz falscher Batterien kann zu Entzündung - Lenovo 18665GU | Hardware Maintenance Manual - Page 19
(continuation of safety notice 4) Safety notices La batteria di supporto e una batteria al litio e puo incendiarsi, esplodere o procurare gravi ustioni. Evitare di ricaricarla, smontarne il connettore polarizzato, smontarla, riscaldarla ad una temperatura superiore ai 100 gradi centigradi, - Lenovo 18665GU | Hardware Maintenance Manual - Page 20
Entsorgung die örtlichen Bestimmungen für Sondermüll beachten. Der LCD-Bildschirm besteht aus Glas und kann zerbrechen, wenn er unsachgemäß behandelt wird oder der Computer auf den Boden fällt. Wenn der Bildschirm beschädigt ist und die darin befindliche Flüssigkeit in Kontakt mit Haut und Augen ger - Lenovo 18665GU | Hardware Maintenance Manual - Page 21
Safety notice 6 DANGER Safety notices To avoid shock, do not remove the plastic cover that protects the lower part of the inverter card. Afin d'éviter tout risque de choc électrique, ne retirez pas le cache en plastique protégeant la partie inférieure de la carte d'alimentation. Aus Sicherheitsgrü - Lenovo 18665GU | Hardware Maintenance Manual - Page 22
Kurzschluß oder Erdung genug Strom abgeben, um brennbare Materialien zu entzünden oder Verletzungen bei Personen hervorzurufen. Sebbene le batterie di alimentazione siano a basso voltaggio, una batteria in corto circuito o a massa può fornire corrente sufficiente da bruciare materiali combustibili - Lenovo 18665GU | Hardware Maintenance Manual - Page 23
Safety notice 8 DANGER Safety notices Before removing any FRU, power off the computer, unplug all power cords from electrical outlets, remove the battery pack, and then disconnect any interconnecting cables. Avant de retirer une unité remplaçable en clientèle, mettez le système hors tension, dé - Lenovo 18665GU | Hardware Maintenance Manual - Page 24
Safety information Safety information The following section presents safety information with which you need to be familiar before you service a ThinkPad computer. General safety Follow these rules to ensure general safety: v Observe good housekeeping in the area of the machines during and after - Lenovo 18665GU | Hardware Maintenance Manual - Page 25
Safety information v After service, reinstall all safety shields, guards, labels, and ground electrical shock. v Find the room emergency power-off (EPO) switch, disconnecting switch, or electrical outlet. If an electrical accident occurs, you can then operate the switch or unplug the power cord - Lenovo 18665GU | Hardware Maintenance Manual - Page 26
special safety precautions when you work with very high voltages; Instructions for these precautions are in the safety sections of maintenance ; such touching can cause personal injury and machine damage. v Do not service the following parts with the power on when they are removed from their - Lenovo 18665GU | Hardware Maintenance Manual - Page 27
ThinkPad features or options not covered by this inspection guide . If any unsafe conditions are present, you must determine how serious the apparent hazard could be and whether you can continue without first correcting the problem every service task Power off the computer. Disconnect the power - Lenovo 18665GU | Hardware Maintenance Manual - Page 28
to electrostatic discharge Any computer part containing transistors or integrated to provide protection that meets the specific service requirement. Note The use of a grounding wire ground. - When working on a double-insulated or battery-operated system, use an ESD common ground or reference point - Lenovo 18665GU | Hardware Maintenance Manual - Page 29
- Use the round ground prong of the ac plug on ac-operated computers. Grounding requirements Electrical grounding of the computer is required for operator safety and correct system function. Proper grounding of the electrical outlet can be verified by a certified electrician. Introduction 25 - Lenovo 18665GU | Hardware Maintenance Manual - Page 30
statement Laser compliance statement Some models of ThinkPad computer are equipped from the factory with an certified in the U.S. to conform to the requirements of the Department of Health and Human Services 21 Code of Federal Regulations (DHHS 21 CFR) Subchapter J for Class 1 laser products - Lenovo 18665GU | Hardware Maintenance Manual - Page 31
the CD-ROM drive, the DVD-ROM drive, or any other optical storage device could result in exposure to hazardous laser radiation. There are no serviceable parts inside those drives. Do not open. Introduction 27 - Lenovo 18665GU | Hardware Maintenance Manual - Page 32
Laser compliance statement A CD-ROM drive, a DVD-ROM drive, or any other storage device installed may contain an embedded Class 3A or Class 3B laser diode. Note the following: DANGER Emits visible and invisible laser radiation when open. Do not stare into the beam, do not view directly with optical - Lenovo 18665GU | Hardware Maintenance Manual - Page 33
any ThinkPad model that has the PC-Doctor® for DOS diagnostics program. Some descriptions might not apply to your particular computer. Read this first Before you go to the checkout guide, be sure to read this section. Important notes v Only certified trained personnel should service the computer - Lenovo 18665GU | Hardware Maintenance Manual - Page 34
use. Before checking problems with the computer, determine whether the damage computer unusable) v Sticky keys caused by spilling a liquid onto the keyboard The following symptoms might indicate damage caused by nonwarranted activities: v Missing parts might be a symptom of unauthorized service - Lenovo 18665GU | Hardware Maintenance Manual - Page 35
and the system program service diskette become available, they will be posted on http://www.lenovo.com/think/spm Restoring the preloaded system If the data on a hard disk drive is damaged or accidentally erased, you can restore the software that was shipped with the computer. This software includes - Lenovo 18665GU | Hardware Maintenance Manual - Page 36
service information computer. Make a Recovery Repair diskette and save it for future use. To make a Recovery Repair diskette, do the following: 1. Shut down and restart the computer diskette. Press Enter. 5. Follow the on-screen instructions. 6. When the process is completed, label the diskette - Lenovo 18665GU | Hardware Maintenance Manual - Page 37
information 6. When the Product Recovery program finishes running, the computer will restart with the pre-installed operating system, drivers, and software. Using the recovery CD To create the service partition and install the preloaded system from the recovery CD, do the following: To create - Lenovo 18665GU | Hardware Maintenance Manual - Page 38
into the drive, and then turn on the computer. 3. Follow the on-screen instructions. Recovering the hard disk to original contents Recovering the hard disk using Access IBM Predesktop Area Hard disk of ThinkPad computer you are servicing has a hidden, protected area for backups. Contained within - Lenovo 18665GU | Hardware Maintenance Manual - Page 39
normal startup, press the blue Access IBM button." 4. Double-click Recover to factory contents. 5. Follow the instructions on the screen. 6. When the recovery process finishes, the computer will restart with the pre-installed operating system, drivers, and software. Recovering the hard disk - Lenovo 18665GU | Hardware Maintenance Manual - Page 40
Related service information 2. For the proper removal of the Hidden Protected Area(HPA), refer to the white paper at http://www.pc.ibm.com/qtechinfo/AIBM-TOOLS.html 3. Boot with the recovery CD (and the boot diskette if required.) 4. Following message is displayed: "Your computer originally included - Lenovo 18665GU | Hardware Maintenance Manual - Page 41
Related service information Passwords As many as three passwords may be needed for any ThinkPad computer: the power-on password (POP), the hard disk password (HDP), and the supervisor password (SVP). If any of these passwords has been set, a prompt for it appears on the screen whenever the computer - Lenovo 18665GU | Hardware Maintenance Manual - Page 42
battery and the battery pack. (B) If an SVP has been set and is known by the servicer: 1. Turn on the computer; then, while the "To interrupt normal startup, press the blue Access IBM made available to the servicer, neither Lenovo nor Lenovo authorized servicers provide any services to reset the user - Lenovo 18665GU | Hardware Maintenance Manual - Page 43
Related service information message is displayed at the lower-left of the screen, press the Access IBM button. 2. Press F1 screen blank mode and resume normal operation, press any key. Standby mode When the computer enters standby mode, the following events occur in addition to what occurs in screen - Lenovo 18665GU | Hardware Maintenance Manual - Page 44
computer goes into hibernation mode.) If you are using the ACPI operating system, only the low-battery alarm is available. To cause the computer 2000 does not support the ring indicator (RI) resume by PC Card device.) v The time set on the resume timer elapses. Note: The computer does not accept - Lenovo 18665GU | Hardware Maintenance Manual - Page 45
Related service information operation. If you do undock it and then try to resume normal operation, you will get an error message, and you will have to restart the system. To cause the computer to enter hibernation mode, do any of the following: v Press the Fn+F12 keys. v If you are using the - Lenovo 18665GU | Hardware Maintenance Manual - Page 46
Checkout guide Checkout guide Use the following procedures as a guide in identifying and correcting problems with the ThinkPad computer. Note: The diagnostic tests are intended to test only ThinkPad products. The use of non-ThinkPad products, prototype cards, or modified options can lead to false - Lenovo 18665GU | Hardware Maintenance Manual - Page 47
the Access IBM application or the Rescue and Recovery workspace finishes loading, double-click the "Create Diagnostic Diskettes" icon or click "Create diagnostic disks" respectively. 3. It will take about 15 seconds to authenticate the digital signature, and then the ThinkPad computer will reboot - Lenovo 18665GU | Hardware Maintenance Manual - Page 48
guide If an error code appears, go to "Symptom-to-FRU index" on page 59. On the first screen, select the model and press Enter. Follow the instructions , it cannot be sensed. v Video Adapter test supports only the LCD display on the ThinkPad computer. Before running PC-Doctor for DOS, detach the - Lenovo 18665GU | Hardware Maintenance Manual - Page 49
guide 4. Run the applicable function test. 5. Follow the instructions on the screen. If there is a problem v Tech Support Form v Battery Rundown v computer. 2. Remove the battery pack. 3. Connect the ac adapter. 4. Check that power is supplied when you power on the computer. 5. Power off the computer - Lenovo 18665GU | Hardware Maintenance Manual - Page 50
the ac adapter" v "Checking operational charging" v "Checking the battery pack" on page 47 v "Checking the backup battery" on page 47 Checking the ac adapter You are here because the computer fails only when the ac adapter is used: v If the power problem occurs only when the port replicator is used - Lenovo 18665GU | Hardware Maintenance Manual - Page 51
. After it cools down, reinstall and recharge it. To check the battery pack, do the following: 1. Power off the computer. 2. Remove the battery pack and measure the voltage between battery terminals 1 (+) and 5 (−). See the following figure: 1(+) 2 3 4 5(-) Terminal Voltage (V dc) 1 + 0 to + 16 - Lenovo 18665GU | Hardware Maintenance Manual - Page 52
Checkout guide 1. Power off the computer, and unplug the ac adapter from it. 2. Turn the computer upside down. 3. Remove the battery pack (see "1010 Battery pack" on page 77). 4. Remove the backup battery (see "Checking the battery pack" on page 47). 5. Measure the voltage of the backup battery. - Lenovo 18665GU | Hardware Maintenance Manual - Page 53
ThinkPad X41 Product overview 51 Specifications 51 Status indicators for X41 53 FRU tests 55 Fn key combinations 57 Symptom-to-FRU index 59 Numeric error codes 59 Error messages 67 Beep symptoms 69 No-beep symptoms 69 LCD-related symptoms 70 Intermittent problems 1080 Backup battery 91 - Lenovo 18665GU | Hardware Maintenance Manual - Page 54
Keyboard 131 Recovery CDs 133 For Windows XP Professional 133 For Windows XP Home Edition . . . . . 134 Miscellaneous parts 134 Optional FRUs 135 AC adapters 136 Common parts list 137 Tools 137 Power cords (system 137 Telephone cable 139 Notices 140 Trademarks 142 50 MT1864/1865/2525/ - Lenovo 18665GU | Hardware Maintenance Manual - Page 55
This section presents the following product-unique information: v "Specifications" v "Status indicators for X41" on page 53 v "FRU tests" on page 55 v "Fn key combinations" on GB, 1.8-inch, IDE interface v 12.1-inch, 16M colors, XGA (1024 × 768 resolution) TFT color LCD (continued) ThinkPad X41 51 - Lenovo 18665GU | Hardware Maintenance Manual - Page 56
UltraBay Slim (supported by X4 UltraBase Dock) v ThinkPad Integrated 56K Modem (MDC-2) v ThinkPad Integrated Bluetooth IV with 56K Modem (BMDC-3) v 56-watt type v USB diskette drive v 1 parallel of 4 series of cells (1P4S) Li-Ion battery pack (1.9 AH) (Standard Battery) v 2 parallel of 4 series - Lenovo 18665GU | Hardware Maintenance Manual - Page 57
Product overview Status indicators for X41 The system status indicators show the status of the computer, as follows: 123 4 56 78 2 7 8 Indicator 1 Wireless status Meaning Green: Wireless is indicator is on when the Bluetooth is on and not in suspend mode. (continued) ThinkPad X41 53 - Lenovo 18665GU | Hardware Maintenance Manual - Page 58
to the hard disk drive, or the drive in the Ultrabay device. When this indicator is on, do not put the computer into standby mode or turn off the computer. 6 Power on 7 Battery status 8 Standby status Note: Do not move the system while the Green drive in use light is on. Sudden physical - Lenovo 18665GU | Hardware Maintenance Manual - Page 59
is applied to the TrackPointing Stick. This symptom is not a hardware problem. If the pointer stops after a short time, no service action is necessary. If enabling the TrackPoint does not correct the problem, continue with the following: v Interactive Tests --> Mouse (continued) ThinkPad X41 55 - Lenovo 18665GU | Hardware Maintenance Manual - Page 60
one of them and run Diagnostics --> Memory Test - Quick. 2. If the problem does not recur, return the DIMM to its place, remove the other one, Full. 1. Turn on the computer and check the air turbulence at the louver near the power switch. 2. Run Diagnostics --> ThinkPad Devices --> Fan. 56 MT1864 - Lenovo 18665GU | Hardware Maintenance Manual - Page 61
v External monitor (CRT display) v Computer display and external monitor (LCD + CRT display) v Computer display (LCD) Note: For any This function does not work when different desktop images are displayed on the computer display and the external monitor (the Extend desktop function). 2. This function - Lenovo 18665GU | Hardware Maintenance Manual - Page 62
. Note: To use Fn+F12 for hibernation in Windows XP and Windows 2000, the PM device driver must have been installed on the computer. ThinkPad light Note: This function is supported only on the ThinkPad computer that have the ThinkLight. The on or off status of the ThinkLight is shown on the screen - Lenovo 18665GU | Hardware Maintenance Manual - Page 63
problem, put the original part back in the computer. Do not replace a nondefective FRU. This index can also help you determine, during regular servicing, problems" on page 71. Note For a device not supported by diagnostic codes in the ThinkPad notebook computers, see the manual ) ThinkPad X41 59 - Lenovo 18665GU | Hardware Maintenance Manual - Page 64
Invalid RFID configuration information area-EEPROM checksum is not correct (block #4,5). 0190 Critical low-battery error 0191 System Security-Invalid Remote Change requested. 0192 System Security-IBM Embedded Security hardware tamper detected. FRU or action, in sequence 1. Run BIOS Setup Utility - Lenovo 18665GU | Hardware Maintenance Manual - Page 65
or error FRU or action, in sequence 0199 1. Run BIOS Setup Utility, System Security-IBM Security password retry count exceeded. and then save current setting by pressing F10. 2. System Setup Defaults in BIOS Setup Utility. 3. Hard disk drive. 4. System board. (continued) ThinkPad X41 61 - Lenovo 18665GU | Hardware Maintenance Manual - Page 66
and run BIOS Setup Utility to reset the time and date. 0251 System CMOS checksum bad -Default configuration used. Replace the backup battery and run BIOS Setup Utility to reset the time and date. 0252 Reset the password by Password checksum bad-The running BIOS Setup Utility. password - Lenovo 18665GU | Hardware Maintenance Manual - Page 67
action, in sequence 0270 Real time clock error-Real-Time Clock fails BIOS hardware test 1. Replace the backup battery and run BIOS Setup Utility to reset the time and date. 2. System board. 0271 Date and time error the cache jumpers. You may have to replace the cache (continued) ThinkPad X41 63 - Lenovo 18665GU | Hardware Maintenance Manual - Page 68
Unsupported docking station is attached-Attached docking station is not supported by the product 1802 Unauthorized network card is plugged in Replace the backup battery. 3. System board. 1. DIMM. 2. System board. 1. DIMM. 2. System board. 1. DIMM. 2. System board. Shut down the computer and remove it - Lenovo 18665GU | Hardware Maintenance Manual - Page 69
1. If the Access IBM Predesktop Area has been previously IBM Predesktop Area. Boot from Recovery CD and perform full recovery from it. 5. If item 4 failed, replace the hard disk drive. 1. Undock docking station or port replicator if it is attached to the ThinkPad computer, and place the computer - Lenovo 18665GU | Hardware Maintenance Manual - Page 70
installed. Inform the following information to the customer: If in the primary bay the customer is using a non-IBM or non-Lenovo hard disk drive (HDD), or an old generation IBM HDD which is not supported by this system, with the risk in mind, the customer can still use it by pressing ESC. If - Lenovo 18665GU | Hardware Maintenance Manual - Page 71
error. Authentication of system services failed. Press - Lenovo 18665GU | Hardware Maintenance Manual - Page 72
Symptom-to-FRU index Symptom or error FRU or action, in sequence Fixed disk n 1. DIMM. 2. System board. P/S 2 mouse boot summary screen 1. DIMM. 2. System board. One or more I2O block storage 1. DIMM. devices were excluded from the 2. System board. setup boot menue Parity Check 1 nnnn 1. - Lenovo 18665GU | Hardware Maintenance Manual - Page 73
password prompt A hard-disk password is set. appears. Type the password and press Enter. The DOS full screen looks smaller than it should. Start the ThinkPad Configuration program and set the Screen expansion function - Lenovo 18665GU | Hardware Maintenance Manual - Page 74
symptoms Important The TFT LCD for the notebook computer contains many thin-film transistors (TFTs). The presence of a small number of dots that are missing, discolored, or always lighted is characteristic of TFT LCD technology, but excessive pixel problems can cause viewing concerns. The LCD should - Lenovo 18665GU | Hardware Maintenance Manual - Page 75
Non-ThinkPad devices b. Devices attached to the port replicator c. Printer, mouse, and other external devices d. Battery pack e. Hard disk drive f. External diskette drive g. DIMM h. CD-ROM and diskette drive in the Ultrabay i. PC Cards 4. Turn on the computer. 5. Determine whether the problem has - Lenovo 18665GU | Hardware Maintenance Manual - Page 76
Screw notices Loose screws can cause a reliability problem. In the ThinkPad computer, this problem is addressed with special nylon-coated screws that have 180 degrees more (Cross-section) v Torque driver If you have a torque driver, refer to the "Torque" column for each step. 72 MT1864/1865/2525/ - Lenovo 18665GU | Hardware Maintenance Manual - Page 77
the serial number by doing the following: 1. Install the ThinkPad Hardware Maintenance Diskette Version 1.71 or later and restart the computer. 2. From the main menu, select 1. Set System Identification. 3. Select 1. Add S/N data from EEPROM. Follow the instructions on the screen. ThinkPad X41 73 - Lenovo 18665GU | Hardware Maintenance Manual - Page 78
1.71 or later. 1. Insert the ThinkPad Hardware Maintenance Diskette Version 1.71 or later, and restart the computer. 2. From the main menu, select 6. Set ECA Information. 3. To read ECA information, select 2. Read ECA/rework number from EEPROM and follow the instruction. 4. To read box build date - Lenovo 18665GU | Hardware Maintenance Manual - Page 79
Write box build date from EEPROM, and follow the instruction on the screen. If the system board is being replaced, try to read the ECA information from the old system board and transfer the information to the new system. If the system board is inoperable, this will not be possible. ThinkPad X41 75 - Lenovo 18665GU | Hardware Maintenance Manual - Page 80
to observe the following general rules: 1. Do not try to service any computer unless you have been trained and certified. An untrained person runs removing any FRU, turn off the computer, unplug all power cords from electrical outlets, remove the battery pack, and then disconnect any interconnecting - Lenovo 18665GU | Hardware Maintenance Manual - Page 81
parts list for your computer. The use of an incorrect battery can result in ignition or explosion of the battery. Before processing, seperate main unit from docking first. 3 1 2 Release the lock knob, shown as 1 , and latche knob, shown as 2 , to remove the battery pack. 2 2 3 1 1 ThinkPad X41 77 - Lenovo 18665GU | Hardware Maintenance Manual - Page 82
drive if possible. v Never remove the drive while the system is operating or is in suspend mode. For access, remove following FRU: v "1010 Battery pack" on page 77 1 3 2 Step 1 Screw (quantity) M3 × 4 mm, nylon-coated (1) Torque 0.245 Nm (2.5 kgfcm) When installing: Make sure that the hard disk - Lenovo 18665GU | Hardware Maintenance Manual - Page 83
Removing and replacing a FRU 1030 DIMM cover For access, remove following FRU: v "1010 Battery pack" on page 77 Note: Loosen the screws 1 , but do not remove them. 1 1 1 3 2 Step 1 Screw (quantity) M2 ×3 mm (3) Torque 0.157 Nm (1.6 kgfcm) ThinkPad X41 79 - Lenovo 18665GU | Hardware Maintenance Manual - Page 84
Removing and replacing a FRU 1040 Mini PCI adapter, DIMM, MDC-2, and BMDC-3 For access, remove following FRUs, in order: v "1010 Battery pack" on page 77 v "1030 DIMM cover" on page 79 Detach antenna and remove Mini PCI adapter. 1 AUX M AIN 2 2 3 Pull over the levers to detach - Lenovo 18665GU | Hardware Maintenance Manual - Page 85
Removing and replacing a FRU Remove MDC-2 (ThinkPad Integrated 56K Modem). 1 1 2 3 Or remove BMDC-3 (ThinkPad Integrated Bluetooth IV with 56K Modem). 1 1 2 3 4 Step 1 Screw (quantity) M2 × 3.5 mm, nylon-coated (2) (continued) Torque 0.196 Nm (2 kgfcm) ThinkPad X41 81 - Lenovo 18665GU | Hardware Maintenance Manual - Page 86
Removing and replacing a FRU When installing, route the modem cable as shown below. Note: The bluetooth cable should be routine between planar and BMDC. 82 MT1864/1865/2525/2526/2527/2528 - Lenovo 18665GU | Hardware Maintenance Manual - Page 87
Removing and replacing a FRU 1050 Keyboard For access, remove following FRU: v "1010 Battery pack" on page 77 Remove 6 screws with keyboard icon to remove keyboard. 1 1 1 1 1 1 Step 1 Screw (quantity) M2 × 6 mm, nylon-coated (6) (continued) Torque 0.196 Nm (2 kgfcm) ThinkPad X41 83 - Lenovo 18665GU | Hardware Maintenance Manual - Page 88
Removing and replacing a FRU Gently push the keyboard forward, as shown in step 1 . Then lift up the keyboard slightly, as shown in step 2 . 2 1 1 Detach the keyboard connector to remove the keyboard. 84 MT1864/1865/2525/2526/2527/2528 - Lenovo 18665GU | Hardware Maintenance Manual - Page 89
keys with your thumbs and try to slide the keyboard toward you. 3 3 4. Secure the keyboard by tightening the screws from the bottom side of the computer. ThinkPad X41 85 - Lenovo 18665GU | Hardware Maintenance Manual - Page 90
Removing and replacing a FRU 1060 Upper case For access, remove following FRUs, in order: v "1010 Battery pack" on page 77 v "1050 Keyboard" on page 83 Remove 6 screws as shown below. 1 1 1 1 1 1 Step 1 Screw (quantity) M2 × 6 mm, nylon-coated (6) (continued) Torque 0.196 Nm (2 - Lenovo 18665GU | Hardware Maintenance Manual - Page 91
lift it up slightly, as shown in step 2 . Then release the latches, as shown in step 3 and step 4 , carefully to remove the upper case. 4 2 4 4 1 3 3 (continued) ThinkPad X41 87 - Lenovo 18665GU | Hardware Maintenance Manual - Page 92
Removing and replacing a FRU When installing: Make sure that the upper case edges, shown in the step 1 , are under the frame. 1 2 Note: After installing upper case, arrange antenna as 1 . If BMDC-3 is used, arrange antenna as 2 . 1 2 88 MT1864/1865/2525/2526/2527/2528 - Lenovo 18665GU | Hardware Maintenance Manual - Page 93
Only for the models with fingerprint function. For access, remove following FRUs, in order: v "1010 Battery pack" on page 77 v "1050 Keyboard" on page 83 v "1060 Upper case" on page -coated (2) Torque 0.196 Nm (2 kgfcm) Remove the fingerprint FPC and remove the fingerprint board. ThinkPad X41 89 - Lenovo 18665GU | Hardware Maintenance Manual - Page 94
Removing and replacing a FRU 4 3 90 MT1864/1865/2525/2526/2527/2528 - Lenovo 18665GU | Hardware Maintenance Manual - Page 95
or explosion of the battery. For access, remove following FRUs, in order: v "1010 Battery pack" on page 77 v "1020 Hard disk drive" on page 78 v "1030 DIMM cover" on page 79 v "1050 Keyboard" on page 83 2 1 When installing: Make sure that the battery connector is attached firmly. ThinkPad X41 91 - Lenovo 18665GU | Hardware Maintenance Manual - Page 96
Removing and replacing a FRU 1090 LCD module For access, remove following FRUs, in order: v "1010 Battery pack" on page 77 v "1020 Hard disk drive" on page 78 v "1040 Mini PCI adapter, DIMM, MDC-2, and BMDC-3" on page 80 v "1050 Keyboard" on - Lenovo 18665GU | Hardware Maintenance Manual - Page 97
Removing and replacing a FRU Then remove the four screws as shown. 3 3 1a 3 1 3 Step 3 Screw (quantity) M2 ×6 mm, nylon-coated (4) (continued) Torque 0.196 Nm (2 kgfcm) ThinkPad X41 93 - Lenovo 18665GU | Hardware Maintenance Manual - Page 98
Removing and replacing a FRU Remove LCD module. 4 4 94 MT1864/1865/2525/2526/2527/2528 - Lenovo 18665GU | Hardware Maintenance Manual - Page 99
Removing and replacing a FRU 1100 Hard disk housing assembly For access, remove following FRUs, in order: v "1010 Battery pack" on page 77 v "1020 Hard disk drive" on page 78 v "1050 Keyboard" on page 83 v "1060 Upper case" on page 86 1a 1a 1b - Lenovo 18665GU | Hardware Maintenance Manual - Page 100
Hard disk drive" on page 78 v "1030 DIMM cover" on page 79 v "1040 Mini PCI adapter, DIMM, MDC-2, and BMDC-3" on page 80 v "1080 Backup battery" on page 91 v "1050 Keyboard" on page 83 v "1060 Upper case" on page 86 1b 1a 1a 1b 2 Step 1a Screw (quantity) M2 × 8 mm, nylon - Lenovo 18665GU | Hardware Maintenance Manual - Page 101
Hard disk drive" on page 78 v "1030 DIMM cover" on page 79 v "1040 Mini PCI adapter, DIMM, MDC-2, and BMDC-3" on page 80 v "1080 Backup battery" on page 91 v "1050 Keyboard" on page 83 v "1060 Upper case" on page 86 v "1100 Hard disk housing assembly" on page 95 v "1110 Top shielding - Lenovo 18665GU | Hardware Maintenance Manual - Page 102
Removing and replacing a FRU Remove the two screws at the bottom. 1 1 1a Step 1 Screw (quantity) M2 × 6 mm, nylon-coated (2) (continued) Torque 0.196 Nm (2 kgfcm) 98 MT1864/1865/2525/2526/2527/2528 - Lenovo 18665GU | Hardware Maintenance Manual - Page 103
Remove lower case. Removing and replacing a FRU 1a 1b 1b 2 Step 1a Screw (quantity) M2 × 3.5 mm, nylon-coated (1) 1b M2 × 3.5 mm, nylon-coated (2) (continued) Torque 0.1372 Nm (1.4 kgfcm) 0.1372 Nm (1.4 kgfcm) ThinkPad X41 99 - Lenovo 18665GU | Hardware Maintenance Manual - Page 104
Removing and replacing a FRU When installing: Becareful to align with the 2 location notches. 100 MT1864/1865/2525/2526/2527/2528 - Lenovo 18665GU | Hardware Maintenance Manual - Page 105
1030 DIMM cover" on page 79 v "1040 Mini PCI adapter, DIMM, MDC-2, and BMDC-3" on page 80 v "1080 Backup battery" on page 91 v "1050 Keyboard" on page 83 v "1060 Upper case" on page 86 v "1100 Hard disk housing mm (4) 2b M2 ×3.5 mm (2) Torque 0.196 Nm (2 kgfcm) 0.196 Nm (2 kgfcm) ThinkPad X41 101 - Lenovo 18665GU | Hardware Maintenance Manual - Page 106
Hard disk drive" on page 78 v "1030 DIMM cover" on page 79 v "1040 Mini PCI adapter, DIMM, MDC-2, and BMDC-3" on page 80 v "1080 Backup battery" on page 91 v "1050 Keyboard" on page 83 v "1060 Upper case" on page 86 v "1090 LCD module" on page 92 Before removing the LCD bezel - Lenovo 18665GU | Hardware Maintenance Manual - Page 107
Remove LCD bezel. Removing and replacing a FRU 1a 1b 1b 1b 2 1a 1b 1b 1b Step 1a Screw (quantity) M2.5 × 5 mm, nylon-coated (2) 1b M2 × 2.5 mm, nylon-coated (6) (continued) Torque 0.294 Nm (3 kgfcm) 0.1568 Nm (1.6 kgfcm) ThinkPad X41 103 - Lenovo 18665GU | Hardware Maintenance Manual - Page 108
Removing and replacing a FRU When installing: first place the top edge under the frame, shown as 1 , then push the bezel down and secure with the latches, shown as 3 2 3 3 3 3 3 1 1 3 3 3 3 3 104 MT1864/1865/2525/2526/2527/2528 - Lenovo 18665GU | Hardware Maintenance Manual - Page 109
DIMM cover" on page 79 v "1040 Mini PCI adapter, DIMM, MDC-2, and BMDC-3" on page 80 v "1080 Backup battery" on page 91 v "1050 Keyboard" on page 83 v "1060 Upper case" on page 86 v "1090 LCD module 3 Step 1 Screw (quantity) M2 × 2.5 mm, nylon-coated (1) Torque 0.196 Nm (2 kgfcm) ThinkPad X41 105 - Lenovo 18665GU | Hardware Maintenance Manual - Page 110
Hard disk drive" on page 78 v "1030 DIMM cover" on page 79 v "1040 Mini PCI adapter, DIMM, MDC-2, and BMDC-3" on page 80 v "1080 Backup battery" on page 91 v "1050 Keyboard" on page 83 v "1060 Upper case" on page 86 v "1090 LCD module" on page 92 v "2010 LCD bezel" on page - Lenovo 18665GU | Hardware Maintenance Manual - Page 111
Removing and replacing a FRU When installing: Attach the inverter back to its original position, as shown in step 1 . And reconnect the LCD cable and inverter cable, as shown in step 2 . Then secure with the one screw, as shown in step 3 . 3 1 2 2 2 ThinkPad X41 107 - Lenovo 18665GU | Hardware Maintenance Manual - Page 112
Hard disk drive" on page 78 v "1030 DIMM cover" on page 79 v "1040 Mini PCI adapter, DIMM, MDC-2, and BMDC-3" on page 80 v "1080 Backup battery" on page 91 v "1050 Keyboard" on page 83 v "1060 Upper case" on page 86 v "1090 LCD module" on page 92 v "2010 LCD bezel" on page - Lenovo 18665GU | Hardware Maintenance Manual - Page 113
Removing and replacing a FRU When installing: Put the antenna L in the two clips and put the tape back to its original place, shown as 1 and 2 , before securing it with the two screws. 1 121b 2a (continued) ThinkPad X41 109 - Lenovo 18665GU | Hardware Maintenance Manual - Page 114
Removing and replacing a FRU Remove the antenna R. Note: For FRU LCD 92P6687 (ID Tech), remove the antenna R (without gasket) as 5a . For FRU 92P6728 (Samsung), remove the antenna R (with gasket) as 5b 4 5a 2 1a 5b 3 1b Step 3 Screw (quantity) M2 × 2.5 mm, nylon-coated (1) (continued) Torque - Lenovo 18665GU | Hardware Maintenance Manual - Page 115
, shown as 3 , and put the tape back to its original place, shown as 4a and 4b , before securing it with the one screw. 2 1 3 4b 4a ThinkPad X41 111 - Lenovo 18665GU | Hardware Maintenance Manual - Page 116
Hard disk drive" on page 78 v "1030 DIMM cover" on page 79 v "1040 Mini PCI adapter, DIMM, MDC-2, and BMDC-3" on page 80 v "1080 Backup battery" on page 91 v "1050 Keyboard" on page 83 v "1060 Upper case" on page 86 v "1090 LCD module" on page 92 v "2010 LCD bezel" on page - Lenovo 18665GU | Hardware Maintenance Manual - Page 117
Remove hinge R. Removing and replacing a FRU 2 Step 1 Screw (quantity) M2 × 2.5 mm, nylon-coated (2) 1 1 Torque 0.1568 Nm (1.6 kgfcm) ThinkPad X41 113 - Lenovo 18665GU | Hardware Maintenance Manual - Page 118
Hard disk drive" on page 78 v "1030 DIMM cover" on page 79 v "1040 Mini PCI adapter, DIMM, MDC-2, and BMDC-3" on page 80 v "1080 Backup battery" on page 91 v "1050 Keyboard" on page 83 v "1060 Upper case" on page 86 v "1090 LCD module" on page 92 v "2010 LCD bezel" on page - Lenovo 18665GU | Hardware Maintenance Manual - Page 119
Locations Locations Front view for X41 series 1 Computer display 2 System status indicators 3 Power switch 4 Security keyhole 5 Modem button 15 TrackPointing stick 16 Access IBM button 17 Volume and mute buttons 17 16 15 14 13 1 12 11 2 3 4 5 6 7 8 9 10 ThinkPad X41 115 - Lenovo 18665GU | Hardware Maintenance Manual - Page 120
Locations Rear view for X41 series 1 LCD latch 2 Standby status indicators 3 Battery status indicators 4 Bluetooth status indicators 5 AC Power connector 6 External monitor connector 7 Powered USB 2.0 connector 1 2 3 4 7 5 6 116 MT1864/1865/2525/2526/2527/2528 - Lenovo 18665GU | Hardware Maintenance Manual - Page 121
Bottom view for X41 series 1 Hard disk drive 2 Mini-PCI and memory door 3 Docking connector 4 Battery pack latches 5 Battery pack 1 5 Locations 2 4 3 ThinkPad X41 117 - Lenovo 18665GU | Hardware Maintenance Manual - Page 122
Locations Front View for X4 UltraBase Dock 1 Docking connector 2 Power lock knob 3 Power button 4 Ultrabay latch 5 Ultrabay status indicator 6 Ultrabay eject lever 7 Ultra Plus Note: The Ultrabay Slim accepts several storage devices, such as a DVD drive or a CD-RW drive, and also - Lenovo 18665GU | Hardware Maintenance Manual - Page 123
5 RJ45 (ethernet connector) 6 RJ11 (modem connector) 7 USB connectors 8 PS/2 (keyboard or mouse) connector 9 Security keyhole 10 System eject button 11 System eject lever 11 10 9 1 2 3 4 5 6 7 8 ThinkPad X41 119 - Lenovo 18665GU | Hardware Maintenance Manual - Page 124
Parts list Parts list Overall 22 21 20 a 19 18 17 16 15 14 13 12 1 2 3 4 5 6 7 8 9 10 11 120 MT1864/1865/2525/2526/2527/2528 - Lenovo 18665GU | Hardware Maintenance Manual - Page 125
by CTO Hitachi (DK14FA-20) 92P6083 * Hitachi OP 39T2541 * Hard disk drive, 30 GB, 9.5 mm, 4,200 rpm with tray and screws, Hitachi OP v Supported by CTO 92P6140 * Hard disk drive, 30 GB, 7 mm, 4,200 rpm 39T2543 * with tray and screws, Hitachi v Supported by CTO (continued) ThinkPad X41 121 - Lenovo 18665GU | Hardware Maintenance Manual - Page 126
Parts list No. FRU P/N CRU ID 3 Hard disk drive, 40 GB, 9.5 mm, 4,200 rpm with tray and screws OP v 1864-16x v 1865-17x v 2525-14x, 15x, 18x, 1Ax, 1Bx, 1Gx, 1Kx, 1Lx, 23x, 24x, 33x, 3Bx, 3Cx, 3Dx, 43x, 45x, 47x, 48x, 4Cx, 54x, 55x, 56x, 57x, 58x, 59x, 5Gx, 5Hx, 5Zx, 64x, 65X, 68x, 69x, 6Jx, A2x - Lenovo 18665GU | Hardware Maintenance Manual - Page 127
2525-Axx, Cxx, Exx v 2526-Axx, Cxx, Exx v 2527-Axx, Cxx, Exx v 2528-Axx, Exx 93P4212 ** ThinkPad Integrated Bluetooth IV with 56K Modem (BMDC-3) v 2525-2xx, 4xx, 6xx, Bxx, Dxx, Fxx v 2527-2xx, 4xx, 6xx Lower case with label, 2528 WW v 2528-all except xxK 26R8933 N (continued) ThinkPad X41 123 - Lenovo 18665GU | Hardware Maintenance Manual - Page 128
Dxx, Exx, Fxx 41W1008 N 13 Mini-PCI and DIMM door with screws 26R8938 * 14 Battery pack, Li-Ion (4 cell) WW OP v 2525-14x, 15x, 1Lx, 23x, 33x 6Ex v 2527-1Mx, 29x, 44x, 64x, 67x, 6Fx, 6Gx Sanyo 92P0998 * Panasonic 92P1000 * Battery pack, Li-Ion (4 cell) WW OP v 2525-A4x, A5x, A9x, C4x, C6x, F5x - Lenovo 18665GU | Hardware Maintenance Manual - Page 129
2528-ELx, EMx, FPx, FRx, FSx 92P1149 * Battery pack, Li-Ion (4 cylindrical cell, 2.6 Ah) WW OP v Supported by CTO Sanyo 92P1078 * Sanyo 92P1143 * For optional battery, see "Optional FRUs" on page 135. 15 PC 29U, 2AF, 2AU, 64F, 64U, 6LF, 6LU v 2528-1DU 93P3483 * (continued) ThinkPad X41 125 - Lenovo 18665GU | Hardware Maintenance Manual - Page 130
Parts list No. FRU P/N CRU ID 16 Intel PRO Wireless 2200BG Mini-PCI Adapter OP WW 93P3485 * v 2525-14x, 15x, 1Ax, 1Bx, 1Gx, 1Kx, 23x, 24x, 33X, 3Cx, 43x, 45x, 47X, 53x, 54x, 64x, 68x, 6Bx, 6Dx, 6Jx, 6Lx, 6Mx (xxA, xxB, xxC, xxE, xxG, xxH, xxJ, xxK, xxL, xxM, xxP, xxQ, xxS, xxY) v 2526- - Lenovo 18665GU | Hardware Maintenance Manual - Page 131
, F4x, E9x, EBx, F5x, F6x, F8x, FAx, D6x, FCx, FDx, FGx v 2527-EJx, FQx, B4x, FLx, FNx v 2528-ELx, FPz, EMx, FRx, FSx 39T0393 * (continued) ThinkPad X41 127 - Lenovo 18665GU | Hardware Maintenance Manual - Page 132
Parts list No. FRU P/N CRU ID 16 Intel PRO Wireless 2915ABG Mini-PCI Adapter OP US, Canada v 2525-C5x, E3x, E5x, F4x, E9x, EBx, F5x, F6x, F8x, FAx, D6x, FCx, FDx, FGx (xxU) v 2527-EJx, FQx, B4x, FLx, FNx (xxU) v 2528-ELx, FPz, EMx, FRx, FSx (xxU) 27K9936 * EU v 2525-C5x, E3x, E5x, F4x, E9x, - Lenovo 18665GU | Hardware Maintenance Manual - Page 133
Parts list No. FRU P/N CRU ID 16 ThinkPad 11a/b/g Wireless LAN Mini PCI Adapter II OP WW v 2525-3DF, , see "Optional FRUs" on page 135. 17 Cable assembly kit, Microphone 91P8318 N 18 Backup battery (3 V with wire) 92P1004 ** 19 Track point cap set 91P9642 N 20 Cable assembly kit, - Lenovo 18665GU | Hardware Maintenance Manual - Page 134
Parts list LCD FRUs 12.1-in. XGA TFT 9 1 8 2 7 6 3 5 4 No. FRU 1 LCD bezel assembly 12.1-in. TFT 2 Antenna cable set 3 Bluetooth antenna cable set 4 LCD rear cover assembly, 12.1-in. TFT 5 LCD hinge and bracket kit 6 LCD cable assembly LCD cable assembly, Samsung 7 LCD inverter card, AMBIT - Lenovo 18665GU | Hardware Maintenance Manual - Page 135
93P4614 93P4672 93P4606 93P4664 93P4610 93P4668 93P4626 93P4684 93P4624 93P4682 93P4600 93P4658 93P4634 93P4692 91P8331 93P4650 93P4604 93P4662 93P4636 93P4694 93P4616 93P4674 13N9925 - CRU ID ** ThinkPad X41 131 - Lenovo 18665GU | Hardware Maintenance Manual - Page 136
Parts list For Models-xxU, xxP, xxA, xxH, xxC, xxM, xxE, xxQ, xxF, xxG, xxJ, xxV, xxB, xxK, xxS, xxY Language Arabic Belgian Chinese, Traditional Czech Danish Dutch English, U.K. English, U.S. French, Canadian French, Canadian (058) French, European German Greek Hungarian Hebrew Italian Japanese - Lenovo 18665GU | Hardware Maintenance Manual - Page 137
39K7562 39K7563 39K7558 39K7556 39K7557 39K7544 39K7543 39K7553 39K7546 39K7547 39K7567 39K7559 39K7566 39K7550 39K7545 39K7564 39K7554 39K7560 39K7549 39K7552 39K7548 39K7555 39K7565 CRU ID * ThinkPad X41 133 - Lenovo 18665GU | Hardware Maintenance Manual - Page 138
M3 x 4 ZN (54) v Screw MACH wafer M2.5 x 3 ZN (54) Base cover miscellaneous parts kit: v Knob battery lock v Lens IR v Battery latch knob v Batterylatch v Batterylock v SPG battery spring SWP_A v Spring CDROM DD Rubber kit System miscellaneous parts kit: v Assembly I/O bracket v Assembly holder heat - Lenovo 18665GU | Hardware Maintenance Manual - Page 139
(8 cell) WW, Sanyo Battery pack, Li-Ion, cylindrical (4 cell), WW, Sanyo Extended battery, Li-Ion WW, Sanyo Extended battery, Li-Ion, WW Label group 73P3841 73P3845 09N4283 13N6847 93P4235 93P4237 93P4239 93P4241 91P7416 91P7418 92P1002 92P1143 92P1007 92P1151 31L5042 CRU ID ThinkPad X41 135 - Lenovo 18665GU | Hardware Maintenance Manual - Page 140
Parts list AC adapters FRU P/N CRU ID 2-pin (56 W, 16 V) AC adapter OP v Models-CTO, xxE, xxF, xxJ, xxP, xxS, xxU, xxY DELTA 02K6814 * LITEON 02K6816 * LITEON 92P1045 * 3-pin (56 W, 16 V) AC adapter OP v Models-CTO, xxA, xxB, xxC, xxG, xxH, xxK, xxM, xxQ, xxV DELTA 02K6813 * LITEON - Lenovo 18665GU | Hardware Maintenance Manual - Page 141
later Note: Download the file from the following Web site: http://www.lenovo.com/think/spm Power cords (system) A ThinkPad power cord for a specific country or region is usually available only in or region Argentina Japan US and Canada P/N CRU ID 39M5020 ** 39M5040 39M5016 ThinkPad X41 137 - Lenovo 18665GU | Hardware Maintenance Manual - Page 142
Parts list For 3-pin power cords: Country or region Australia and New Zealand China (P.R.C.) Denmark Europe Israel Italy Korea South Africa and India Switzerland U.K. U.S., Canada, and Thailand P/N 76H3514 02K0539 76H3520 76H3518 76H3532 76H3530 76H3535 76H3522 76H3528 76H3524 76H3516 CRU ID ** - Lenovo 18665GU | Hardware Maintenance Manual - Page 143
U.S., Canada, Japan, Taiwan, APS, Latin America, Brazil Parts list P/N 27L0467 27L0449 27L0451 27L0447 27L0446 27L0443 27L0441 27L0448 27L0444 27L0462 27L0450 27L0445 27L0442 27L0465 CRU ID ** ThinkPad X41 139 - Lenovo 18665GU | Hardware Maintenance Manual - Page 144
and verify the operation of any other product, program, or service. Lenovo may have patents or pending patent applications covering subject matter described document are not intended for use in implantation or other life support applications where malfunction may result in injury or death to - Lenovo 18665GU | Hardware Maintenance Manual - Page 145
of those Web sites. The materials at those Web sites are not part of the materials for this Lenovo product, and use of those Web sites is at your own risk. Any performance data contained herein was this document should verify the applicable data for their specific environment. ThinkPad X41 141 - Lenovo 18665GU | Hardware Maintenance Manual - Page 146
Lenovo ThinkLight ThinkPad ThinkPad Port Replicator TrackPoint Ultrabay The following terms are trademarks of the International Business Machines Corporation in the United States, other countries, or both: IBM , or service names may be the trademarks or service marks of others. 142 MT1864/1865/ - Lenovo 18665GU | Hardware Maintenance Manual - Page 147
Trademarks ThinkPad X41 143 - Lenovo 18665GU | Hardware Maintenance Manual - Page 148
Part Number: 39T5971 (1P) P/N: 39T5971
-
 1
1 -
 2
2 -
 3
3 -
 4
4 -
 5
5 -
 6
6 -
 7
7 -
8
-
9
-
10
-
11
-
12
-
13
-
14
-
15
-
16
-
17
-
18
-
19
-
20
-
21
-
22
-
23
-
24
-
25
-
26
-
27
-
28
-
29
-
30
-
31
-
32
-
33
-
34
-
35
-
36
-
37
-
38
-
39
-
40
-
41
-
42
-
43
-
44
-
45
-
46
-
47
-
48
-
49
-
50
-
51
-
52
-
53
-
54
-
55
-
56
-
57
-
58
-
59
-
60
-
61
-
62
-
63
-
64
-
65
-
66
-
67
-
68
-
69
-
70
-
71
-
72
-
73
-
74
-
75
-
76
-
77
-
78
-
79
-
80
-
81
-
82
-
83
-
84
-
85
-
86
-
87
-
88
-
89
-
90
-
91
-
92
-
93
-
94
-
95
-
96
-
97
-
98
-
99
-
100
-
101
-
102
-
103
-
104
-
105
-
106
-
107
-
108
-
109
-
110
-
111
-
112
-
113
-
114
-
115
-
116
-
117
-
118
-
119
-
120
-
121
-
122
-
123
-
124
-
125
-
126
-
127
-
128
-
129
-
130
-
131
-
132
-
133
-
134
-
135
-
136
-
137
-
138
-
139
-
140
-
141
-
142
-
143
-
144
-
145
-
146
-
147
-
148
 |
 |

ThinkPad
Computer
Hardware
Maintenance
Manual
September 2005
This manual supports:
ThinkPad
X41
(MT 1864, 1865, 2525, 2526, 2527, 2528)