Lenovo A61e User Guide - Page 13
Setting, computer
 |
UPC - 883609333652
View all Lenovo A61e manuals
Add to My Manuals
Save this manual to your list of manuals |
Page 13 highlights
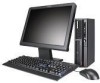
Chapter 3. Setting up your computer Read and understand the Safety and Warranty Guide before you set up your computer. Reading and understanding the safety information reduces the risk of personal injury and or damage to your product. Set up your computer in the best possible work area that suits your needs and habits. For more information, see Chapter 2, "Arranging your workspace," on page 3. Connecting your computer Use the following information when connecting your computer. v Look for the small connector icons on the back of your computer. Match the connectors to the icons. v If your computer cables and connector panel have color-coded connectors, match the color of the cable end with the color of the connector. For example, match a blue cable end with a blue connector or a red cable end with a red connector. Note: Depending on your model type, your computer might not have all of the connectors that are described in this section. 1. Check the position of the voltage-selection switch on the rear of the computer. Use a ballpoint pen to slide the switch, if necessary. Note: Some computers do not have a voltage switch. These computers automatically control the voltage. v If the voltage supply range is 100-127 V ac, set the switch to 115 V. v If the voltage supply range is 200-240 V ac, set the switch to 230 V. 115 2. Connect the keyboard cable to the appropriate keyboard connector, either the standard keyboard connector 1 or the Universal Serial Bus (USB) connector 2. © Lenovo 2005, 2007. Portions © IBM Corp. 2005. 5
-
 1
1 -
2
-
3
-
4
-
5
-
6
-
7
-
 8
8 -
 9
9 -
 10
10 -
 11
11 -
 12
12 -
 13
13 -
 14
14 -
 15
15 -
 16
16 -
 17
17 -
 18
18 -
19
-
20
-
21
-
22
-
23
-
24
-
25
-
26
-
27
-
28
-
29
-
30
-
31
-
32
-
33
-
34
-
35
-
36
-
37
-
38
-
39
-
40
-
41
-
42
-
43
-
44
-
45
-
46
-
47
-
48
-
49
-
50
-
51
-
52
-
53
-
54
-
55
-
56
-
57
-
58
-
59
-
60
-
61
-
62
-
63
-
64
-
65
-
66
-
67
-
68
 |
 |
