Lenovo PC 300PL Installing Options in Your Personal Computer - Page 56
Installing a Drive in Bay 1
 |
View all Lenovo PC 300PL manuals
Add to My Manuals
Save this manual to your list of manuals |
Page 56 highlights
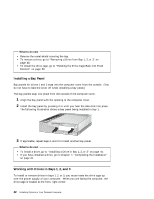
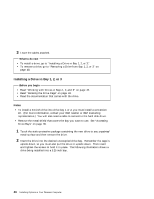
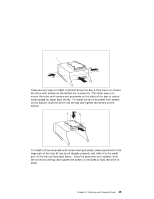
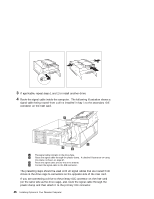
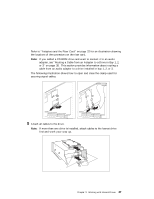
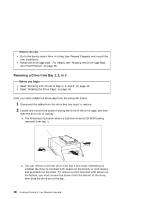
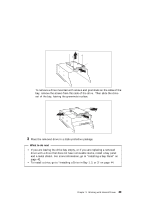
3 Leave the cables attached. What to do next To install a drive, go to "Installing a Drive in Bay 1, 2, or 3." To remove a drive, go to "Removing a Drive from Bay 1, 2, or 3" on page 48. Installing a Drive in Bay 1, 2, or 3 Before you begin Read "Working with Drives in Bays 1, 2, and 3" on page 42. Read "Rotating the Drive Cage" on page 43. Read the documentation that comes with the drive. Notes: To install a 3.5-inch drive into drive bay 1 or 2, you must install a conversion kit. (For more information, contact your IBM reseller or IBM marketing representative.) You will also need a cable to connect to the hard disk drive. Remove the metal shield that covers the bay you want to use. See "Accessing Drive Bays" on page 39. 1 Touch the static-protective package containing the new drive to any unpainted metal surface and then remove the drive. 2 Insert the drive into the desired unoccupied drive bay. Remember the cage is upside down, so you must also put the drive in upside down. Then insert and tighten the screws to hold it in place. The following illustration shows a drive being installed into a 5.25 inch bay. 44 Installing Options in Your Personal Computer
-
 1
1 -
2
-
3
-
4
-
5
-
6
-
7
-
8
-
9
-
10
-
11
-
12
-
13
-
14
-
15
-
16
-
17
-
18
-
19
-
20
-
21
-
22
-
23
-
24
-
25
-
26
-
27
-
28
-
29
-
30
-
31
-
32
-
33
-
34
-
35
-
36
-
37
-
38
-
39
-
40
-
41
-
42
-
43
-
44
-
45
-
46
-
47
-
48
-
49
-
50
-
 51
51 -
 52
52 -
 53
53 -
 54
54 -
 55
55 -
 56
56 -
 57
57 -
 58
58 -
 59
59 -
 60
60 -
 61
61 -
62
-
63
-
64
-
65
-
66
-
67
-
68
-
69
-
70
-
71
-
72
-
73
-
74
-
75
-
76
-
77
-
78
-
79
-
80
-
81
-
82
-
83
-
84
-
85
-
86
-
87
-
88
-
89
-
90
-
91
-
92
 |
 |