Lenovo ThinkPad Edge 13 Harware Maintenance Manual - Page 59
Removal steps of bottom slot cover, When installing, Applying label to the bottom slot cover
 |
View all Lenovo ThinkPad Edge 13 manuals
Add to My Manuals
Save this manual to your list of manuals |
Page 59 highlights
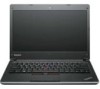
Removal steps of bottom slot cover Note: Loosen the screws 1 , but do not remove them. 1 1 1 2 1 1 When installing: Make sure that all the projections of the cover are attached firmly to the frame. Then secure the screws. Applying label to the bottom slot cover When you replace the cover, following label needs to be peeled off from the old cover, and needs to be put on the new cover: 1 Asset tag label For the label location, refer to the following figure: Chapter 8. Removing and replacing a FRU 53
-
 1
1 -
2
-
3
-
4
-
5
-
6
-
7
-
8
-
9
-
10
-
11
-
12
-
13
-
14
-
15
-
16
-
17
-
18
-
19
-
20
-
21
-
22
-
23
-
24
-
25
-
26
-
27
-
28
-
29
-
30
-
31
-
32
-
33
-
34
-
35
-
36
-
37
-
38
-
39
-
40
-
41
-
42
-
43
-
44
-
45
-
46
-
47
-
48
-
49
-
50
-
51
-
52
-
53
-
 54
54 -
 55
55 -
 56
56 -
 57
57 -
 58
58 -
 59
59 -
 60
60 -
 61
61 -
 62
62 -
 63
63 -
 64
64 -
65
-
66
-
67
-
68
-
69
-
70
-
71
-
72
-
73
-
74
-
75
-
76
-
77
-
78
-
79
-
80
-
81
-
82
-
83
-
84
-
85
-
86
-
87
-
88
-
89
-
90
-
91
-
92
-
93
-
94
-
95
-
96
-
97
-
98
-
99
-
100
-
101
-
102
-
103
-
104
-
105
-
106
-
107
-
108
-
109
-
110
-
111
-
112
-
113
-
114
-
115
-
116
-
117
-
118
-
119
-
120
-
121
-
122
-
123
-
124
-
125
-
126
 |
 |

Removal steps of bottom slot cover
Note:
Loosen the screws
1
, but do not remove them.
2
1
1
1
1
1
When installing:
Make sure that all the projections of the cover are attached firmly to the frame. Then
secure the screws.
Applying label to the bottom slot cover
When you replace the cover, following label needs to be peeled off from the old cover, and needs to be
put on the new cover:
1
Asset tag label
For the label location, refer to the following figure:
Chapter 8
.
Removing and replacing a FRU
53