Lenovo ThinkPad T42p IBM System Information Center Administrator's Guide - Page 16
Quick, installation - manual
 |
View all Lenovo ThinkPad T42p manuals
Add to My Manuals
Save this manual to your list of manuals |
Page 16 highlights
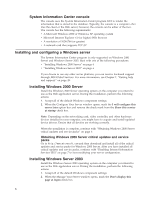
v The JAVA_HOME environment variable is created. v The System Information Center Web application is installed, along with the IBM Cloudscape 5.1 database. v Information is gathered and entered into the ISIC.PROPERTIES file. Note: After you have finished installing the System Information Center program, which produces a customized ISIC.PROPERTIES file, you have the option later of manually changing this file if changes in your environment require it. You can find details on the configuration of this file in Chapter 5, "Performing System Information Center advanced functions," on page 27. In order to install the System Information Center program, complete the following procedure: 1. Insert the System Information Center program installation CD. In most cases, the installation program will start automatically. If the program does not start automatically, complete the following procedure: a. Click the Windows Start menu. b. Click Run. c. Type D:\SERVER\ISIC_SETUP.EXE (where D is the letter of your CD drive). 2. The ″Welcome to the InstallShield Wizard for IBM System Information Center program″ window opens. 3. Click Next. The Apache Tomcat 4.1.30 Required window opens. Note: The following step requires that you temporarily leave the wizard and open a Web browser. 4. Create a folder named C:\TOMCAT4. 5. Using your Web browser, go to: http://jakarta.apache.org/site/binindex.cgi and download the Tomcat 4.1.30 zipped file to the C:\TOMCAT4 folder. Note: When you install the System Information Center program, this file will be unzipped. 6. Return to the wizard and click Next. The License Agreement window opens. 7. Read the license agreement; if you agree, mark the I accept the terms in the license agreement option button, and then click Next. The Setup Type window opens. 8. At this point, you can choose to do a Quick installation or a Custom installation. Note: A Custom installation provides more features than a Quick installation. The following features are provided when you choose a Custom installation: v E-mail capability v The ability to check assets for standard Windows security settings v The ability to schedule tasks that automatically perform functions such as generating reports and uploading asset scans. Quick installation To perform a Quick Installation, complete the following procedure: 1. In the Setup Type window, mark the Quick check box. (Click Browse if you want to choose a different destination folder than the default C:\ISIC for the installation.) The Web site Settings window opens. 8
-
 1
1 -
2
-
3
-
4
-
5
-
6
-
7
-
8
-
9
-
10
-
 11
11 -
 12
12 -
 13
13 -
 14
14 -
 15
15 -
 16
16 -
 17
17 -
 18
18 -
 19
19 -
 20
20 -
 21
21 -
22
-
23
-
24
-
25
-
26
-
27
-
28
-
29
-
30
-
31
-
32
-
33
-
34
-
35
-
36
-
37
-
38
-
39
-
40
-
41
-
42
-
43
-
44
-
45
-
46
-
47
-
48
-
49
-
50
-
51
-
52
-
53
-
54
-
55
-
56
-
57
-
58
-
59
-
60
-
61
-
62
-
63
-
64
-
65
-
66
-
67
-
68
-
69
-
70
-
71
-
72
-
73
-
74
-
75
-
76
-
77
-
78
-
79
-
80
-
81
-
82
-
83
-
84
-
85
-
86
-
87
-
88
-
89
-
90
-
91
-
92
-
93
-
94
-
95
-
96
-
97
-
98
-
99
-
100
-
101
-
102
-
103
-
104
-
105
-
106
-
107
-
108
 |
 |