Lenovo U31-70 Laptop Hardware Maintenance Manual - Lenovo U31-70
Lenovo U31-70 Laptop Manual
 |
View all Lenovo U31-70 Laptop manuals
Add to My Manuals
Save this manual to your list of manuals |
Lenovo U31-70 Laptop manual content summary:
- Lenovo U31-70 Laptop | Hardware Maintenance Manual - Lenovo U31-70 - Page 1
Lenovo U31-70 Hardware Maintenance Manual - Lenovo U31-70 Laptop | Hardware Maintenance Manual - Lenovo U31-70 - Page 2
and the product it supports, be sure to read the general information under "Notices" on page 75. First Edition (April 2015) © Copyright Lenovo 2015. All rights reserved. LIMITED AND RESTRICTED RIGHTS NOTICE: If data or software is delivered pursuant a General Services Administration "GSA" contract - Lenovo U31-70 Laptop | Hardware Maintenance Manual - Lenovo U31-70 - Page 3
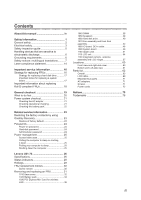
blank state 25 Putting the computer to sleep or shutting it down 25 Putting your computer to sleep 25 Shutting down the computer 25 Lenovo U31-70 26 Specifications 26 Status indicators 28 Hotkeys 29 FRU replacement notices 30 Screw notices 30 Removing and replacing an FRU 31 1010 Base - Lenovo U31-70 Laptop | Hardware Maintenance Manual - Lenovo U31-70 - Page 4
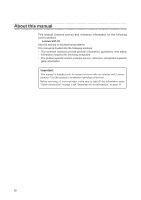
About this manual This manual contains service and reference information for the following Lenovo product: Lenovo U31-70 Use this manual to troubleshoot problems. The manual is divided into the following sections: • The common sections provide general information, guidelines, and safety information - Lenovo U31-70 Laptop | Hardware Maintenance Manual - Lenovo U31-70 - Page 5
presents the following safety information that you need to get familiar with before you service a Lenovo U31-70 computer: • "General safety" on page 2 • "Electrical safety" on page 3 • "Safety inspection guide" on page 5 • "Handling devices that are sensitive to electrostatic discharge" on page - Lenovo U31-70 Laptop | Hardware Maintenance Manual - Lenovo U31-70 - Page 6
U31-70 Hardware Maintenance Manual General safety Follow these rules below to ensure general • Please remove covers and other parts in a safe place, away from all personnel, while you are servicing the machine. • Keep your toolcase away from walk areas so that other people will not trip over it - Lenovo U31-70 Laptop | Hardware Maintenance Manual - Lenovo U31-70 - Page 7
working on electrical equipments. Important: Use only approved tools and test equipments. Some hand tools have handles covered with a soft the special safety precautions when you work with very high voltages; instructions for these precautions are in the safety sections of maintenance information. - Lenovo U31-70 Laptop | Hardware Maintenance Manual - Lenovo U31-70 - Page 8
U31-70 Hardware Maintenance Manual • Always look carefully for possible hazards in your work area The surface is conductive; such touching can cause personal injury and machine damage. • Do not service the following parts with the power on when they are removed from their normal operating places in - Lenovo U31-70 Laptop | Hardware Maintenance Manual - Lenovo U31-70 - Page 9
and service personnel from injury. This guide addresses only non-Lenovo features or options not covered by this inspection guide. If any unsafe conditions are present, you must determine how serious the apparent hazard could be and whether you can continue without first correcting the problem - Lenovo U31-70 Laptop | Hardware Maintenance Manual - Lenovo U31-70 - Page 10
U31-70 Hardware Maintenance Manual Handling devices that are sensitive to electrostatic discharge Any a grounding system, such as those listed below, to provide protection that meets the specific service requirement. Note: The use of a grounding system to guard against ESD damage is desirable - Lenovo U31-70 Laptop | Hardware Maintenance Manual - Lenovo U31-70 - Page 11
Safety information Safety notices: multilingual translations The safety notices in this section are provided in English, French, German, Hebrew, Italian, Japanese, and Spanish. Safety notice 1 Before the computer is powered on after FRU replacement, make sure all screws, springs, and other small - Lenovo U31-70 Laptop | Hardware Maintenance Manual - Lenovo U31-70 - Page 12
U31-70 Hardware Maintenance Manual Safety notice 2 DANGER Some standby batteries contain a small amount of nickel and cadmium. Do not disassemble a standby battery, recharge it, throw it into fire or - Lenovo U31-70 Laptop | Hardware Maintenance Manual - Lenovo U31-70 - Page 13
Safety information Safety notice 3 DANGER The battery pack contains small amounts of nickel. Do not disassemble it, throw it into fire or water, or short-circuit it. Dispose of the battery pack as required by local ordinances or regulations. Use only the battery in the appropriate parts listing when - Lenovo U31-70 Laptop | Hardware Maintenance Manual - Lenovo U31-70 - Page 14
U31-70 Hardware Maintenance Manual Safety notice 4 DANGER The lithium battery can cause a fire, an explosion, or a severe burn. Do not recharge it, remove its polarized connector, disassemble it, heat - Lenovo U31-70 Laptop | Hardware Maintenance Manual - Lenovo U31-70 - Page 15
Safety information Safety notice 5 If the LCD breaks and the fluid from inside the LCD gets into your eyes or on your hands, immediately wash the affected areas with water at least for 15 minutes. Seek medical care if any symptoms caused by the fluid are present after washing. Si le panneau d' - Lenovo U31-70 Laptop | Hardware Maintenance Manual - Lenovo U31-70 - Page 16
U31-70 Hardware Maintenance Manual Safety notice 6 DANGER To avoid shock, do not remove the plastic cover that protects the lower part of the inverter card. Afin d'éviter tout risque - Lenovo U31-70 Laptop | Hardware Maintenance Manual - Lenovo U31-70 - Page 17
Safety information Safety notice 8 DANGER Before removing any FRU, turn off the computer, unplug all power cords from electrical outlets, remove the battery pack, and then disconnect any interconnecting cables. Avant de retirer une unité remplaçable en clientèle, mettez le système hors tension, dé - Lenovo U31-70 Laptop | Hardware Maintenance Manual - Lenovo U31-70 - Page 18
U31-70 Hardware Maintenance Manual Laser compliance statement Some models of Lenovo computer are equipped from the certified in the U.S. to conform to the requirements of the Department of Health and Human Services 21 Code of Federal Regulations (DHHS 21 CFR) Subchapter J for Class 1 laser products - Lenovo U31-70 Laptop | Hardware Maintenance Manual - Lenovo U31-70 - Page 19
Safety information A CD-ROM drive, a DVD-ROM drive, or any other storage device installed may contain an embedded Class 3A or Class 3B laser diode. Note the following: DANGER Emits visible and invisible laser radiation when open. Do not stare into the beam, do not view directly with optical - Lenovo U31-70 Laptop | Hardware Maintenance Manual - Lenovo U31-70 - Page 20
U31-70 Hardware Maintenance Manual Important service information This chapter presents the following important service information: • "Strategy for replacing FRUs and device drivers are posted on the customer support site: http://support.lenovo.com. Strategy for replacing FRUs Before replacing parts - Lenovo U31-70 Laptop | Hardware Maintenance Manual - Lenovo U31-70 - Page 21
information Use the following strategy to prevent unnecessary expense for replacing and servicing FRUs: • If you are instructed to replace an FRU, but the replacement does not solve the problem, reinstall the original FRU before you continue. • Some computers have both a processor board and a system - Lenovo U31-70 Laptop | Hardware Maintenance Manual - Lenovo U31-70 - Page 22
U31-70 Hardware Maintenance Manual Important information about replacing RoHS compliant FRUs RoHS, The Restriction RoHS compliance well before the implementation date and expects its suppliers to be ready to support Lenovo's requirements and schedule in the EU. Products sold in 2005 and 2006 will - Lenovo U31-70 Laptop | Hardware Maintenance Manual - Lenovo U31-70 - Page 23
following important notes: Important notes: • Only certified trained personnel can service the computer. • Before replacing any FRU, read the entire page an FRU only when a problem recurs. If you suspect that an FRU is defective, clear the error logs and run the test again. If the error does - Lenovo U31-70 Laptop | Hardware Maintenance Manual - Lenovo U31-70 - Page 24
U31-70 Hardware Maintenance Manual What to do first When you do return an FRU, you must include the following information in the parts exchange form or parts return form that you attach to it: 1. Name and phone number of servicer 2. Date of service use. Before checking problems with the computer, - Lenovo U31-70 Laptop | Hardware Maintenance Manual - Lenovo U31-70 - Page 25
AC adapter pin No. 2 may differ from the one you are servicing. 3. If the voltage is not correct, replace the AC adapter. 4. If the voltage is acceptable, do the following: • Replace the system board. • If the problem persists, go to "Lenovo U31-70" on page 26. Note: Noise from the AC adapter does - Lenovo U31-70 Laptop | Hardware Maintenance Manual - Lenovo U31-70 - Page 26
U31-70 Hardware Maintenance Manual Perform operational charging. If the battery status indicator or icon does not light on, remove the battery pack and let it return to room temperature. - Lenovo U31-70 Laptop | Hardware Maintenance Manual - Lenovo U31-70 - Page 27
service information This chapter presents the following information: • "Restoring the factory contents by using OneKey Recovery" on page 23 • "Passwords" on page 24 • "Power management" on page 25 Restoring the factory contents by using OneKey Recovery Restore of factory default The Lenovo U31-70 - Lenovo U31-70 Laptop | Hardware Maintenance Manual - Lenovo U31-70 - Page 28
U31-70 Hardware Maintenance Manual Passwords As many as three passwords may be needed for any Lenovo computer: the power-on hard disk drive. If no master HDP is available, neither Lenovo nor Lenovo authorized service technicians provide any services to reset either the user or the master HDP, or to - Lenovo U31-70 Laptop | Hardware Maintenance Manual - Lenovo U31-70 - Page 29
Related service information Power management Note: Power management modes are not supported for APM operating system. To reduce power consumption, the computer has three power management modes: screen blank, sleep (standby), and hibernation. Screen blank state If - Lenovo U31-70 Laptop | Hardware Maintenance Manual - Lenovo U31-70 - Page 30
U31-70 Hardware Maintenance Manual Lenovo U31-70 This chapter presents the following product-specific service references and product-specific parts information: • "Specifications" on page 26 • "Status indicators" on page 28 • "Hotkeys" on page 29 • "FRU replacement notices" on page 30 • " - Lenovo U31-70 Laptop | Hardware Maintenance Manual - Lenovo U31-70 - Page 31
Lenovo U31-70 Table 1. Specifications (continued) Feature Ethernet (on the system board) Bluetooth wireless Keyboard Touchpad Integrated camera Battery AC adapter Pre-installed operating system Description • 1,000 Mbps • Combined in combo card • 6-row Lenovo Keyboard • Multi-touch type • HD • 2 - Lenovo U31-70 Laptop | Hardware Maintenance Manual - Lenovo U31-70 - Page 32
U31-70 Hardware Maintenance Manual Status indicators The system status indicators below show the computer status: 1 2 Table 2. Status indicators Indicator 1 Battery status indicator 2 Power status indicator Indicator status On (solid - Lenovo U31-70 Laptop | Hardware Maintenance Manual - Lenovo U31-70 - Page 33
Lenovo U31-70 Hotkeys You can access certain system settings quickly by pressing the appropriate hotkeys. Table 3. Hotkeys : Mutes/unmutes the sound. : Decreases the volume level. : Increases the - Lenovo U31-70 Laptop | Hardware Maintenance Manual - Lenovo U31-70 - Page 34
U31-70 Hardware Maintenance Manual FRU replacement notices This section presents notices related to removing and replacing parts. Read this section carefully before replacing any FRU. Screw notices Loose screws can cause a reliability problem. In the Lenovo computer, this problem is addressed with - Lenovo U31-70 Laptop | Hardware Maintenance Manual - Lenovo U31-70 - Page 35
Lenovo U31-70 Removing and replacing an FRU This section presents exploded figures with the instructions to indicate how to remove and replace the FRU. Make sure to observe the following general rules: 1. Do not attempt to service any computer unless you have been trained and certified. An untrained - Lenovo U31-70 Laptop | Hardware Maintenance Manual - Lenovo U31-70 - Page 36
U31-70 Hardware Maintenance Manual 1010 Base cover Figure 1. Removal steps of base cover Remove the screws 1. 1 1 1 1 1 1 1 1 1 1 Step 1 Screw (quantity) M2 × 6 mm, Phillips-head, nylok-coated (10) log low---log - Lenovo U31-70 Laptop | Hardware Maintenance Manual - Lenovo U31-70 - Page 37
Lenovo U31-70 Note: Applying labels to the base cover The new base cover FRU is shipped with a kit containing labels of several kinds. When you replace the - Lenovo U31-70 Laptop | Hardware Maintenance Manual - Lenovo U31-70 - Page 38
U31-70 Hardware Maintenance Manual 1020 Battery pack DANGER Only use the battery specified in the parts list for your computer. Any other battery could ignite or explode. For access, - Lenovo U31-70 Laptop | Hardware Maintenance Manual - Lenovo U31-70 - Page 39
Lenovo U31-70 Figure 2. Removal steps of battery pack (continued) Remove the battery pack in the direction shown by arrow 4. 4 35 - Lenovo U31-70 Laptop | Hardware Maintenance Manual - Lenovo U31-70 - Page 40
U31-70 Hardware Maintenance Manual 1030 PCI Express Mini Card for wireless LAN For access, remove these FRUs in order: • "1010 Base cover" on page 32 • "1020 Battery pack" on - Lenovo U31-70 Laptop | Hardware Maintenance Manual - Lenovo U31-70 - Page 41
Lenovo U31-70 Figure 3. Removal steps of PCI Express Mini Card for wireless LAN (continued) Remove the card in the direction shown by arrow 3. 3 When installing: • In models - Lenovo U31-70 Laptop | Hardware Maintenance Manual - Lenovo U31-70 - Page 42
U31-70 Hardware Maintenance Manual 1040 DIMM For access, remove these FRUs in order: • "1010 Base cover" on page 32 • "1020 Battery pack" on page 34 Figure 4. Removal steps of - Lenovo U31-70 Laptop | Hardware Maintenance Manual - Lenovo U31-70 - Page 43
Lenovo U31-70 1050 Speakers For access, remove these FRUs in order: • "1010 Base cover" on page 32 • "1020 Battery pack" on page 34 Figure 5. Removal steps of - Lenovo U31-70 Laptop | Hardware Maintenance Manual - Lenovo U31-70 - Page 44
U31-70 Hardware Maintenance Manual 1060 Hard disk drive For access, remove these FRUs in order: • "1010 Base cover" on page 32 • "1020 Battery pack" on page 34 • "1050 Speakers" - Lenovo U31-70 Laptop | Hardware Maintenance Manual - Lenovo U31-70 - Page 45
Lenovo U31-70 Figure 6. Removal steps of hard disk drive (continued) Detach the HDD connector in the direction shown by arrow 2. Remove the hard disk drive from the - Lenovo U31-70 Laptop | Hardware Maintenance Manual - Lenovo U31-70 - Page 46
U31-70 Hardware Maintenance Manual 1070 Fan assembly and Heat Sink assembly For access, remove these FRUs in order: • "1010 Base cover" on page 32 • "1020 Battery pack" on page 34 Figure 7. Removal steps of fan assembly and Heat Sink assembly Release the cables from the cable guides in the direction - Lenovo U31-70 Laptop | Hardware Maintenance Manual - Lenovo U31-70 - Page 47
Lenovo U31-70 Figure 7. Removal steps of fan assembly and Heat Sink assembly (continued) Unplug the fan connector in the direction shown by arrow 2. Remove the screws 3. 2 3 3 3 Step - Lenovo U31-70 Laptop | Hardware Maintenance Manual - Lenovo U31-70 - Page 48
U31-70 Hardware Maintenance Manual Figure 7. Removal steps of fan assembly and Heat Sink assembly (continued) Remove the screws 5. 5 5 5 5 5 Step Screw (quantity) 5 M2 × 4 mm, Phillips head, nylok-coated (5) cpu thermal - Lenovo U31-70 Laptop | Hardware Maintenance Manual - Lenovo U31-70 - Page 49
Lenovo U31-70 Figure 7. Removal steps of fan assembly and Heat Sink assembly (continued) part shown in the figure above. Either too much or too little grease application can cause a thermal problem due to imperfect contact with a component. Note: • A new thermal module FRU is shipped with several - Lenovo U31-70 Laptop | Hardware Maintenance Manual - Lenovo U31-70 - Page 50
U31-70 Hardware Maintenance Manual 1080 IO board, DC-in cable For access, remove these FRUs in order: • "1010 Base cover" on page 32 • "1020 Battery pack" on page 34 • " - Lenovo U31-70 Laptop | Hardware Maintenance Manual - Lenovo U31-70 - Page 51
Lenovo U31-70 Figure 8. Removal steps of IO board, DC-in cable (continued) Remove the IO board in the direction shown by arrow 4. 4 Unplug the DC-in cable - Lenovo U31-70 Laptop | Hardware Maintenance Manual - Lenovo U31-70 - Page 52
U31-70 Hardware Maintenance Manual 1090 System board Important notices for handling the system board: When handling the system board, bear the following in mind. • Be careful not to drop - Lenovo U31-70 Laptop | Hardware Maintenance Manual - Lenovo U31-70 - Page 53
Lenovo U31-70 Figure 9. Removal steps of system board (continued) Remove the system board in the direction shown by arrow 6. 6 Remove the screws 7. 7 7 Step Screw (quantity) 7 M2 × 2.5 mm, Phillips-head, nylok-coated (2) RJ45 cover---M/B Color Torque Silver 1.0~1.5 kgf*cm 49 - Lenovo U31-70 Laptop | Hardware Maintenance Manual - Lenovo U31-70 - Page 54
U31-70 Hardware Maintenance Manual Figure 9. Removal steps of system board (continued) Remove the RJ-45 door in the direction shown by arrow 8. 8 Note: • A new system board FRU is shipped - Lenovo U31-70 Laptop | Hardware Maintenance Manual - Lenovo U31-70 - Page 55
Lenovo U31-70 1100 Upper case For access, remove these FRUs in order: • "1010 Base cover" on page 32 • "1020 Battery pack" on page 34 • "1030 PCI Express - Lenovo U31-70 Laptop | Hardware Maintenance Manual - Lenovo U31-70 - Page 56
U31-70 Hardware Maintenance Manual Figure 10. Removal steps of upper case (continued) Open the hinge in the direction shown by arrows 2. 2 2 Remove the upper case from the LCD module in the directions shown by arrow 3. 3 52 - Lenovo U31-70 Laptop | Hardware Maintenance Manual - Lenovo U31-70 - Page 57
Lenovo U31-70 Figure 10. Removal steps of upper case (continued) Remove the screws 4. Then remove the touchpad module 5. 444 4 5 Step Screw (quantity) 4 M2 × 2 mm, Phillips-head, nylok-coated (4) tp bracket---log up Color Torque Black 1.0~1.5 kgf*cm 53 - Lenovo U31-70 Laptop | Hardware Maintenance Manual - Lenovo U31-70 - Page 58
U31-70 Hardware Maintenance Manual 1110 LCD unit For access, remove these FRUs in order: • "1010 Base cover" on page 32 • "1020 Battery pack" on page 34 • "1030 PCI Express - Lenovo U31-70 Laptop | Hardware Maintenance Manual - Lenovo U31-70 - Page 59
Lenovo U31-70 Figure 11. Removal steps of LCD unit (continued) Remove the LCD front bezel in the direction shown by arrows 3. 3 3 3 3 Remove the screws 4. Lift the LCD - Lenovo U31-70 Laptop | Hardware Maintenance Manual - Lenovo U31-70 - Page 60
U31-70 Hardware Maintenance Manual Figure 11. Removal steps of LCD unit (continued) Detach the camera connector in the direction shown by arrow 7. 7 Remove the LCD cable in and that you do not pinch the antenna cables when you attach the LCD assembly. Route the LCD cable along the cable guides. 56 - Lenovo U31-70 Laptop | Hardware Maintenance Manual - Lenovo U31-70 - Page 61
Lenovo U31-70 1120 Integrated camera, antenna assembly and LCD hinges For access, remove these FRUs in order: • "1010 Base cover" on page 32 • "1020 Battery pack" on - Lenovo U31-70 Laptop | Hardware Maintenance Manual - Lenovo U31-70 - Page 62
U31-70 Hardware Maintenance Manual Figure 12. Removal steps of integrated camera, antenna assembly and LCD hinges (continued) Peel off the adhesive tape securing the antenna boards, release the cables from the cable guide, and then remove the antenna assembly in the direction shown by arrows 2. 2 2 - Lenovo U31-70 Laptop | Hardware Maintenance Manual - Lenovo U31-70 - Page 63
Lenovo U31-70 Figure 12. Removal steps of integrated camera, antenna assembly and LCD hinges (continued) Remove the LCD hinges in the direction shown by arrows 4. 4 4 59 - Lenovo U31-70 Laptop | Hardware Maintenance Manual - Lenovo U31-70 - Page 64
U31-70 Hardware Maintenance Manual Locations Front view and right-side view 1 Integrated camera 2 Built-in microphone 3 Computer display 4 Wireless LAN antennas 5 Ventilation slots 6 Touchpad 7 Novo button 8 USB 3.0 port 9 RJ-45 port J HDMI port K Power button 3 21 2 4 5 6 11 10 9 8 7 60 - Lenovo U31-70 Laptop | Hardware Maintenance Manual - Lenovo U31-70 - Page 65
Lenovo U31-70 Bottom and Left-side view 1 Speakers 2 System status indicators Note: For the description of each indicator, see "Status indicators" on page 28. 3 Combo audio jack 4 Memory card slot 5 USB 2.0 port 6 AC power adapter jack 7 Kensington lock slot 8 Louvers 8 7 1 6 5 4 3 1 2 61 - Lenovo U31-70 Laptop | Hardware Maintenance Manual - Lenovo U31-70 - Page 66
U31-70 Hardware Maintenance Manual Parts list This section presents the following service parts: • "Overall" on page 63 • "LCD FRUs" on on your own. If an FRU is damaged, contact a Lenovo authorized servicer or a marketing representative for replacement or repair. Only qualified technicians can - Lenovo U31-70 Laptop | Hardware Maintenance Manual - Lenovo U31-70 - Page 67
Overall 1 3 4 c 6 10 11 13 Lenovo U31-70 2 5 a 7 8 9 b 12 63 - Lenovo U31-70 Laptop | Hardware Maintenance Manual - Lenovo U31-70 - Page 68
U31-70 Hardware Maintenance Manual Table 4. Parts list-Overall No. FRU a-c See "Miscellaneous parts" on page 71. 1 LCD unit (see "LCD FRUs" on page 69). 2 Upper Case C U31-70 BKL White US 2 Upper Case C U31-70 BKL White GK 2 Upper Case C U31-70BKL White INT'E 2 Upper Case C U31-70 BKL White KR 2 - Lenovo U31-70 Laptop | Hardware Maintenance Manual - Lenovo U31-70 - Page 69
Case C U31-70 NBKL White ICE 2 Upper Case C U31-70 NBKL White SA 2 Upper Case C U31-70 NBKL White SW 2 Upper Case C U31-70 NBKL White BU 2 Upper Case C U31-70NBKL WhiteCZ-SK 2 Upper Case C U31-70 NBKL Red US 2 Upper Case C U31-70 NBKL Red GK 2 Upper Case C U31-70NBKL Red INT'E Lenovo U31-70 FRU no - Lenovo U31-70 Laptop | Hardware Maintenance Manual - Lenovo U31-70 - Page 70
U31-70 Hardware Maintenance Manual Table 4. Parts list-Overall (continued) No. FRU 2 Upper Case C U31-70 NBKL Red KR 2 Upper Case C U31-70 NBKL Red CH 2 Upper Case C U31-70 NBKL Red RU 2 Upper Case C U31-70 NBKL Red AR 2 Upper Case C U31-70 NBKL Red HE 2 Upper Case C U31-70 NBKL Red TH 2 Upper Case - Lenovo U31-70 Laptop | Hardware Maintenance Manual - Lenovo U31-70 - Page 71
Lenovo U31-70 Table 4. Parts list-Overall (continued) No. FRU 5 MB C U31-70 WIN I3-5010 UMA BKL 5 MB C U31-70 NOK I3-5010UMA NBKL 5 MB C U31-70 WIN I3-5010UMA NBKL 5 MB C U31-70 NOK I3-5005 DIS BKL 5 MB C U31-70 WIN I3-5005 DIS BKL 5 MB C U31-70 NOK 5005UMA BKL NGC 5 MB C U31-70 WIN 5005UMA BKL - Lenovo U31-70 Laptop | Hardware Maintenance Manual - Lenovo U31-70 - Page 72
U31-70 Hardware Maintenance Manual Table 4. Parts list-Overall (continued) No. FRU 12 Hard disk drive, WD5000LPCX-24C6HT0 6G 7mm 5.4K 500G HDD 12 Hard disk drive, MQ01ABF050 6G 7mm 5. - Lenovo U31-70 Laptop | Hardware Maintenance Manual - Lenovo U31-70 - Page 73
LCD FRUs In Lenovo U31-70, there is following type of LCD. • "13.3-in. HD LED" Lenovo U31-70 1 2 3 4 5 6 7 69 - Lenovo U31-70 Laptop | Hardware Maintenance Manual - Lenovo U31-70 - Page 74
U31-70 Hardware Maintenance Manual Table 5. Parts list-LCD FRUs No. FRU 1 LCD Bezel C U31-70 Black 1 LCD Bezel C U31-70 White 2 Panel, AUO B133XTN01.6 0A HD AG S NB 2 Panel, IVO M133NWN1 R4 HD AG S NB 2 Panel, BOE HB133WX1-402 HD AG S LED1 NB LCD 2 Panel, - Lenovo U31-70 Laptop | Hardware Maintenance Manual - Lenovo U31-70 - Page 75
Lenovo U31-70 Miscellaneous parts Table 6. Parts list-Miscellaneous parts FRU FRU no. System miscellaneous parts: • (a) RJ45 Door C U31-70 White • (a) RJ45 Door C U31-70 Red • (b) HDD Bracket C U31-70 5D30J30998 5D30J30924 5B40J30985 Cable miscellaneous parts: • (c) DC-IN Cable C U31-70 - Lenovo U31-70 Laptop | Hardware Maintenance Manual - Lenovo U31-70 - Page 76
U31-70 Hardware Maintenance Manual Power cords A Lenovo power cord for a specific country or region is usually available only in that country 145500010 145500011 145500012 145500013 145500014 145500015 145000568 145000567 145000566 145000565 145000564 CRU U31-70 U31-70 ID. BDW HSW * ● ● 72 - Lenovo U31-70 Laptop | Hardware Maintenance Manual - Lenovo U31-70 - Page 77
+VCTF+VAC5S 1m Japan 3PIN • VOLEX VAC5S+VCTF+M755 1m Argentina 3PIN • VOLEX VA2073+H03VV-F+VAC5S 1m Lenovo U31-70 P/N 145000563 145000562 145000561 145000560 145000559 145000558 145000557 145000556 145000555 145000554 145000553 145000538 145000537 145000605 145000524 145000535 145000534 145000533 - Lenovo U31-70 Laptop | Hardware Maintenance Manual - Lenovo U31-70 - Page 78
U31-70 Hardware Maintenance Manual Table 9. Parts list-power cords (continued) Region Brazil 3PIN • VOLEX CH10S3+H03VV-F+VAC5S 145000596 145000595 145000594 145000593 145000592 145000591 145000590 145000589 145000588 145000587 145000586 145000585 CRU U31-70 U31-70 ID. BDW HSW * ● ● 74 - Lenovo U31-70 Laptop | Hardware Maintenance Manual - Lenovo U31-70 - Page 79
and verify the operation of any other product, program, or service. Lenovo may have patents or pending patent applications covering subject matter described document are not intended for use in implantation or other life support applications where malfunction may result in injury or death to - Lenovo U31-70 Laptop | Hardware Maintenance Manual - Lenovo U31-70 - Page 80
U31-70 Hardware Maintenance Manual Any performance data contained herein was determined in a controlled following terms are trademarks or registered trademarks of Lenovo in the United States, other countries, or both. Lenovo OneKey Microsoft and Windows are trademarks of Microsoft Corporation
-
 1
1 -
 2
2 -
 3
3 -
 4
4 -
 5
5 -
 6
6 -
 7
7 -
8
-
9
-
10
-
11
-
12
-
13
-
14
-
15
-
16
-
17
-
18
-
19
-
20
-
21
-
22
-
23
-
24
-
25
-
26
-
27
-
28
-
29
-
30
-
31
-
32
-
33
-
34
-
35
-
36
-
37
-
38
-
39
-
40
-
41
-
42
-
43
-
44
-
45
-
46
-
47
-
48
-
49
-
50
-
51
-
52
-
53
-
54
-
55
-
56
-
57
-
58
-
59
-
60
-
61
-
62
-
63
-
64
-
65
-
66
-
67
-
68
-
69
-
70
-
71
-
72
-
73
-
74
-
75
-
76
-
77
-
78
-
79
-
80
 |
 |

Lenovo U31-70
Hardware
Maintenance
Manual