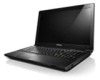
Lenovo V580c Lenovo V580, V580c Hardware Maintenance Manual
Lenovo V580c Manual
 |
View all Lenovo V580c manuals
Add to My Manuals
Save this manual to your list of manuals |
Lenovo V580c manual content summary:
- Lenovo V580c | Lenovo V580, V580c Hardware Maintenance Manual - Page 1
Hardware Maintenance Manual Lenovo V580 and V580c - Lenovo V580c | Lenovo V580, V580c Hardware Maintenance Manual - Page 2
and the product it supports, be sure to read the general information under Appendix A "Notices" on page 105. Second Edition (July 2012) © Copyright Lenovo 2012. LIMITED AND RESTRICTED RIGHTS NOTICE: If data or software is delivered pursuant a General Services Administration "GSA" contract, use - Lenovo V580c | Lenovo V580, V580c Hardware Maintenance Manual - Page 3
the battery pack 31 Chapter 4. Related service information 33 Recovering the computer settings 33 Passwords 33 Power-on password 33 Supervisor password 33 Power management 34 Screen blank mode 34 Sleep mode 34 Hibernation mode 34 Chapter 5. Lenovo V580 and V580c . . 37 Specifications 37 - Lenovo V580c | Lenovo V580, V580c Hardware Maintenance Manual - Page 4
ii Hardware Maintenance Manual - Lenovo V580c | Lenovo V580, V580c Hardware Maintenance Manual - Page 5
V580 Lenovo V580c Machine type (MT) 4738, 20147 4980, 20160 Use this manual to troubleshoot problems. The manual is divided into the following sections: • The common sections provide general information, guidelines, and safety information required for servicing computers. • The product-specific - Lenovo V580c | Lenovo V580, V580c Hardware Maintenance Manual - Page 6
iv Hardware Maintenance Manual - Lenovo V580c | Lenovo V580, V580c Hardware Maintenance Manual - Page 7
be familiar with before you service a Lenovo Notebook. • "General safety" on page 1 • "Electrical safety" on page 2 • "Safety inspection guide" on page 3 • correctly before returning the machine to the customer. • Fan louvers on the machine help to prevent overheating of internal components. Do not - Lenovo V580c | Lenovo V580, V580c Hardware Maintenance Manual - Page 8
you work with very high voltages; Instructions for these precautions are in the safety cause personal injury and machine damage. • Do not service the following parts with the power on when they are - Power supply units - Pumps - Blowers and fans - Motor generators - Similar units to listed above This - Lenovo V580c | Lenovo V580, V580c Hardware Maintenance Manual - Page 9
to protect users and service technicians from injury. This guide addresses only those items batteries. 5. Remove the cover. 6. Check for any obvious non-Lenovo alterations. Use good judgment as to the safety of any non-Lenovo -specific ESD procedures when they exceed the requirements noted here. Chapter - Lenovo V580c | Lenovo V580, V580c Hardware Maintenance Manual - Page 10
meets the specific service requirement. Note : The use of a grounding system to guard against ESD damage is desirable but not necessary. - Attach the ESD ground clip to any frame ground, ground braid, or green-wire ground. - When working on a double-insulated or battery Manual - Lenovo V580c | Lenovo V580, V580c Hardware Maintenance Manual - Page 11
DANGER DANGER DANGER DANGER DANGER Chapter 1. Safety information 5 - Lenovo V580c | Lenovo V580, V580c Hardware Maintenance Manual - Page 12
DANGER 6 Hardware Maintenance Manual - Lenovo V580c | Lenovo V580, V580c Hardware Maintenance Manual - Page 13
Chapter 1. Safety information 7 - Lenovo V580c | Lenovo V580, V580c Hardware Maintenance Manual - Page 14
PERIGO PERIGO PERIGO PERIGO PERIGO PERIGO 8 Hardware Maintenance Manual - Lenovo V580c | Lenovo V580, V580c Hardware Maintenance Manual - Page 15
PERIGO PERIGO DANGER DANGER DANGER Chapter 1. Safety information 9 - Lenovo V580c | Lenovo V580, V580c Hardware Maintenance Manual - Page 16
DANGER DANGER DANGER DANGER DANGER VORSICHT 10 Hardware Maintenance Manual - Lenovo V580c | Lenovo V580, V580c Hardware Maintenance Manual - Page 17
VORSICHT VORSICHT VORSICHT VORSICHT Chapter 1. Safety information 11 - Lenovo V580c | Lenovo V580, V580c Hardware Maintenance Manual - Page 18
VORSICHT VORSICHT VORSICHT 12 Hardware Maintenance Manual - Lenovo V580c | Lenovo V580, V580c Hardware Maintenance Manual - Page 19
Chapter 1. Safety information 13 - Lenovo V580c | Lenovo V580, V580c Hardware Maintenance Manual - Page 20
14 Hardware Maintenance Manual - Lenovo V580c | Lenovo V580, V580c Hardware Maintenance Manual - Page 21
Chapter 1. Safety information 15 - Lenovo V580c | Lenovo V580, V580c Hardware Maintenance Manual - Page 22
16 Hardware Maintenance Manual - Lenovo V580c | Lenovo V580, V580c Hardware Maintenance Manual - Page 23
Chapter 1. Safety information 17 - Lenovo V580c | Lenovo V580, V580c Hardware Maintenance Manual - Page 24
18 Hardware Maintenance Manual - Lenovo V580c | Lenovo V580, V580c Hardware Maintenance Manual - Page 25
Laser compliance statement (multilingual translations) The laser compliance statements in this section are provided in the following languages: • English • Arabic • Brazilian Portuguese • French • German • Hebrew • Japanese • Korean • Spanish • Traditional Chinese Chapter 1. Safety information 19 - Lenovo V580c | Lenovo V580, V580c Hardware Maintenance Manual - Page 26
20 Hardware Maintenance Manual - Lenovo V580c | Lenovo V580, V580c Hardware Maintenance Manual - Page 27
Chapter 1. Safety information 21 - Lenovo V580c | Lenovo V580, V580c Hardware Maintenance Manual - Page 28
22 Hardware Maintenance Manual - Lenovo V580c | Lenovo V580, V580c Hardware Maintenance Manual - Page 29
Chapter 1. Safety information 23 - Lenovo V580c | Lenovo V580, V580c Hardware Maintenance Manual - Page 30
24 Hardware Maintenance Manual - Lenovo V580c | Lenovo V580, V580c Hardware Maintenance Manual - Page 31
Chapter 1. Safety information 25 - Lenovo V580c | Lenovo V580, V580c Hardware Maintenance Manual - Page 32
26 Hardware Maintenance Manual - Lenovo V580c | Lenovo V580, V580c Hardware Maintenance Manual - Page 33
in this manual. After a system board is replaced, ensure that the latest BIOS is installed to the system board before completing the service action. To download software fixes, drivers, and BIOS, do the following: 1. Go to http://www.lenovo.com/support. 2. Click Download Drivers & Software. The - Lenovo V580c | Lenovo V580, V580c Hardware Maintenance Manual - Page 34
may be the cause of the error. Before replacing the adapter or sequence in the computer you are servicing may have been changed. Be extremely must be implemented on Lenovo products placed on the Manual or direct substitutions can be used. • Compliant FRUs identified in Hardware Maintenance Manual - Lenovo V580c | Lenovo V580, V580c Hardware Maintenance Manual - Page 35
guide, be sure to read the following important notes. Important notes: • Only certified trained personnel should service the errors. Consider replacing a FRU only when a problem recurs. If you suspect that a FRU is defective, clear the error log and run the test again. If the error Lenovo 2012 29 - Lenovo V580c | Lenovo V580, V580c Hardware Maintenance Manual - Page 36
may differ from the one you are servicing. 3. If the voltage is not correct, replace the ac power adapter. 4. If the voltage is acceptable, do the following: • Replace the system board. • If the problem persists, go to Chapter 5 "Lenovo V580 and V580c" on page 37. 30 Hardware Maintenance Manual - Lenovo V580c | Lenovo V580, V580c Hardware Maintenance Manual - Page 37
pack can charge to 100% of its capacity. This protects the battery pack from being overcharged or from having a shortened life. To check your battery, move your cursor to the power meter icon in the icon tray of the Windows® taskbar and wait for a moment (but do not click it), and the percentage - Lenovo V580c | Lenovo V580, V580c Hardware Maintenance Manual - Page 38
32 Hardware Maintenance Manual - Lenovo V580c | Lenovo V580, V580c Hardware Maintenance Manual - Page 39
in the BIOS. The user must enter the supervisor password to get access to the BIOS and change the system configuration. Attention: If you forget the password, there is no service procedure to reset the password. The system board must be replaced for a scheduled fee. © Copyright Lenovo 2012 33 - Lenovo V580c | Lenovo V580, V580c Hardware Maintenance Manual - Page 40
are not supported for APM resume normal operation, press any key. Sleep mode When the computer enters sleep mode, the following events occur in addition to what occurs drive within that time. • If the battery indicator blinks orange, indicating that the battery power is low. To cause the Manual - Lenovo V580c | Lenovo V580, V580c Hardware Maintenance Manual - Page 41
are satisfied in suspend mode. When the power is turned on, the computer returns from hibernation mode and resumes operation. The hibernation file in the boot record on the hard disk drive is read, and system status is restored from the hard disk drive. Chapter 4. Related - Lenovo V580c | Lenovo V580, V580c Hardware Maintenance Manual - Page 42
36 Hardware Maintenance Manual - Lenovo V580c | Lenovo V580, V580c Hardware Maintenance Manual - Page 43
Lenovo V580 and V580c This chapter presents the following product-specific service references and parts information: • "Specifications" on page 37 • "Status indicators" on page 38 • "Fn key combinations" on page 41 Specifications This topic lists the physical features for the Lenovo V580 and V580c - Lenovo V580c | Lenovo V580, V580c Hardware Maintenance Manual - Page 44
some models) Wireless features • Integrated wireless LAN • Integrated WiMAX • 10/100/1000 Mbps Ethernet communication Security feature • Fingerprint reader Status indicators This topic presents the system status indicators that show the status of the computer. Status indicators (Lenovo V580) 5 1 234 - Lenovo V580c | Lenovo V580, V580c Hardware Maintenance Manual - Page 45
level reaches 20%, the blinking color changes to green. • Orange: The battery discharge level is between 5% and 20%. • Fast blinking orange: The battery charge or discharge level is 5% or less. • Off: The battery is detached or the computer is powered off. Chapter 5. Lenovo V580 and V580c 39 - Lenovo V580c | Lenovo V580, V580c Hardware Maintenance Manual - Page 46
Status indicators (Lenovo V580c) 4 1 23 Table 2. Status indicators Indicator 1 Caps Lock the computer. Sudden physical shock might cause drive errors. 4 Power and battery • Green: The battery charge level is between 80% and 100%, or the battery discharge status indicator level is between 20% - Lenovo V580c | Lenovo V580, V580c Hardware Maintenance Manual - Page 47
Note: You also can use the Windows+P combination to switch between the computer display and an external monitor. Enables or disables the built-in wireless networking features. Enables or disables display brightness level. Increases or decreases the sound volume. Chapter 5. Lenovo V580 and V580c 41 - Lenovo V580c | Lenovo V580, V580c Hardware Maintenance Manual - Page 48
42 Hardware Maintenance Manual - Lenovo V580c | Lenovo V580, V580c Hardware Maintenance Manual - Page 49
. You can find a list of CRUs for your product in this Hardware Maintenance Manual. An electronic version of this manual can be found at http://www.lenovo.com/UserManuals. Follow the on-screen instructions to find the manual for your product. You might be required to return the defective CRU. When - Lenovo V580c | Lenovo V580, V580c Hardware Maintenance Manual - Page 50
. If you have a torque screwdriver, tighten all screws firmly to the torque specified in the screw information table for each step. • Ensure that torque screw drivers are calibrated correctly following country specifications. 44 Hardware Maintenance Manual - Lenovo V580c | Lenovo V580, V580c Hardware Maintenance Manual - Page 51
. You can find a list of CRUs for your product in this Hardware Maintenance Manual. An electronic version of this manual can be found at http://www.lenovo.com/UserManuals. Follow the on-screen instructions to find the manual for your product. You might be required to return the defective CRU. When - Lenovo V580c | Lenovo V580, V580c Hardware Maintenance Manual - Page 52
for your computer. Any other battery could ignite or explode. Unlock the manual battery latch 1 . Hold the right battery latch in the unlocked position, and then remove the battery pack 2 . 1 2 2 When installing: Install the battery pack in the slot. Ensure that the battery latches are in the locked - Lenovo V580c | Lenovo V580, V580c Hardware Maintenance Manual - Page 53
Step 1 Screw (quantity) M2 × 3 mm, flat-head, nylon-coated (2) 1030 Optical drive or blank bezel For access, remove these FRUs in order: • "1010 Battery pack" on page 46 • "1020 Bottom slot cover" on page 46 Removal steps of optical drive or blank bezel Remove the screw 1 . 1 Color Black Torque - Lenovo V580c | Lenovo V580, V580c Hardware Maintenance Manual - Page 54
of optical drive bezel and optical drive bracket Remove the optical drive bezel in the direction shown by the arrow in the following illustrations. For Lenovo V580 models For Lenovo V580c models 48 Hardware Maintenance Manual - Lenovo V580c | Lenovo V580, V580c Hardware Maintenance Manual - Page 55
V580 models Step 1 Screw (quantity) M2 × 3 mm, flat-head, nylon-coated (1) For Lenovo V580c models 2 1 Color Black Torque 1.85 kgfcm Step 1 Screw (quantity) M2 × 3 mm, flat-head, nylon-coated (2) 1040 Memory modules For access, remove these FRUs in order: • "1010 Battery pack" on page - Lenovo V580c | Lenovo V580, V580c Hardware Maintenance Manual - Page 56
only one memory module is to be installed on the computer you are servicing, the memory module must be installed in SLOT-0 ( a lower slot), 1050 Hard disk drive assembly For access, remove these FRUs in order: • "1010 Battery pack" on page 46 • "1020 Bottom slot cover" on page 46 Attention: • Manual - Lenovo V580c | Lenovo V580, V580c Hardware Maintenance Manual - Page 57
Removal steps of hard disk drive assembly Remove the screw 1 , then pull the tab in the direction shown by the arrow 2 . 1 2 Step 1 Screw (quantity) M2 × 3 mm, flat-head, nylon-coated (1) Color Black Remove the hard disk drive from the slot in the direction shown by the arrow 3 . Torque 1.85 - Lenovo V580c | Lenovo V580, V580c Hardware Maintenance Manual - Page 58
coated (4) Color Black Remove the hard disk drive bracket in the direction shown by the arrow 2 . 2 Torque 4.0 kgfcm 1060 PCI Express Mini Card for wireless LAN For access, remove these FRUs in order: • "1010 Battery pack" on page 46 • "1020 Bottom slot cover" on page 46 52 Hardware Maintenance - Lenovo V580c | Lenovo V580, V580c Hardware Maintenance Manual - Page 59
the screw 2 . 1 1 2 Step 2 Screw (quantity) M2 × 3 mm, flat-head, nylon-coated (1) Color Black Torque 1.85 kgfcm Remove the PCI Express Mini Card for wireless LAN in the direction shown by the arrow 3 . 3 When installing: Plug the black cable into the main connector, and the white cable into - Lenovo V580c | Lenovo V580, V580c Hardware Maintenance Manual - Page 60
1070 mSATA solid-state drive For access, remove these FRUs in order: • "1010 Battery pack" on page 46 • "1020 Bottom . • Never remove the drive while the computer is operating or in suspend mode. Removal steps of mSATA solid-state drive Remove the screw 1 . 1 Step 1 Screw (quantity) M2 × 3 mm, - Lenovo V580c | Lenovo V580, V580c Hardware Maintenance Manual - Page 61
Remove the mSATA solid-state drive in the direction shown by the arrow 2 . 2 1080 Backup battery Removal steps of backup battery DANGER Use only the battery specified in the parts list for your computer. Any other battery could ignite or explode. Pry the backup battery out using a screwdriver. - Lenovo V580c | Lenovo V580, V580c Hardware Maintenance Manual - Page 62
1090 Keyboard For access, remove these FRUs in order: • "1010 Battery pack" on page 46 • "1020 Bottom slot cover" on page 46 Removal steps of keyboard Remove the screws 1 . 1 1 Screw (quantity) M2.5 × 8 mm, flat-head, nylon-coated (3) Color Black Torque 4.0 kgfcm 56 Hardware Maintenance Manual - Lenovo V580c | Lenovo V580, V580c Hardware Maintenance Manual - Page 63
Insert a polyester film into the front edge of the keyboard, and then push the polyester film in the direction shown by the arrow 2 to unlatch the front edge of the keyboard. 2 Detach the keyboard lightly in the direction shown by the arrow 3 . 3 Chapter 7. Removing and replacing a FRU 57 - Lenovo V580c | Lenovo V580, V580c Hardware Maintenance Manual - Page 64
keyboard connector. 4 6 5 When installing: Ensure that the keyboard connector is attached firmly. 1100 Keyboard bezel For access, remove these FRUs in order: • "1010 Battery pack" on page 46 • "1020 Bottom slot cover" on page 46 • "1030 Optical drive or blank bezel" on page 47 • "1090 Keyboard" on - Lenovo V580c | Lenovo V580, V580c Hardware Maintenance Manual - Page 65
the screws 1 and 2 that secure the keyboard bezel. 2 2 2 11 1 1 1 1 1 1 1 1 Step 1 2 Screw (quantity) M2.5 × 8 mm, flat-head, nylon-coated (10) M2 × 3 mm, flat-head, nylon-coated (3) Remove the screws 3 . Color Black Silver Torque 4.0 kgfcm 1.85 kgfcm 3 3 3 Step 3 Screw (quantity) M2 - Lenovo V580c | Lenovo V580, V580c Hardware Maintenance Manual - Page 66
Detach the connectors as shown in the following illustration. 5 4 10 11 8 9 6 7 When installing: Ensure that all the connectors are attached firmly. In steps 12 , release the keyboard bezel in the direction shown by the arrow 13 . 12 12 12 13 12 12 12 60 Hardware Maintenance Manual 12 12 12 - Lenovo V580c | Lenovo V580, V580c Hardware Maintenance Manual - Page 67
V580 models 12 3 3 For Lenovo V580c models 1 2 3 3 Step 1 Screw (quantity) M2 × 3 mm, flat-head, nylon-coated (1) 1120 LED board For access, remove these FRUs in order: • "1010 Battery pack" on page 46 • "1020 Bottom slot cover" on page 46 Color Black Torque 1.85 kgfcm Chapter 7. Removing - Lenovo V580c | Lenovo V580, V580c Hardware Maintenance Manual - Page 68
56 • "1100 Keyboard bezel" on page 58 Removal steps of LED board Peel off the mylar tape in the direction shown by the arrow 1 . For Lenovo V580 models 1 For Lenovo V580c models 1 Remove the LED board in the direction shown by the arrow 2 . 62 Hardware Maintenance - Lenovo V580c | Lenovo V580, V580c Hardware Maintenance Manual - Page 69
For Lenovo V580 models 2 For Lenovo V580c models 2 1130 Click pad or touch pad bracket For access, remove these FRUs in order: • "1010 Battery pack" on page 46 • "1020 Bottom slot cover" on page 46 • "1030 Optical drive or blank bezel" on page 47 • "1090 Keyboard" on page 56 • " - Lenovo V580c | Lenovo V580, V580c Hardware Maintenance Manual - Page 70
Removal steps of click pad for Lenovo V580 models Remove the click pad cable and then push the click pad in the direction shown by the arrow 3 . 1 2 3 Remove the click pad in the direction shown by the arrow 4 . 4 64 Hardware Maintenance Manual - Lenovo V580c | Lenovo V580, V580c Hardware Maintenance Manual - Page 71
touch pad bracket for Lenovo V580c models Remove the screw 1 and then remove the touch pad bracket in the direction shown by the arrow 2 . 2 1 Step 1 Screw (quantity) M2 × 3 mm, flat-head, nylon-coated (1) 1140 Power board For access, remove these FRUs in order: • "1010 Battery pack" on page 46 - Lenovo V580c | Lenovo V580, V580c Hardware Maintenance Manual - Page 72
For Lenovo V580c models 2 1 Step 1 Screw (quantity) M2 × 3 mm, flat-head, nylon-coated (1) Color Black 1150 Microphone assembly For access, remove these FRUs in order: • "1010 Battery pack" on page 46 • "1020 Bottom is attached firmly to the system board. 66 Hardware Maintenance Manual - Lenovo V580c | Lenovo V580, V580c Hardware Maintenance Manual - Page 73
I/O board For access, remove these FRUs in order: • "1010 Battery pack" on page 46 • "1020 Bottom slot cover" on page firmly to the system board. 1170 USB board For access, remove these FRUs in order: • "1010 Battery pack" on page 46 • "1020 Bottom slot cover" on page 46 • "1030 Optical drive or - Lenovo V580c | Lenovo V580, V580c Hardware Maintenance Manual - Page 74
Memory modules" on page 49 • "1050 Hard disk drive assembly" on page 50 • "1060 PCI Express Mini Card for wireless LAN" on page 52 • "1070 mSATA solid-state drive" on page 54 • "1080 Backup battery" on page 55 • "1090 Keyboard" on page 56 • "1100 Keyboard bezel" on page 58 • "1170 USB board" on - Lenovo V580c | Lenovo V580, V580c Hardware Maintenance Manual - Page 75
Removal steps of DC-in connector Disconnect the DC-in connector 1 , and remove the screw 2 . Then remove the DC-in bracket and DC-in cable as shown in the following illustration. 1 4 2 3 4 Step 2 Screw (quantity) M2 × 3 mm, flat-head, nylon-coated (1) Color Black Torque 1.85 kgfcm 1190 System - Lenovo V580c | Lenovo V580, V580c Hardware Maintenance Manual - Page 76
Memory modules" on page 49 • "1050 Hard disk drive assembly" on page 50 • "1060 PCI Express Mini Card for wireless LAN" on page 52 • "1070 mSATA solid-state drive" on page 54 • "1080 Backup battery" on page 55 • "1090 Keyboard" on page 56 • "1100 Keyboard bezel" on page 58 Removal steps of system - Lenovo V580c | Lenovo V580, V580c Hardware Maintenance Manual - Page 77
For Lenovo V580 models 11 12 For Lenovo V580c models 11 12 Chapter 7. Removing and replacing a FRU 71 - Lenovo V580c | Lenovo V580, V580c Hardware Maintenance Manual - Page 78
modules" on page 49 • "1050 Hard disk drive assembly" on page 50 • "1060 PCI Express Mini Card for wireless LAN" on page 52 • "1070 mSATA solid-state drive" on page 54 • "1080 Backup battery" on page 55 • "1090 Keyboard" on page 56 • "1100 Keyboard bezel" on page 58 • "1150 Microphone assembly" on - Lenovo V580c | Lenovo V580, V580c Hardware Maintenance Manual - Page 79
Loosen the screws 2 to 8 . 7 6 5 2 3 8 4 Chapter 7. Removing and replacing a FRU 73 - Lenovo V580c | Lenovo V580, V580c Hardware Maintenance Manual - Page 80
attach the thermal fan assembly to the problem due to imperfect contact with a component. a b 1210 Microprocessor For access, remove these FRUs in order: • "1010 Battery wireless LAN" on page 52 • "1070 mSATA solid-state drive" on page 54 • "1080 Backup battery" on page 55 74 Hardware Maintenance - Lenovo V580c | Lenovo V580, V580c Hardware Maintenance Manual - Page 81
69 • "1200 Thermal fan assembly" on page 72 Attention: The microprocessor is extremely sensitive. When you service the microprocessor, avoid 1060 PCI Express Mini Card for wireless LAN" on page 52 • "1070 mSATA solid-state drive" on page 54 • "1080 Backup battery" on page 55 Chapter 7. Removing and - Lenovo V580c | Lenovo V580, V580c Hardware Maintenance Manual - Page 82
Removal steps of LCD unit Release the antenna cables from the cable guides. Then remove the screws 1 . 1 1 1 1 Step installing: • Route the antenna cables along the cable guides. As you route the cables, ensure that they are the cables to be damaged by the cable guides, or a wire to be broken. • - Lenovo V580c | Lenovo V580, V580c Hardware Maintenance Manual - Page 83
modules" on page 49 • "1050 Hard disk drive assembly" on page 50 • "1060 PCI Express Mini Card for wireless LAN" on page 52 • "1070 mSATA solid-state drive" on page 54 • "1080 Backup battery" on page 55 • "1090 Keyboard" on page 56 • "1100 Keyboard bezel" on page 58 • "1150 Microphone assembly" on - Lenovo V580c | Lenovo V580, V580c Hardware Maintenance Manual - Page 84
Removal steps of speaker assembly and base cover Remove the screws 1 . Then remove the speaker assembly 2 . 1 1 2 11 2 Step 1 Screw (quantity) M2.5 × 5.7 mm, flat-head, nylon-coated (4) Color Black Torque 4.0 kgfcm 78 Hardware Maintenance Manual - Lenovo V580c | Lenovo V580, V580c Hardware Maintenance Manual - Page 85
1 11 10 2 3 4 5 6 7 8 9 If the Windows Certificate of wireless LAN label / wireless LAN label for United States/Canada/Taiwan 8 PPT label for China 3G models 9 Malaysia SIRIM label 10 Vodafone label 12 Rating label 2010 LCD front bezel For access, remove these FRUs in order: • "1010 Battery - Lenovo V580c | Lenovo V580, V580c Hardware Maintenance Manual - Page 86
that all the latches are attached firmly. Then secure the bezel with the screws. 2020 Integrated camera For access, remove these FRUs in order: • "1010 Battery pack" on page 46 • "1220 LCD unit" on page 75 • "2010 LCD front bezel" on page 79 80 Hardware Maintenance - Lenovo V580c | Lenovo V580, V580c Hardware Maintenance Manual - Page 87
the placement to ensure that the connector is attached firmly. 2030 LCD panel, LCD cable, and hinges For access, remove these FRUs in order: • "1010 Battery pack" on page 46 • "1220 LCD unit" on page 75 • "2010 LCD front bezel" on page 79 Chapter 7. Removing and replacing a FRU 81 - Lenovo V580c | Lenovo V580, V580c Hardware Maintenance Manual - Page 88
the arrow 3 . Then detach the LCD cable as shown in the following illustration. 5 4 3 When installing: Ensure that the cable is attached firmly. 82 Hardware Maintenance Manual - Lenovo V580c | Lenovo V580, V580c Hardware Maintenance Manual - Page 89
1 2 Step 1 Screw (quantity) M2 × 3.5 mm, flat-head, nylon-coated (4) 2040 Antenna assembly and LCD rear cover For access, remove these FRUs in order: • "1010 Battery pack" on page 46 • "1220 LCD unit" on page 75 • "2010 LCD front bezel" on page 79 • "2020 Integrated camera" on page 80 • "2030 LCD - Lenovo V580c | Lenovo V580, V580c Hardware Maintenance Manual - Page 90
the LCD rear cover assembly and from the hinges in the direction shown by the arrows 1 . 1 1 Cable routing: Route the antenna cables along the cable guides and secure the antenna boards with tape. As you route the cables, ensure that they are not subject to any tension. Tension could cause the - Lenovo V580c | Lenovo V580, V580c Hardware Maintenance Manual - Page 91
10 Figure 1. Lenovo V580 front view 1 Integrated camera (on some models) 2 Wireless battery status indicator1 15 Power button 16 OneKey Recovery Pro program button 17 Speaker (left) 1 For the description of the indicators, see "Status indicators (Lenovo V580)" on page 38. © Copyright Lenovo - Lenovo V580c | Lenovo V580, V580c Hardware Maintenance Manual - Page 92
2 1 2 17 16 15 3 4 14 13 12 5 6 7 8 11 9 10 Figure 2. Lenovo V580c front view 1 Integrated camera (on some models) 2 Wireless antennas 3 Status indicators1 4 Speaker (right) 5 Power jack 6 USB connector 7 Optical drive or blank bezel 8 Fingerprint reader (on some models) 9 USB connector - Lenovo V580c | Lenovo V580, V580c Hardware Maintenance Manual - Page 93
Bottom view 1 2 3 4 10 5 6 7 8 9 Figure 3. Lenovo V580 and V580c bottom view 1 Battery latch (manual) 2 Battery pack 3 Battery latch (spring-loaded) 4 Security keyhole 5 Fan louvers 6 Monitor connector 7 RJ45 Ethernet connector 8 HDMI port 9 USB 3.0 connectors 10 Bottom slot cover1 1 The - Lenovo V580c | Lenovo V580, V580c Hardware Maintenance Manual - Page 94
88 Hardware Maintenance Manual - Lenovo V580c | Lenovo V580, V580c Hardware Maintenance Manual - Page 95
-service CRUs: These CRUs are isolated parts within the computer that are concealed by an access panel that is typically secured by more than two screws. Once the access panel is removed, the specific CRU is visible. Overall • "Overall for Lenovo V580 models" on page 90 • "Overall for Lenovo V580c - Lenovo V580c | Lenovo V580, V580c Hardware Maintenance Manual - Page 96
15 14 i 13 Table 4. Parts list-Overall for Lenovo V580 models No. FRU (Overall) a-j See "Miscellaneous parts" on page 98 1 LCD unit (see "LCD FRUs" on page 96) 2 LA58 Power Board 3 LA58 Upper Case 90 Hardware Maintenance Manual 1 2 a 3 b c 4 d 5 6 7 e f 8 9 g 10 h 11 12 FRU No. CRU ID 90000412 - Lenovo V580c | Lenovo V580, V580c Hardware Maintenance Manual - Page 97
Lenovo V580 models (continued) No. FRU (Overall) 4 LA58 FingerPrint Board 5 LA58 USB Board 6 LB58 Speaker L 7 LB58 Speaker R 8 Battery, 6-cell, 2.2 Ah, 48 Wh 8 Battery, 6-cell, 2.8 Ah, 62 Wh 9 LB58 Lower Case 10 Optical drive, 12.7 mm tray-in Rambo, DS-8A8SH 10 LA48 Microphone 15 mSATA solid-state - Lenovo V580c | Lenovo V580, V580c Hardware Maintenance Manual - Page 98
4. Parts list-Overall for Lenovo V580 models (continued) No. FRU (Overall) 15 mSATA solid-state drive, 16 G, LMT-16M3M 16 Wireless LAN, non-Intel 1x1 11bgn + BT4.0 Combo 16 Wireless LAN, non-Intel 2x2 11abgn + BT4.0 Combo 16 Wireless LAN, Intel 2x2 11bgn + BT4.0 Combo 16 Wireless LAN, Non-Intel 1x1 - Lenovo V580c | Lenovo V580, V580c Hardware Maintenance Manual - Page 99
20 19 18 17 16 15 h 14 Table 5. Parts list-Overall for Lenovo V580c models No. FRU (Overall) a-j See "Miscellaneous parts" on page 98 1 LCD unit (see "LCD FRUs" on page 96) 2 LA58C Power Board 3 LB58 LED Board W/Cable 1 2 a 3 4 b 5 c d 6 7 8 e 9 10 f 11 g 12 13 FRU No. CRU ID 90000570 N 90200814 - Lenovo V580c | Lenovo V580, V580c Hardware Maintenance Manual - Page 100
Lenovo V580c models (continued) No. FRU (Overall) 4 LB58 Upper Case W/TP 5 LA58C FingerPrint Board 6 LA58C USB Board 7 LB58 Speaker R 8 Battery, 6-cell, 2.2 Ah, 48 Wh 8 Battery, 6-cell, 2.8 Ah, 62 Wh 9 LB58 DC-IN Cable 10 G, 7200 rpm 94 Hardware Maintenance Manual FRU No. 90200819 90000569 90000571 - Lenovo V580c | Lenovo V580, V580c Hardware Maintenance Manual - Page 101
Lenovo V580c models (continued) No. FRU (Overall) 14 SATA hard disk drive, 500 G, 7200 rpm 15 LB48 Microphone 23.42384.001 16 LB58 Speaker L 17 mSATA solid-state drive, 16 G, U100 18 Wireless LAN, non-Intel 1x1 11bgn + BT4.0 Combo 18 Wireless 3M 2cPGA 21 Microprocessor, Intel I5-2520M 2.5G 3M 2c J1 - Lenovo V580c | Lenovo V580, V580c Hardware Maintenance Manual - Page 102
list-Overall for Lenovo V580c models (continued) No. FRU (Overall) 21 Microprocessor, Intel B820 1.7G Q0 2M 2cPGA 21 Microprocessor, Intel I5-3210M 2.5G L1 3M 2cPGA 21 Microprocessor, Intel I3-3110M 2.3G L1 3M 2cPGA 22 LB58 Thermal Module UMA W/FAN 22 LA58 Thermal Module DIS W/FAN 23 Keyboard (see - Lenovo V580c | Lenovo V580, V580c Hardware Maintenance Manual - Page 103
Table 6. Parts list - LCD No. FRU k See "Miscellaneous parts" on page 98 1 LA58 LCD Bezel 1 LA58C LCD Bezel W/Camera Hole 2 LA58 Hinge L+R 3 LA58 Antenna R 4 LA48 Camera 1M 5 LA58 LCD Cover 5 LA58C LCD Cover WO/Antenna 6 LA58 Antenna L 7 LCD panel, 15.6-inch, Wedge Glossy Keyboard Table 7. Parts - Lenovo V580c | Lenovo V580, V580c Hardware Maintenance Manual - Page 104
parts for Lenovo V580 models" on page 98 • "Miscellaneous parts for Lenovo V580c models" on page 99 Miscellaneous parts for Lenovo V580 models Note: Italicized letters in parentheses are references to the exploded view in "Overall for Lenovo V580 models" on page 90. 98 Hardware Maintenance Manual - Lenovo V580c | Lenovo V580, V580c Hardware Maintenance Manual - Page 105
Note: Italicized letters in parentheses are references to the exploded view in "Overall for Lenovo V580c models" on page 93. Table 10. Parts list - System miscellaneous parts FRU (c) LB58 FP Bracket (e) LB58 DC-IN Bracket (f LA48 ODD Bracket (g) LB58 ODD Bezel Rambo FRU no. 90200818 90200821 - Lenovo V580c | Lenovo V580, V580c Hardware Maintenance Manual - Page 106
Table 14. Parts list-3-pin (65 W) ac power adapters FRU 3-pin, Eup models 3-pin, EPA models 3-pin, CS2 plug 100 Hardware Maintenance Manual FRU no. 90000237 90200813 90201171 CRU ID N N N FRU no. 36200090 36200092 36200094 36200143 36200144 36200210 36200289 36200291 36200293 CRU ID * * * FRU - Lenovo V580c | Lenovo V580, V580c Hardware Maintenance Manual - Page 107
EPA models 3-pin, CS2 plug FRU no. 36200106 36200105 36200107 36200030 36200031 36200032 36200294 36200296 36200298 CRU ID * * * Power cords A Lenovo power cord for a specific country or region is usually available only in that country or region. Table 16. Parts list - 3-pin power cords (Linetek - Lenovo V580c | Lenovo V580, V580c Hardware Maintenance Manual - Page 108
-F+LS-5 1 m South Africa • Longwell LP-39+H03VV-F+LS-18 1 Switzerland • Longwell LP-37+H03VV-F+LS-18 1 m 102 Hardware Maintenance Manual FRU no. 145000597 145000588 145000593 145000594 CRU ID * * * * FRU no. 145000567 145000557 145000564 145000553 145000568 145000566 145000560 145000563 145000559 - Lenovo V580c | Lenovo V580, V580c Hardware Maintenance Manual - Page 109
Table 17. Parts list - 3-pin power cords (Longwell) (continued) Country or region Taiwan • Longwell LP-71+VCTF+LS-33 1 m U.K. • Longwell LP-61L+H03VV-F+LS-18 1 m U.S.A • Longwell LP-30B+SPT-2 18AWG+LS-18 1 m Table 18. Parts list - 3-pin power cords (Volex) Country or region Argentina • VOLEX VA2073+ - Lenovo V580c | Lenovo V580, V580c Hardware Maintenance Manual - Page 110
Table 18. Parts list - 3-pin power cords (Volex) (continued) Country or region U.K. • VOLEX MP5004+H03VV-F+VAC5S 1 m U.S.A • Volex US15S3+SPT-2 +VAC5S 1 m FRU no. 145000605 145000537 CRU ID * * 104 Hardware Maintenance Manual - Lenovo V580c | Lenovo V580, V580c Hardware Maintenance Manual - Page 111
the operation of any other product, program, or service. Lenovo may have patents or pending patent applications covering support applications where malfunction may result in injury or death to persons. The information contained in this document does not affect or change Lenovo product specifications - Lenovo V580c | Lenovo V580, V580c Hardware Maintenance Manual - Page 112
: Active Protection System Lenovo OneKey Windows is a trademark of the Microsoft group of companies. Intel is a trademark of Intel Corporation in the U.S. and/or other countries. Other company, product, or service names may be trademarks or service marks of others. 106 Hardware Maintenance Manual - Lenovo V580c | Lenovo V580, V580c Hardware Maintenance Manual - Page 113
- Lenovo V580c | Lenovo V580, V580c Hardware Maintenance Manual - Page 114
-
 1
1 -
 2
2 -
 3
3 -
 4
4 -
 5
5 -
 6
6 -
 7
7 -
8
-
9
-
10
-
11
-
12
-
13
-
14
-
15
-
16
-
17
-
18
-
19
-
20
-
21
-
22
-
23
-
24
-
25
-
26
-
27
-
28
-
29
-
30
-
31
-
32
-
33
-
34
-
35
-
36
-
37
-
38
-
39
-
40
-
41
-
42
-
43
-
44
-
45
-
46
-
47
-
48
-
49
-
50
-
51
-
52
-
53
-
54
-
55
-
56
-
57
-
58
-
59
-
60
-
61
-
62
-
63
-
64
-
65
-
66
-
67
-
68
-
69
-
70
-
71
-
72
-
73
-
74
-
75
-
76
-
77
-
78
-
79
-
80
-
81
-
82
-
83
-
84
-
85
-
86
-
87
-
88
-
89
-
90
-
91
-
92
-
93
-
94
-
95
-
96
-
97
-
98
-
99
-
100
-
101
-
102
-
103
-
104
-
105
-
106
-
107
-
108
-
109
-
110
-
111
-
112
-
113
-
114
 |
 |

Hardware Maintenance Manual
Lenovo V580 and V580c