Lexmark 44J0000 Setup Guide
Lexmark 44J0000 - J 110 Color Inkjet Printer Manual
 |
UPC - 734646207737
View all Lexmark 44J0000 manuals
Add to My Manuals
Save this manual to your list of manuals |
Lexmark 44J0000 manual content summary:
- Lexmark 44J0000 | Setup Guide - Page 1
Lexmark J110 Setup Guide www.lexmark.com - Lexmark 44J0000 | Setup Guide - Page 2
services, except those expressly designated by the manufacturer, are the user's responsibility. Lexmark and Lexmark with diamond design, MarkNet, and MarkVision are trademarks of Lexmark 2000 Lexmark International, Inc. All rights reserved. UNITED STATES GOVERNMENT RESTRICTED RIGHTS This software and - Lexmark 44J0000 | Setup Guide - Page 3
Lexmark International, Inc. 740 West New Circle Road Lexington, KY 40550 (859) 232-3000 Please see the online User's Guide for instructions, to a professional service person. • This product is designed, tested, and approved to meet strict global safety standards with the use of specific Lexmark - Lexmark 44J0000 | Setup Guide - Page 4
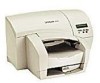
Meet your printer Your LexmarkTM J110 printer is a compact color and monochrome printer with a PerfectFinish™ cartridge to print great looking documents fast. Lexmark J110 Lexmark J110 with options Manual feeder Feeds a single sheet of media. MarkNetTM XP external print server option Connects - Lexmark 44J0000 | Setup Guide - Page 5
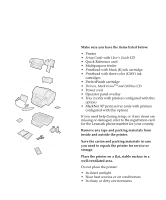
sure you have the items listed below: • Printer • Setup Guide with User's Guide CD • Quick Reference card • Multipurpose feeder • Printhead with black (K) ink cartridge • Printhead with three color (CMY) ink cartridges • PerfectFinish cartridge • Drivers, MarkVisionTM and Utilities CD • Power cord - Lexmark 44J0000 | Setup Guide - Page 6
Step 2: Install the PerfectFinish cartridge Your printer's unique PerfectFinish cartridge sets a new standard for high-quality printing on a wide range of plain paper. 1 Remove the manual feeder. 2 Remove the PerfectFinish cartridge from its packaging. Install the PerfectFinish cartridge 3 - Lexmark 44J0000 | Setup Guide - Page 7
3 Remove the tape covering the valve. 4 Hold the PerfectFinish cartridge so the valve is on the left side. Valve 4 Install the PerfectFinish cartridge - Lexmark 44J0000 | Setup Guide - Page 8
5 Align the cartridge with the latches inside the printer. Latch Latch 6 Lower the cartridge until it is under the latches Latch Latch as shown. 7 Push down on the cartridge to make sure it is securely in place. Install the PerfectFinish cartridge 5 - Lexmark 44J0000 | Setup Guide - Page 9
8 Reinstall the manual feeder. Warning: Keep the printer and computer turned off until you finish installing all options and cables. 6 Install the PerfectFinish cartridge - Lexmark 44J0000 | Setup Guide - Page 10
drawer from its packaging. 2 Place the drawer in the location you have chosen for your printer. 3 Using the handholds on either side of the printer, carefully lift it and place it on top of the drawer. The printer weighs 35 lb (16 kg); you may want someone to help you lift it. 4 Once - Lexmark 44J0000 | Setup Guide - Page 11
sure to remove the 250-sheet drawer before moving your printer to another location. Installing a The multipurpose feeder comes in two pieces: the base multipurpose feeder and the paper support. Base Paper support Manual feeder 1 Remove the manual feeder, if installed. 8 Install printer options - Lexmark 44J0000 | Setup Guide - Page 12
2 Remove the multipurpose feeder from its packaging. 3 Align the base between the open slots inside the printer and lower it into place. 4 Insert the paper support into the slot. Install printer options 9 - Lexmark 44J0000 | Setup Guide - Page 13
server 1 Make sure the printer and computer are turned off. 2 Remove the MarkNet XP print server, two hangers and cable from the packaging. If you are using a MarkNet X2000 series print server, refer to the documentation that came with it for installation instructions. 3 Insert the hangers into - Lexmark 44J0000 | Setup Guide - Page 14
5 Plug one end of the parallel cable into the connector as shown. 6 Plug the other end of the parallel cable and the power jack into the MarkNet XP external print server. Install printer options 11 - Lexmark 44J0000 | Setup Guide - Page 15
Step 4: Load paper Both tray 1 and tray 2 are loaded the same way. 1 Grip the tray tab and pull the tray completely out of the printer. 2 Squeeze the width guide and slide it all the way to the left. 12 Load paper - Lexmark 44J0000 | Setup Guide - Page 16
the paper in the tray, print side down. Do not exceed the stack height indicator on the right side of the tray. 5 Press the length guide button to slide the guide lightly against the bottom edge of the paper stack. Load paper 13 - Lexmark 44J0000 | Setup Guide - Page 17
The paper should lie flat in the tray (1). If the 1 length guide is pushed too tightly against the paper, the paper bends (2) against the paper supports, causing a jam as it is pulled into the printer. 2 6 Squeeze the width guide and slide it to the right until it is lightly touching the edge - Lexmark 44J0000 | Setup Guide - Page 18
To load media in the multipurpose feeder: 1 Load the media against the right paper guide with the print side facing you. 2 Squeeze the left paper guide lever and slide it lightly against the edge of the media. To remove media from the multipurpose feeder: 1 Push the paper release lever toward the - Lexmark 44J0000 | Setup Guide - Page 19
computer with a parallel cable, use an IEEE 1284-compliant parallel cable that supports bidirectional communication. We recommend Lexmark part number 1329605 (10 ft) or 1247498 (20 ft). Clip Clip 1 Make sure the printer and computer (and any attached peripherals) are turned off and unplugged from - Lexmark 44J0000 | Setup Guide - Page 20
Serial Bus (USB) cable, we recommend Lexmark part number 12A2405 (2 m). 1 Make sure the printer and computer (and any attached peripherals) are or side) of the computer. Attaching an Ethernet cable 1 Make sure the printer and computer (and any attached peripherals) are turned off. 2 Plug one - Lexmark 44J0000 | Setup Guide - Page 21
Attaching the power cord 1 Make sure the printer power switch is in the off (O) position. 2 Plug one end of the power cord into the power cord connector as shown. 3 Plug the other end into a properly grounded electrical outlet. 18 Attach cables - Lexmark 44J0000 | Setup Guide - Page 22
Install the printheads Your printer has two printheads: • One printhead has three color ink cartridges (C=Cyan, M=Magenta, Y=Yellow) already installed. • The other printhead has a black ink cartridge (K=Black) installed. 1 Turn on (|) the printer with the on/off switch. The printer requires several - Lexmark 44J0000 | Setup Guide - Page 23
2 Open the printer front cover. After a few seconds, the carrier moves to the load position at the center of the printer. 3 Lift the carrier handle. 20 Install the printheads - Lexmark 44J0000 | Setup Guide - Page 24
Printhead with Printhead with color (CMY) ink black (K) ink cartridges cartridge 4 Remove the printheads from their packaging. Do not remove the ink cartridges from the printheads. 5 Remove the plastic cushioning from the black ink printhead. Install the printheads 21 - Lexmark 44J0000 | Setup Guide - Page 25
6 Pull out the tape between the ink cartridge and the printhead. 7 Gently pull off the plastic cap from the bottom of the printhead. 22 Install the printheads - Lexmark 44J0000 | Setup Guide - Page 26
Release tab 8 Hold the black printhead as shown. Avoid touching the release tab on the ink cartridge or it will pop out of the printhead. 9 Insert the printhead tab under the small arrow on the right carrier slot. 10 Rotate the printhead toward the back of the printer until it snaps down into - Lexmark 44J0000 | Setup Guide - Page 27
11 Repeat steps 5 through 10 to install the color ink printhead in the left slot. 12 Pull the carrier handle all the way down to lock the printheads in place. If the handle does not close easily, make sure the printhead is installed under the slot (see step 9). 13 Close the front cover. 24 Install - Lexmark 44J0000 | Setup Guide - Page 28
not your preferred language, attach the overlay for your language to the printer operator panel. 1 Peel the protective backing off the overlay. 2 . 3 Peel the protective covering away from the overlay. Instructions for changing the language on your operator panel display are in Step 8 - Lexmark 44J0000 | Setup Guide - Page 29
not your preferred language, change the language of the text displayed on the operator panel before printing a menu settings page. 1 Make sure your printer is turned on and all attached peripherals are plugged in. 2 Press Menu> until Setup Menu appears on the operator panel display. 3 Press Select - Lexmark 44J0000 | Setup Guide - Page 30
tray 2 or multipurpose feeder option, be sure to update your printer configuration through your Windows printer driver. Refer to "Adding new hardware options" on the User's Guide CD for instructions. To list the current printer settings and verify that options are installed correctly, print a menu - Lexmark 44J0000 | Setup Guide - Page 31
visit our Web site at www.lexmark.com to download printer drivers, ColorSync profiles, watermark files, Help files, a Help library and status reporting tools. Refer to the CD Readme for a complete list of drivers included on the CD. If you are using a Macintosh printer driver, go to page 31. If you - Lexmark 44J0000 | Setup Guide - Page 32
install the version of software on the CD. 13 Click Agree to accept the license agreement. 14 Click Local Printer Install if your printer is connected directly to your computer and then click Next. 14a Click the Lexmark J110 printer and select a printer port. Load printer drivers and MarkVision 29 - Lexmark 44J0000 | Setup Guide - Page 33
with step 19, othewise skip to step 21. 19 Click where you want to install the software (the default is local computer). 20 Click Next. 21 Make sure Bi-Di Support for Drivers is checked and Printer Drivers is not checked. 22 Click Next. Make sure the status window is selected. 23 Click Finish - Lexmark 44J0000 | Setup Guide - Page 34
the correct AppleTalk zone (not required if the printer is connected to the computer with a USB cable). 15 Select the Lexmark J110 printer from the right hand list. 16 Close the Chooser. An alert that you changed your current printer appears. 17 Click OK. Load printer drivers and MarkVision 31 - Lexmark 44J0000 | Setup Guide - Page 35
Setup and click OK so your computer recognizes your new default printer. Installing network support For TCP/IP, NetWare, and Windows NT Servers, refer to can use the printer. Refer to the "AppleTalk and MarkNet print server" section on the User's Guide CD. 32 Load printer drivers and MarkVision - Lexmark 44J0000 | Setup Guide - Page 36
the User's Guide CD in the back of this book for: • Printing tips • Changing menu settings from the Windows driver, Macintosh driver, and the operator panel • Replacing ink cartridges, printheads and the PerfectFinish cartridge • Clearing paper jams • Troubleshooting Warning: If you move the printer - Lexmark 44J0000 | Setup Guide - Page 37
Troubleshooting tips Installing the PerfectFinish cartridge Problem Action You get a PerfectFinish Empty message, even though you just installed a new cartridge The cartridge is not installed correctly. • Remove the cartridge and re-install it, making sure it is under the latches. • Press Go to - Lexmark 44J0000 | Setup Guide - Page 38
Troubleshooting tips You get a Check Tray 2 paper jam message You get a printer to Ready status. • Make sure there is media loaded in the printer. Press Go to return the printer to Ready status. Installing the printheads Problem You get a Missing Printhead message You need to re-install a printhead - Lexmark 44J0000 | Setup Guide - Page 39
on. 6 If this does not clear the message, try steps 1-5 again. 7 If the 93X service message remains, try wiping the printhead tab circuit. See Cleaning the Printheads on the User's Guide CD for more information. The printer is printing, but Make sure you removed all tape and the plastic cap from - Lexmark 44J0000 | Setup Guide - Page 40
specific warranty information that came with your printer. Lexmark J110 This statement of limited warranty applies Lexmark or a Lexmark remarketer, referred to in this statement as "Remarketer." Warranty Lexmark warrants that this product: • Is manufactured from new parts or new and serviceable - Lexmark 44J0000 | Setup Guide - Page 41
to that user. Warranty service The warranty period is 12 months and starts on the date of original purchase as shown on the purchase receipt. To obtain warranty service you may be required to present proof of original purchase. Warranty service will be provided at a Lexmark designated location - Lexmark 44J0000 | Setup Guide - Page 42
installed a maintenance kit as specified (if applicable) • Use of print media outside of Lexmark specifications • Use of other than Lexmark supplies (such as inkjet cartridges, ink, pre-coating fluid and printheads) • Use of other than Lexmark product or component Statement of limited warranty 39 - Lexmark 44J0000 | Setup Guide - Page 43
any claim by you based on a third-party claim. This limitation of remedies also applies to any developer of materials supplied to Lexmark. Lexmark's and the developer's limitations of remedies are not cumulative. Such developer is an intended beneficiary of this limitation. 40 Statement of limited - Lexmark 44J0000 | Setup Guide - Page 44
Additional rights Some states do not allow limitations on how long an implied warranty lasts, or do not allow the exclusion or limitation of incidental or consequential damages. If such laws apply, the limitations or exclusions contained in this statement may not apply to you. This warranty gives - Lexmark 44J0000 | Setup Guide - Page 45
42 Statement of limited warranty - Lexmark 44J0000 | Setup Guide - Page 46
Viewing the User's Guide CD Insert the CD into the CD-ROM drive. If the CD does not launch ). You must have a copy of Adobe Acrobat Reader Version 4.0 or later to view the User's Guide CD. If Acrobat Reader is not installed on your operating system, visit the Adobe Web site at www.adobe.com - Lexmark 44J0000 | Setup Guide - Page 47
- Lexmark 44J0000 | Setup Guide - Page 48
Lexmark and Lexmark with diamond design are trademarks of Lexmark International, Inc., registered in the United States and/or other countries. © 2000 Lexmark International, Inc. 740 West New Circle Road Lexington, Kentucky 40550 www.lexmark.com
-
 1
1 -
 2
2 -
 3
3 -
 4
4 -
 5
5 -
 6
6 -
 7
7 -
8
-
9
-
10
-
11
-
12
-
13
-
14
-
15
-
16
-
17
-
18
-
19
-
20
-
21
-
22
-
23
-
24
-
25
-
26
-
27
-
28
-
29
-
30
-
31
-
32
-
33
-
34
-
35
-
36
-
37
-
38
-
39
-
40
-
41
-
42
-
43
-
44
-
45
-
46
-
47
-
48
 |
 |

www.lexmark.com
Setup Guide
Lexmark J110