Lexmark 560n Troubleshooting Guide - Page 2
Solving copy problems - toner cartridge
 |
UPC - 734646059534
View all Lexmark 560n manuals
Add to My Manuals
Save this manual to your list of manuals |
Page 2 highlights
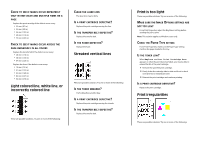
4 Press or repeatedly until System Settings appears, and then press OK. 5 Press or repeatedly until Time-Out appears, and then press OK. 6 Press or repeatedly until On appears, and then press OK. 7 Press or repeatedly to adjust the time, or use the keypad to enter a value, and then press OK. 8 Press or repeatedly to adjust the time, or use the keypad to enter a value, and then press OK. 9 Press repeatedly until Select Function appears. Solving copy problems Copier does not respond These are possible solutions. Try one or more of the following: ARE THERE ANY ERROR MESSAGES ON THE DISPLAY? Clear any error messages. CHECK THE POWER Make sure the printer is plugged in, the power is on, and Select Function appears. Scanner unit does not close Make sure there are no obstructions: 1 Lift the scanner unit. 2 Remove any obstruction keeping the scanner unit open. 3 Lower the scanner unit. Poor copy quality These are some examples of poor copy quality: • Blank pages • Checkerboard pattern • Distorted graphics or pictures • Missing characters • Faded print • Dark print • Skewed lines • Smudges • Streaks • Unexpected characters • White lines in print These are possible solutions. Try one or more of the following: ARE THERE ANY ERROR MESSAGES ON THE DISPLAY? Clear any error messages. IS THE TONER LOW? When Replace Print Cartridge Soon appears or when the print becomes faded, you may be able to extend the life of the print cartridge: 1 Remove the specified print cartridge. 2 Firmly shake the cartridge side-to-side and front-to-back several times to redistribute toner. 3 Reinsert the print cartridge and continue printing. IS THE SCANNER GLASS DIRTY? Clean the scanner glass with a clean, lint-free cloth dampened with water. IS THE COPY TOO LIGHT OR TOO DARK? To darken or lighten the overall color levels of your copies: 1 From the printer control panel, press System. 2 Press or repeatedly until Default Settings appears, and then press OK. 3 Press or repeatedly until Copy Defaults appears, and then press OK. 4 Press or repeatedly until Color Saturation appears, and then press OK. 5 Press or repeatedly until Higher, Normal, or Lower appears, and then press OK. 6 Press repeatedly until Select Function appears. ADJUST THE COPY QUALITY 1 From the printer control panel, press System. 2 Press or repeatedly until Default Settings appears, and then press OK. 3 Press or repeatedly until Copy Defaults appears, and then press OK. 4 Press or repeatedly until Output Quality appears, and then press OK. 5 Press or repeatedly until Standard or Enhanced appears, and then press OK. 6 Press repeatedly until Select Function appears. CHECK THE QUALITY OF THE ORIGINAL DOCUMENT Make sure the quality of the original document is satisfactory. CHECK THE DOCUMENT PLACEMENT Make sure the document or photo is loaded facedown on the scanner glass in the upper left corner.
-
 1
1 -
 2
2 -
 3
3 -
 4
4 -
 5
5 -
 6
6 -
 7
7 -
 8
8 -
9
 |
 |