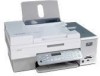
Lexmark 6570 User's Guide
Lexmark 6570 - X Color Inkjet Manual
 |
UPC - 734646047951
View all Lexmark 6570 manuals
Add to My Manuals
Save this manual to your list of manuals |
Lexmark 6570 manual content summary:
- Lexmark 6570 | User's Guide - Page 1
6500 Series User's Guide May 2007 www.lexmark.com - Lexmark 6570 | User's Guide - Page 2
. Lexmark is not responsible for the use of other replacement parts. CAUTION: Do not use the fax feature during a lightning storm. Do not set up this product or make any electrical or cabling connections, such as the power supply cord or telephone, during a lightning storm. SAVE THESE INSTRUCTIONS. - Lexmark 6570 | User's Guide - Page 3
system notice...16 Wireless network compatibility...16 Setting up the printer 17 Checking the box contents...17 Understanding the parts of the printer 18 Standalone setup...20 Installing the printer on additional network computers 25 Setting up the printer on a Windows operating system 26 - Lexmark 6570 | User's Guide - Page 4
...55 Installing the printer on a network...55 Sharing the printer on a network ...55 Configure network printers ...56 Types of wireless networks ...56 Tips for using network adapters ...57 Advanced wireless setup...57 Creating an ad hoc wireless network using Windows 57 Adding a printer to an - Lexmark 6570 | User's Guide - Page 5
75 Printing on both sides of the paper (duplexing) manually 76 Changing printer settings...76 Saving and deleting print settings...76 Resetting printer software to factory default settings 77 Working with photos 78 Retrieving and managing photos...78 Inserting a memory card...78 Inserting a flash - Lexmark 6570 | User's Guide - Page 6
the scanner glass 99 Copying on both sides of the paper using the Automatic Document Feeder (ADF 99 Copying photos...100 Copying a photo using images for editing...106 Scanning a photo to Work with Documents and Photos 106 Scanning multiple photos at one time using the computer 107 Creating - Lexmark 6570 | User's Guide - Page 7
number ...113 Sending a fax using the software ...113 Sending a fax using the control panel ...114 Sending a fax while listening to a call (On Hook Dial 115 Sending a broadcast fax at a scheduled time 115 Receiving a fax...116 Receiving a fax manually...116 Setting a fax manual answer code ...116 - Lexmark 6570 | User's Guide - Page 8
the exterior of the printer 135 Ordering supplies...135 Ordering print cartridges...135 Ordering paper and other supplies ...136 Troubleshooting...137 Setup Troubleshooting...137 Incorrect language appears on the display 137 Power button is not lit ...138 Software does not install ...138 Page does - Lexmark 6570 | User's Guide - Page 9
Ping the access point ...152 Ping the printer ...152 Run the Wireless Setup Utility (Windows users only 153 Check printer ports (Windows users only 153 Print troubleshooting...154 Partial 4 x 6 in. (10 x 15 cm) photo prints when using a PictBridge-enabled digital camera 154 Improving print - Lexmark 6570 | User's Guide - Page 10
Memory card cannot be inserted ...176 Nothing happens when memory card is inserted 177 Photos do not transfer from a memory card across a wireless network 177 Copy troubleshooting...178 Copier does not respond ...178 Scanner unit does not close ...178 Poor copy quality ...179 Partial document or - Lexmark 6570 | User's Guide - Page 11
Alignment Error...191 Cartridge Error (1102, 1203, 1204, or 120F 192 Black Ink Low / Color Ink Low / Photo Ink Low 192 Clear Carrier Jam ...192 Cover Open ...193 Error 1104...193 Left Cartridge Error / Right Cartridge Error 193 Left Cartridge Incorrect / Right Cartridge Incorrect 193 Left - Lexmark 6570 | User's Guide - Page 12
Networking glossary 212 Index...214 12 - Lexmark 6570 | User's Guide - Page 13
The User's Guide gives you instructions for setting up You can find this document in the printer box or on the hardware and software (on Windows operating Lexmark Web site at www.lexmark.com. systems) and some basic instructions for using the printer. Note: If your printer supports Macintosh - Lexmark 6570 | User's Guide - Page 14
(if supported by The installation screen appears. your printer) Note: If necessary, click ŒAll Programs Œ • Troubleshooting problems with printing, copying, Run. In Windows XP and earlier versions, click scanning, faxing, paper jams, and misfeeds Start Œ Run, and then type D:\setup, where - Lexmark 6570 | User's Guide - Page 15
free of defects in printer, or set forth at printer. materials and workmanship for a www.lexmark.com. period of 12 months after the 1 Click CUSTOMER SUPPORT. original date of purchase. 2 Click Warranty Information. 3 From the Statement of Limited Warranty section, click Inkjet & All-In-One - Lexmark 6570 | User's Guide - Page 16
. For complete descriptions: • Windows users-See the User's Guide. • Macintosh users-If your product supports Macintosh, see the Mac Help installed with the printer software. Wireless network compatibility Your printer contains an IEEE 802.11g wireless print server. Your printer is compatible with - Lexmark 6570 | User's Guide - Page 17
Initial setup directions 7 User's Guide Printed booklet that serves as a guide. Note: Complete user information (User's Guide: Comprehensive Version or Mac Help) can be found on the installation software CD. 8 Installation software CD for Windows and Mac • Installation software for the printer - Lexmark 6570 | User's Guide - Page 18
these items on the scanner glass. 5 Automatic Document Feeder (ADF) output tray Hold documents as they exit from the ADF. 6 Wi-Fi indicator Check wireless status: • Off indicates that no wireless option is installed. • Orange indicates that the printer is ready for wireless connection, but not - Lexmark 6570 | User's Guide - Page 19
carrier Install, replace, or remove a print cartridge. 3 Power supply with port Plug the power cord into the power supply at the back of the printer and then into the wall outlet. 4 Duplex cover • Print on both sides of a sheet of paper. • Remove paper jams. 5 Lexmark N2050 (internal wireless - Lexmark 6570 | User's Guide - Page 20
port except when plugging in or removing a USB cable or installation cable. 1 2 3 4 1 2 3 5 8 7 6 Notes: • Place the printer near the computer during setup. If you're setting up on a wireless network, you may move the printer after setup is complete. • You may need to purchase a USB cable - Lexmark 6570 | User's Guide - Page 21
2 Remove all tape and packing material from all areas of the printer. 3 Raise the control panel. 4 Extend the paper exit tray. 5 Raise the paper support. 21 - Lexmark 6570 | User's Guide - Page 22
6 Extend the paper guides. 7 Load paper. 8 Connect the power cord. 9 Make sure the power is on. 2 1 22 - Lexmark 6570 | User's Guide - Page 23
want appears on the display. b Press to save. 11 If prompted, set the country/region. 121 a Using the control panel of the printer, press or repeatedly until the country or region you want appears on the display. b Press to save. 12 Open the printer. 13 Press down on the cartridge carrier levers. 23 - Lexmark 6570 | User's Guide - Page 24
14 Remove the tape from the black print cartridge, and insert it in the left cartridge carrier. 15 Close the black cartridge carrier lid 16 Remove the tape from the color print cartridge, and insert it in the right cartridge carrier. 17 Close the color cartridge lid. 24 - Lexmark 6570 | User's Guide - Page 25
the alignment page are normal and not an indication of a problem. Installing the printer on additional network computers If you are installing your network printer for use with multiple computers on the network, insert the installation CD into each additional computer, and follow the instructions on - Lexmark 6570 | User's Guide - Page 26
that Lexmark software is trying to communicate with your computer system. Always allow these programs to communicate. This is necessary for the printer to work properly. Lexmark XXXX Series Installation Welcome... Click Install to begin. To prevent errors during installation, close all open programs - Lexmark 6570 | User's Guide - Page 27
equipment, use the telephone line adapter included in the box with the printer. 1 Connect one end of the telephone cord into the Line port of the printer. 2 Connect the adapter to the telephone line that came with the printer. Note: The UK adapter is shown. Your adapter may look different, but - Lexmark 6570 | User's Guide - Page 28
Connect your telecommunications equipment directly to the EXT port on the back of the printer. Warning: Do not touch cables or the printer in the area shown while actively sending or receiving a fax. Country/region • Saudi Arabia • United Arab Emirates • Egypt • Bulgaria • Czech Republic • Belgium - Lexmark 6570 | User's Guide - Page 29
to the EXT port on the back of the printer. Warning: Do not touch cables or the printer in the area shown while actively sending or receiving a fax. Country/region • Germany • Austria • Switzerland There is a plug installed in the EXT port of the printer. This plug is necessary for the proper - Lexmark 6570 | User's Guide - Page 30
Choosing a fax connection You can connect the printer with equipment such as a telephone, an answering machine, or a computer modem. If problems occur, see "Setup Troubleshooting" on page 137. Note: The printer is an analog device that works best when directly connected to the wall jack. Other - Lexmark 6570 | User's Guide - Page 31
2 Connect one telephone cord into the LINE port of the printer, and then plug it into an active telephone wall jack. 3 Remove the protective plug from the EXT port of the printer. 4 Connect a second telephone cord from the telephone to the answering machine. 5 Connect a third telephone cord from the - Lexmark 6570 | User's Guide - Page 32
to a telephone wall jack to make copies or to send and receive faxes without using a computer. 1 Make sure you have a telephone cord and a telephone wall jack. 2 Connect one end of the telephone cord into the LINE port of the printer. 3 Connect the other end of the telephone cord into an active - Lexmark 6570 | User's Guide - Page 33
answering machine and the other N slot of the telephone wall jack. Connecting to a computer with a modem Connect the printer to a computer with a modem to send faxes from the software application. Note: Setup steps may vary depending on your country or region. For more information on connecting the - Lexmark 6570 | User's Guide - Page 34
. 4 Connect a second telephone cord from the computer modem to the EXT port of the printer. Connecting to a telephone Connect a telephone to the printer to use the fax line as a normal telephone line. Then set up the printer wherever your telephone is located to make copies or to send and receive - Lexmark 6570 | User's Guide - Page 35
: Setup steps may vary depending on your country or region. For more information on connecting the printer to telecommunications equipment, see the related topic, "Using an RJ11 adapter." 1 Make sure you have the following: • A telephone • Two telephone cords • A telephone wall jack 2 Connect one - Lexmark 6570 | User's Guide - Page 36
line" area, select Behind PBX from the Dialing Method drop-down list. 6 Click OK to save the setting. Using a digital phone service The fax modem is an analog device. Certain devices can be connected to the printer so that digital telephone services can be used. • If you are using an ISDN telephone - Lexmark 6570 | User's Guide - Page 37
. 7 Settings Access the settings default screen and change printer settings. Note: Other button lights are off when this button is selected. 8 Lighter / Darker Adjust the brightness of a copy, fax, or photo. 9 Display the Copy, Scan, Fax, or Photo Card menu, depending on which mode is selected - Lexmark 6570 | User's Guide - Page 38
• Cancel a print, copy, scan, or fax job in progress. • Clear a fax number or end a fax transmission and return to the fax default screen. • Exit a menu or submenu, and return to the default copy, scan, fax, or photo card screen. • Clear current settings or error messages, and return to default - Lexmark 6570 | User's Guide - Page 39
(1-89) or Group Dial numbers (90-99). 5 Start Color Start a color copy, scan, fax, or photo print job, depending on which mode is selected. 6 Start Black Start a black-and-white copy, scan, fax, or photo print job, depending on which mode is selected. Saving settings In a setting menu, an - Lexmark 6570 | User's Guide - Page 40
Setup appears. 3 Press . 4 Press or repeatedly until Clear Settings Timeout appears. 5 Press . 6 Press or repeatedly until Never appears. 7 Press . To change one perform maintenance functions and also change and save various printer settings. For information on saving temporary and other - Lexmark 6570 | User's Guide - Page 41
Maintenance Paper Setup Device Setup Defaults You can Select: • Ink Level to view the ink level of the color cartridge. Press or to view the ink level of the black (or photo) cartridge. • Clean Cartridges to clean the print cartridge nozzles. • Align Cartridges to align the cartridge. • Print Test - Lexmark 6570 | User's Guide - Page 42
These instructions apply only if you received one or more additional language control panels with the printer. 1 Lift the scanner unit. 2 Grasp the control panel at the front. Lift and rotate it back to remove it (if one is installed). 3 Choose the correct control panel for your language. 4 Align - Lexmark 6570 | User's Guide - Page 43
for your operating system. 4 Follow the instructions on the computer screen to download the driver and install the printer software. Understanding the printer software Using the software that installed with your printer, you can edit photos, send faxes, maintain your printer, and do many other tasks - Lexmark 6570 | User's Guide - Page 44
• In Windows XP and earlier, click Start. 2 Click Programs orAll Programs Œ Lexmark 6500 Series. 3 Select Productivity Studio. Click the Productivity Studio icon for the task you want to complete. Depending on the printer you have, some of the features of this software may not be applicable. Click - Lexmark 6570 | User's Guide - Page 45
printing photos, troubleshooting printing problems, installing print cartridges, and performing maintenance tasks. To open the Solution Center, use one of the following methods. Method 1 Method 2 1 From the desktop, double-click on the Solution Center icon. 2 Click Setup and diagnose printer. The - Lexmark 6570 | User's Guide - Page 46
Troubleshoot other ink problems. Turning printing voice notification on or off The printer has a voice notification feature that tells you when printing starts and when it is completed. To turn the voice notification on or off: 1 Do one of the following: • In Windows Vista, click . • In Windows XP - Lexmark 6570 | User's Guide - Page 47
contain an internal wireless print server that allows the printer to be used on a wireless network. If your printer does not have an internal wireless print server already installed, you can purchase one separately. Use the following instructions to install the internal wireless print server: 1 Turn - Lexmark 6570 | User's Guide - Page 48
print server into the printer. For more information, see "Installing an optional internal wireless print server" in the "Setting up the printer" chapter. 2 Click Start ΠPrograms or All Programs ΠLexmark 6500 Series. 3 Click Wireless Setup. 4 Click Start. 5 Follow the instructions on the computer - Lexmark 6570 | User's Guide - Page 49
the following diagrams represent Lexmark printers with Lexmark internal print servers built in or installed in them so that they can communicate over a network. Lexmark internal print servers are devices made by Lexmark to enable Lexmark printers to be connected to wired or wireless networks. Wired - Lexmark 6570 | User's Guide - Page 50
to the Internet through a DSL or a cable modem. Internet Scenario 2: Computer, laptop, and printer connected wirelessly with Internet • A computer, a laptop, and a printer are connected wirelessly to a wireless router. • The network is connected to the Internet through a DSL or a cable modem - Lexmark 6570 | User's Guide - Page 51
wireless mode (the type of wireless network you are using, either infrastructure or ad hoc) • The type of security used on the network (WEP, WPA, or WPA2) • Any applicable Media Access Control (MAC) address. If your printer has a factory installed internal wireless print server, the MAC address is a - Lexmark 6570 | User's Guide - Page 52
network, the MAC address of the printer must be included in the MAC filter list. Printing a network setup page A network setup page lists your network configuration settings. Note: You can print a network setup page only after a print server has been installed. To print a network setup page: 1 From - Lexmark 6570 | User's Guide - Page 53
than one is listed, match the MAC address of the print server to the one in the list. For more information, see "Finding the MAC address" on page 51. Checking the port setting Windows 2000 or XP users only: 1 Click Start ΠSettings ΠPrinters or Printers and Faxes. 2 Right-click the Lexmark 6500 - Lexmark 6570 | User's Guide - Page 54
tray, load paper, install the print cartridges, and align the cartridges. 7 Look at the W-Ffi Indicator on your printer and select the matching option on the software screen. 8 Follow the instructions on the next several screens to continue with setup. 9 Select Yes to set up fax functions. 10 Follow - Lexmark 6570 | User's Guide - Page 55
the directions on the computer screen until installation is complete. Windows 2000 or Windows XP users only: 1 For more information, see the setup information that came with your printer. 2 Click Start ΠSettings ΠPrinters. 3 Right-click your printer icon, and select Sharing. 4 Click Shared as - Lexmark 6570 | User's Guide - Page 56
click Next. 4 Select Manual Setup. 5 From the Network Printer Setup dialog, select the Peer-to-Peer client option, and then click Next. 6 Select the appropriate printer from the list, and then click Next. 7 Select the software you want to install, and then click Next. 8 When setup is complete, click - Lexmark 6570 | User's Guide - Page 57
use on that network. If you don't have a wireless access point (wireless router) or would like to set up a standalone network between your printer and a computer with a wireless network adapter, you can set up an ad hoc network. For Windows Vista users 1 Click ΠControl Panel ΠNetwork and Internet - Lexmark 6570 | User's Guide - Page 58
4. The installer will configure the printer for use with the computer. 8 Store a copy of your network name and security information in a safe place for future reference. For Windows XP users 1 Click Start ΠSettings ΠControl Panel ΠNetwork Connections. 2 Right-click Wireless Network Connections - Lexmark 6570 | User's Guide - Page 59
and then click the Refresh network list button. 21 Click Start ΠPrograms or All Programs ΠLexmark 6500 Series. 22 Click Wireless Setup Utility. Note: You may be prompted to connect the printer to the computer again using the installation cable as part of the setup process. 23 Follow the prompts on - Lexmark 6570 | User's Guide - Page 60
used or damaged. • If you are using specialty paper, you follow the instructions that came with it. • You do not force paper into the printer. 2 Before loading paper the first time, slide the paper guides out toward the edges of the paper support. You can load up to: • 100 sheets of plain paper • 25 - Lexmark 6570 | User's Guide - Page 61
bars. 1 Load envelopes in the center of the paper support with the stamp location in the upper left corner. 2 Make sure: • The print side of the envelopes faces you. • The envelopes are designed for use with inkjet printers. • The paper guides rest against the edges of the envelopes. Notes: • Do - Lexmark 6570 | User's Guide - Page 62
: • The cards are loaded in the center of the paper support. • The paper guides rest against the edges of the cards. Note: Photo cards require more drying time. Remove each photo card as it exits, and allow it to dry to avoid ink smudging. Loading transparencies You can load up to 50 transparencies - Lexmark 6570 | User's Guide - Page 63
the top cover. 4 Feed the leading edge of the banner paper into the printer first. 5 Make sure: • The paper is loaded in the center of the paper support. • The paper guides rest against the edges of the paper. Loading original documents on the scanner glass You can scan and then print photos, text - Lexmark 6570 | User's Guide - Page 64
Note: The maximum scan area for the scanner glass is 216 x 297 mm (8.5 x 11.7 in.). 1 Open the top cover. 2 Place the original document or item facedown on the scanner glass in the lower right corner. Note: Photos should be loaded as shown. 3 Close the top cover to avoid dark edges on the scanned - Lexmark 6570 | User's Guide - Page 65
document into the Automatic Document Feeder tray for scanning, copying, and faxing. You can load A4, letter, or legal size paper into photos, small items, or thin media (such as magazine clippings) into the Automatic Document Feeder. Place these items on the scanner glass. 2 Adjust the paper guide - Lexmark 6570 | User's Guide - Page 66
Custom paper • Pre-punched paper • Reinforced edge copier paper • Preprinted forms • Letterhead paper Make sure • The document is loaded text side up. • The paper guide is against the edge of the paper. • You do not use media printed with metallic ink particles. • You avoid embossed designs. 66 - Lexmark 6570 | User's Guide - Page 67
printer-friendly version of any Web page. 1 Load paper. 2 Open a Web page using Microsoft Internet Explorer 5.5 or later. 3 If you want to check or change your print settings: a From the toolbar area, click Lexmark ΠPage Setup Print Preview window, then click Print in the Print dialog that opens or - Lexmark 6570 | User's Guide - Page 68
the printable side, see the instructions that came with the paper.) 2 Open a Web page with Microsoft Internet Explorer 5.5 or later. On the Toolbar, the number of photos valid for printing appears next to Photos. 3 If no number appears next to Photos: a From the Lexmark logo drop-down menu, select - Lexmark 6570 | User's Guide - Page 69
, or Setup. 3 Click the Quality/Copies tab. 4 From the Multiple Copies section, click Collate Copies. 5 Click OK to close any printer software dialog boxes that are open. 6 Print the document. Notes: • This option is available only when you are printing multiple copies. • If printing photos, to - Lexmark 6570 | User's Guide - Page 70
XP, click Start ΠSettings ΠPrinters and Faxes. 2 Right-click the Lexmark 6500 Series icon. 3 Select Pause. Canceling print jobs 1 In Windows Vista, click ΠControl Panel ΠPrinter. In Windows XP, click Start ΠSettings ΠPrinters and Faxes. 2 Right-click the Lexmark 6500 Series icon. 3 Select Open - Lexmark 6570 | User's Guide - Page 71
envelopes use landscape orientation. • Make sure the same orientation is also selected in the software application. 7 Click OK to close any printer software dialogs that are open. 8 Click OK or Print. Printing greeting cards, index cards, photo cards, and postcards 1 Load greeting cards, index cards - Lexmark 6570 | User's Guide - Page 72
ΠAdd Photo from Scanner. 4 If you are not scanning a new item, open the folder that contains the photo you want to print as a poster. 5 Drag the photo to the Print a Multi-Page Poster preview area of the screen. 6 Click Next Step. 7 From the "Paper size to print poster on" drop-down list, select - Lexmark 6570 | User's Guide - Page 73
are stacked, one on top of the other, keeping the correct page order. The stacked bundles can be bound to make a booklet. When printing with a heavier paper stock, select a smaller number of Printed sheets per bundle. 7 Click OK to close any printer software dialog boxes that are open. 8 Print the - Lexmark 6570 | User's Guide - Page 74
-on transfers 1 Load up to 10 iron-on transfers. 2 With an image open, click File ΠPrint. 3 Click Properties, Preferences, Options, or Setup. 4 From the Print Layout tab, select Mirror if you want the printer software to flip the image. Select Normal if you have a program that automatically flips - Lexmark 6570 | User's Guide - Page 75
print two-sided documents on another size or type of paper, use the manual duplexing method. To print a two-sided copy, the light must be on. The printer software. To access the Duplexing settings: 1 With a document open, click File ŒPrint. button works in tandem with the Duplexing settings in the - Lexmark 6570 | User's Guide - Page 76
of the sheets. 1 With a document open, click File ΠPrint. 2 Click Properties, Preferences, Options or Setup. 3 Click the Print Layout tab. 4 From the Duplexing area, select Manual from the drop-down box. 5 Select the Print manual duplex instructions check box. 6 Press . 7 The printer prints the odd - Lexmark 6570 | User's Guide - Page 77
Delete. Resetting printer software to factory default settings Windows 2000, Windows XP, or Windows Vista users 1 In Windows Vista, click ΠControl Panel ΠPrinter. In Windows 2000 and Windows XP, click Start ΠSettings ΠPrinters or Printers and Faxes. 2 Right-click the Lexmark 6500 Series icon - Lexmark 6570 | User's Guide - Page 78
Working with photos Retrieving and managing photos Inserting a memory card 1 Insert a memory card. • Insert the card with the brand name label facing up. • If there is an arrow on the card, make sure it points toward the printer. • Make sure you connect the memory card to the adapter that came with - Lexmark 6570 | User's Guide - Page 79
recognizes that a memory card is installed, the message Memory Card Detected appears. If the printer does not read the memory card, remove and reinsert it. For more information, see "Memory card troubleshooting" on page 176. Notes: • The printer recognizes one active media device at a time. • If - Lexmark 6570 | User's Guide - Page 80
you insert more than one media device, a message appears on the display prompting you to designate the device you want the printer to recognize. Understanding the Photo Card menu 1 If necessary, press Photo Card, or insert a memory card or a flash drive into the printer. 2 Press or repeatedly until - Lexmark 6570 | User's Guide - Page 81
-enabled digital camera to the printer, and use the camera to control printing photos. 1 Insert one end of the USB cable into error message will be displayed on the control panel of the printer. For more information, see the documentation that came with your camera. • The printer reads only one - Lexmark 6570 | User's Guide - Page 82
. For more information on making camera selections, see the documentation that came with your camera. 1 Connect a PictBridge-enabled digital camera to the printer. a Insert one end of the USB cable into the camera. Note: Use only the USB cable that came with the digital camera. b Insert the other - Lexmark 6570 | User's Guide - Page 83
connected to a wireless network, you will need to select the printer. Note: For a network connection, you must manually open the application and select the printer you want to use. The Productivity Studio software launches automatically on your computer. 2 Click Automatically save all photos to "My - Lexmark 6570 | User's Guide - Page 84
with the label facing the printer control panel. The Lexmark Imaging Studio software launches automatically on your computer. Note: For a wireless network connection, you must first open the application and then select the printer you wish to use. 2 Click Select photos to save. 3 Click Deselect All - Lexmark 6570 | User's Guide - Page 85
the computer. 2 If you are using Windows Vista, an "AutoPlay" screen appears. Click Transfer Photos to your computer using the Productivity Studio. 3 If you are using Windows XP, a "What do you want Windows to do?" screen appears. Click Transfer Photos to your computer using the Productivity Studio - Lexmark 6570 | User's Guide - Page 86
one date, selections will include Last Date and Date Range. • To choose a date range, press and then press or repeatedly until the desired date is displayed. Date ranges are displayed by month and year starting with the most recent month. 10 Press Start Color or Start Black or the printer in the - Lexmark 6570 | User's Guide - Page 87
to", and choose to Automatically Save, Manually Save, or Print your photos from the photo storage device connected to your computer. b photos Cropping a photo 1 From the Productivity Studio Welcome Screen, click File ΠOpen to select the image you want to edit. 2 With an image open, click Crop Photo - Lexmark 6570 | User's Guide - Page 88
your image. Note: Click Undo at the top of the window if you are not satisfied with the results after applying any of the One-Click Auto Fixes. Reducing the red-eye effect in a photo 1 From the Productivity Studio Welcome Screen, click File ΠOpen to select the image you want to edit. 2 With an - Lexmark 6570 | User's Guide - Page 89
an image open, click the Enhancements tab. 3 Click Enhance. 4 Use the slider to adjust the Enhance setting. You can preview the changes to your image by comparing the Before and After preview panes at the top of the window. Note: Click Automatic to let the software automatically enhance your photo - Lexmark 6570 | User's Guide - Page 90
to reject them. Note: You can let the software automatically adjust only the brightness of the image by clicking Automatic Brightness on the Quick Fixes tab. Applying a color effect to a photo 1 From the Productivity Studio Welcome Screen, click File ΠOpen to select the image you want to edit - Lexmark 6570 | User's Guide - Page 91
, see the instructions that came with the paper.) 2 Insert a CD or any removable storage device (such as a flash drive, memory card, or digital camera) into the computer. a If you are using Windows XP or Windows Vista, a "What do you want Windows to do?" screen appears. Click Transfer Photos to your - Lexmark 6570 | User's Guide - Page 92
card, select Print your Photo Greeting Card from the Share tab. 9 Select the number of copies from the Copies drop-down list. 10 Select the copy quality from the Quality drop-down list. 11 Select the paper size from the Paper Size in Printer drop-down list. Paper sizes supported Dimensions A4 210 - Lexmark 6570 | User's Guide - Page 93
• For the 20 most recent photos, if there are 20 or more photos on the card • By date, if the photos on the card were taken on more than one date 8 Press . 9 Press again. One or more proof sheets print. 10 Follow the instructions on the proof sheet to select which photos to print, the number of - Lexmark 6570 | User's Guide - Page 94
side is the printable side, see the instructions that came with the paper.) Note: Make sure the paper matches the size you selected on the proof sheet. 16 Press Start Color or Start Black to print your photos. Printing photos by number You can print photos using the numbers assigned to them on - Lexmark 6570 | User's Guide - Page 95
, see "Error messages on the computer screen" on page 197. • Values selected within the menu items are the settings used for Pictbridge printing if no explicit selection is made from the camera. 3 Follow the instructions in the camera documentation to select and print photos. Note: If the printer is - Lexmark 6570 | User's Guide - Page 96
or repeatedly until Print DPOF appears. 6 Press Start Color or Start Black. Printing photos by date range 1 Load photo paper with the glossy or printable side facing you. (If you are not sure which side is the printable side, see the instructions that came with the paper.) 2 Insert a memory card or - Lexmark 6570 | User's Guide - Page 97
. 6 Press . Note: The selected color effect applies to all the photos you print until the active memory card or flash drive is removed. Creating print your slideshow. 6 Click View Show in the lower-right corner of the window to start the slideshow. Note: You can exit the slideshow any time by moving - Lexmark 6570 | User's Guide - Page 98
not want to change a setting, press Start Color or Start Black. 3 If you want to change a setting, press . Quality* Adjust the quality of a copy. Paper Setup Specify the size and type of the paper loaded. image to print on a page. Collate Print one or more copies in the correct order. N-Up - Lexmark 6570 | User's Guide - Page 99
the paper using the scanner glass The printer has a built-in duplex unit that lets you copy on both sides of the paper. Note: For two-sided copying, use only plain paper in letter or A4 size. Do not make two-sided copies on envelopes, card stock, or photo paper. 1 Load paper. 2 Load - Lexmark 6570 | User's Guide - Page 100
see the instructions that came with the paper.) 2 Place a photo facedown on the scanner glass in the lower right corner. For more information, see "Loading original documents on the scanner glass" type of paper loaded into the printer appears. 18 Press . 19 Press Start Color or Start Black. 100 - Lexmark 6570 | User's Guide - Page 101
on the scanner glass. 2 From the desktop, double-click the Productivity Studio icon. 3 From the Welcome screen, click Copy. 4 Select Photo. 5 Click Start. The photo appears in the right pane. 6 From the Quality drop-down list, select the copy quality. 7 From the Paper Size in Printer drop-down - Lexmark 6570 | User's Guide - Page 102
Start Color or Start Black. Making borderless copies using the control panel 1 Load photo paper with the glossy or printable side facing you. (If you are not sure which side is the printable side, see the instructions that came with the paper.) 2 Place a photo facedown on the scanner glass in the - Lexmark 6570 | User's Guide - Page 103
Start Black. Note: If you are using the scanner glass, photos, use photo or heavyweight matte paper, with the glossy or printable side facing you. (If you are not sure which side is the printable side, see the instructions that came with the paper.) 2 Load an original document facedown on the scanner - Lexmark 6570 | User's Guide - Page 104
Photo. 8 Press Start Color or Start Black. Modifying the Copy settings 1 With your scanned image open on the Copy screen, click the Settings tab. 2 From the Copies box, select the number of copies you want. 3 From the Quality drop-down list, select a copy quality. 4 From the Paper Size in Printer - Lexmark 6570 | User's Guide - Page 105
a PIN during network setup and are being asked for it: 1 Enter the PIN using the keypad. 2 Press . 5 Wait until the printer has finished downloading the scan applications list. 6 Press or repeatedly until destination to which you want to scan to appears. 7 Press Start Color or Start Black. Note: If - Lexmark 6570 | User's Guide - Page 106
Optical Character Recognition (OCR) feature turns a scanned document into text you can edit with a wordprocessing application. 1 Make sure the printer is connected to a computer, and both the printer and the computer are powered on. 2 Load an original document facedown on the scanner glass. 3 From - Lexmark 6570 | User's Guide - Page 107
all images as one PDF file or Save each image as individual PDF file. 9 Click Create PDF. 10 If you want to save the scanned image separately, make your selections and click Save. Otherwise, click Cancel when the Photo Save options appear. The software prepares your PDF and opens a Save dialog. 107 - Lexmark 6570 | User's Guide - Page 108
a scan job To cancel a job being scanned on the scanner glass, go to the control panel, and press . To size from the drop-down list. Convert the image to text with OCR Convert an image to do not want to change a setting, press Start Color or Start Black. 4 If you want to change a setting, press . 5 - Lexmark 6570 | User's Guide - Page 109
and make other setting selections. 11 Press Start Color or Start Black. Use this To Quality 1 Adjust the quality of a scan. printer and computer receiving the scan are on. • The printer is configured to scan over a network (Direct IP Printing). 1 Load an original document facedown on the scanner - Lexmark 6570 | User's Guide - Page 110
drop-down list. 11 To select a date for the photo, click the drop-down list, and printer and the computer are on. 2 Load an original document faceup into the Automatic Document Feeder (ADF) or facedown on the scanner glass. Note: Do not load postcards, photos, small items, transparencies, photo - Lexmark 6570 | User's Guide - Page 111
drop-down list. • Click Convert images to text with OCR to convert list of files to be sent. 5 Click Open to select a file. 6 From Work with Documents and Photos facedown on the scanner glass, and close the top cover. 3 Click application. 1 Load an original document facedown on the scanner glass. 111 - Lexmark 6570 | User's Guide - Page 112
2 From the desktop, double-click the Productivity Studio icon. 3 Click E-mail. 4 Select from the Photo, Several Photos, or Document options. 5 Click Start. 6 If you are scanning a photo, select the Photo Size from the Send Quality and Speed area. 7 Click Create E-mail to have your images attached to - Lexmark 6570 | User's Guide - Page 113
Dial entry (90-99). Notes: • For instructions on how to add Speed Dial or Group Dial numbers using the fax numbers have been entered. Sending a fax using the software You can scan a document to the computer and then fax it to someone using the software. 1 Load an original document facedown on the scanner - Lexmark 6570 | User's Guide - Page 114
fax, select Print a copy of your fax. 11 Click Send. Sending a fax using the control panel Make sure the printer is on. 1 Load an original document facedown on the scanner glass. 2 From the control panel, press Fax Mode. 3 Enter a fax -99). Notes: • For instructions on how to add Speed Dial or Group Dial - Lexmark 6570 | User's Guide - Page 115
for a maximum of 30. 5 Press Start Color or Start Black. Sending a fax while listening to a call (On Hook Dial) The manual dialing feature lets you dial a telephone number while listening to the call through a speaker on the printer. It is useful when you must navigate an automated answering system - Lexmark 6570 | User's Guide - Page 116
telephone. The printer receives the fax. Setting a fax manual answer code 1 From the desktop, double-click the Productivity Studio icon. 2 From the Settings area of the Welcome Screen, click Fax History and Settings. 3 From the "I Want To" menu, click Adjust speed dial list and other fax settings - Lexmark 6570 | User's Guide - Page 117
software Caller ID is a service provided by some telephone companies that identifies the telephone number or the name of the person who is calling. If you subscribe to this service, it works with the printer. When you receive a fax down list. 6 Click OK to save the setting. Receiving a fax - Lexmark 6570 | User's Guide - Page 118
fax The printer has a built-in duplex unit that lets you print received faxes on both sides of the paper. Note: For two-sided printing, use only plain paper in letter or A4 size. 1 From the control panel, press . The light comes on. 2 Press Fax Mode. 3 Press . 4 Press or repeatedly until Fax Setup - Lexmark 6570 | User's Guide - Page 119
to another number" area, select the setting you want from the "Fax forwarding" drop-down list. 6 Enter the number to which you want to forward the fax. Notes: • You can include a calling card number as part of the fax number. • A fax number can include up to 64 numbers, commas, periods, spaces, and - Lexmark 6570 | User's Guide - Page 120
adjust the fax settings in the Fax Setup Utility. These settings apply to the faxes you send or receive. 1 From the desktop, double-click the Productivity Studio icon. 2 Click Fax History and Settings. The Fax Solutions Software screen appears. 3 Click Adjust speed dial list and other fax settings - Lexmark 6570 | User's Guide - Page 121
The following screen appears. 121 - Lexmark 6570 | User's Guide - Page 122
print on both sides of the paper. • Select when to print fax activity and confirmation reports. Create, add to, edit, or delete entries from the Speed Dial list, including Group Dial entries. Choose and customize your fax cover page and message. 5 Click OK after you finish customizing the settings - Lexmark 6570 | User's Guide - Page 123
Dial a telephone number while listening to the call through a speaker on the printer. This is useful when you must navigate an automated answering system before sending your fax. Delay Fax Enter a specific time to send a fax. Note: Make sure the date and time are entered correctly before setting - Lexmark 6570 | User's Guide - Page 124
tab. 5 From the Auto Answer drop-down list, select On. 6 Click OK to save the setting. The Auto Answer light on the control panel comes on. When the number of rings you set is detected, the printer automatically receives the incoming fax. Setting up a fax footer using the control panel 1 From the - Lexmark 6570 | User's Guide - Page 125
, double-click the Productivity Studio icon. 2 From the Settings area of the Welcome Screen, click Fax History and Settings. The Fax Solution Software appears. 3 From the "I Want To" menu, click Adjust speed dial list and other fax settings. 4 Click the Ringing and Answering tab. 5 From the "Block - Lexmark 6570 | User's Guide - Page 126
save the settings, they apply to every fax you send or receive. You can also use this software to create and edit the Speed Dial list. 1 Open the program through one of these methods: Method 1 a Do one of the following: • In Windows Vista, click . • In Windows XP and earlier, click Start. b Click - Lexmark 6570 | User's Guide - Page 127
several sample cover pages you can choose from. • View a fax history. • Change software preferences for fax lists. • Adjust fax settings. Help Locate information on faxing, fax settings, and so on. For information on changing fax settings, see "Customizing settings using the Fax Setup Utility" on - Lexmark 6570 | User's Guide - Page 128
setting you want. 6 From the Auto Answer drop-down list, select On. 7 Click OK to save the setting. The Auto Answer light on the control panel comes on. When the number of rings you set is detected, the printer automatically receives the incoming fax. Setting up Speed Dial 1 From the desktop, double - Lexmark 6570 | User's Guide - Page 129
Printing fax activity reports 1 From the desktop, double-click the Productivity Studio icon. 2 From the Settings area of the Welcome Screen, click Fax History and Settings. The Fax Solution Software appears. 3 On the toolbar, click Tools ΠFax History. 4 Click the Print Report button to print. 129 - Lexmark 6570 | User's Guide - Page 130
position, unless the printer is busy. 3 Press down on the cartridge carrier latch to raise the cartridge carrier lid. 4 Remove the used print cartridge. Note: If you are removing both cartridges, repeat step 3 and step 4 for the second cartridge. Installing print cartridges 1 Open the printer. 130 - Lexmark 6570 | User's Guide - Page 131
levers. 3 Remove the used print cartridge or cartridges. For more information, see "Removing a used print cartridge" on page 130. 4 If you are installing new print cartridges, remove the tape from the back and bottom of the black cartridge, and insert the cartridge in the left carrier. Warning: Do - Lexmark 6570 | User's Guide - Page 132
prompt you to load paper and press to print an alignment page. Note: The printer must be closed to start a new scan, print, or copy job. Refilling print cartridges The warranty does not cover repair of failures or damage caused by a refilled cartridge. Lexmark does not recommend use of a refilled - Lexmark 6570 | User's Guide - Page 133
printer without a computer, press Cancel. Lexmark's warranty does not cover damage caused by non-Lexmark ink or print cartridges. Aligning print cartridges times. Wiping the print cartridge nozzles and contacts 1 Remove the print cartridges. 2 Dampen a clean, lint-free cloth with water, and place - Lexmark 6570 | User's Guide - Page 134
times. 11 If print quality is still not satisfactory, replace the print cartridges. Preserving the print cartridges • Keep a new cartridge in its packaging until you are ready to install it. • Do not remove a cartridge from the printer except to replace, clean, or store it in an airtight container - Lexmark 6570 | User's Guide - Page 135
any ink residue that has accumulated on the paper exit tray. Warning: Using a damp cloth to clean the interior may cause damage to your printer. 5 Make sure the paper support and paper exit tray are dry before beginning a new print job. Ordering supplies Ordering print cartridges Lexmark 6500 - Lexmark 6570 | User's Guide - Page 136
did not come with an internal wireless print server already installed, installing the Lexmark N2050 in the printer lets you print and scan on a wireless network. For more information, go to www.lexmark.com Paper Lexmark Photo Paper Lexmark PerfectFinish Photo Paper Note: Availability may vary by - Lexmark 6570 | User's Guide - Page 137
Wi-Fi indicator light is green. • The printer driver is installed on the computer from which you are performing a task. • The correct printer port is selected. Setup Troubleshooting Incorrect language appears on the display These are possible solutions. Try one of the following: Change the language - Lexmark 6570 | User's Guide - Page 138
is not on, press . Software does not install These are possible solutions. Try one or more of the following: Check your operating system The following operating systems are supported: • Windows Vista • Windows XP • Windows 2000 with Service Pack 3 or later • Mac OS X Check your system requirements - Lexmark 6570 | User's Guide - Page 139
paper. Check ink Check the ink levels, and install new print cartridges if necessary. Check cartridges 1 Remove the print cartridges. 2 Make sure the sticker and tape have been removed. 1 2 3 Reinsert the cartridges. Check printer default and pause settings 1 Click: • In Windows Vista: Œ Control - Lexmark 6570 | User's Guide - Page 140
to turn the printer on. Removing and reinstalling the software Uninstall the printer software, and then reinstall it. For more information, see "Removing and reinstalling the software" on page 141. Cannot print from digital camera using PictBridge These are possible solutions. Try one or more of - Lexmark 6570 | User's Guide - Page 141
drive. If the software still does not install correctly, visit our Web site at www.lexmark.com to check for the latest software. 1 In all countries or regions except the United States, select your country or region. 2 Click the links for drivers or downloads. 3 Select your printer family. 4 Select - Lexmark 6570 | User's Guide - Page 142
listed, Contact the Customer Support Center. the USB port is not enabled. For more information, see 1 Click Start ΠPrograms or All Programs Πthe computer documentation. Lexmark 6500 Series. 2 Click Solution Center. 3 Click the Contact Information tab. Solving printer communication problems - Lexmark 6570 | User's Guide - Page 143
orange during installation" in "Wireless troubleshooting." Check if printer driver is installed Make sure the printer driver is installed on the computer from which you are sending the print job. 1 Do one of the following: • In Windows Vista, click: Œ Control Panel Œ Printers. • In Windows XP, click - Lexmark 6570 | User's Guide - Page 144
the printer software. Note: If more than one printer appears in the "Select your printer" list, pick the printer with the MAC address that matches the address on the back of your printer. Network printer does not show up in the printer selection list during installation Check whether the printer is - Lexmark 6570 | User's Guide - Page 145
letters. 2 Click Start ΠPrograms or All Programs ΠLexmark 6500 Series. 3 Click Wireless Setup. Note: You may be prompted to connect the printer to the computer again using the installation cable as part of the setup process. 4 Follow the instructions on the computer screen, including typing in the - Lexmark 6570 | User's Guide - Page 146
10 or 169. This is determined by your operating system or wireless network software. 2 Ping the wireless access point (wireless router). a Click: • In Windows Vista: Œ All Programs Œ Accessories Œ Command Prompt. • In Windows XP and earlier: Start Œ Programs or All Programs Œ Accessories Œ Command - Lexmark 6570 | User's Guide - Page 147
In Windows Vista: . • In Windows XP and earlier: Start. 2 Click Start Œ Programs or All Programs Œ Lexmark 6500 Series. 3 Click Wireless Setup. Note: You may be prompted to connect the printer to the computer again using the installation cable as part of the setup process. 4 Follow the instructions - Lexmark 6570 | User's Guide - Page 148
network name The network name, or SSID (Service Set Identifer) is a setting on a wireless device that allows devices to join the same wireless network. For more information, see "Checking your network name" for Windows or Mac in the "Wireless troubleshooting" section. Reboot the computer Turn off - Lexmark 6570 | User's Guide - Page 149
see "Ping the printer" for Windows or Mac in the "Wireless troubleshooting" section. Run the wireless setup again If your wireless settings have changed, you will need to run the printer wireless setup again. Some reasons your settings may have changed include your having manually changed your WEP - Lexmark 6570 | User's Guide - Page 150
click . • In Windows XP and earlier: Click Start. 2 Click Start Œ Programs or All Programs Œ Lexmark 6500 Series. 3 Click Wireless Setup. Note: You may be prompted to connect the printer to the computer again using the installation cable as part of the setup process. 4 Follow the instructions on the - Lexmark 6570 | User's Guide - Page 151
on the back of the printer. 4 Cancel the software installation. 5 Click Start ΠPrograms or All Programs ΠLexmark 6500 Series. 6 Click Wireless Setup Utility. 7 Follow the prompts on the computer screen to reinstall the software. Checking your network name (Windows users only) Make sure your - Lexmark 6570 | User's Guide - Page 152
cable, the connection may not include the word "wireless" in its name. c Right-click the connection, and then click Repair. Ping the printer 1 Do one of the following: • In Windows Vista, click Œ All Programs Œ Accessories Œ Command Prompt. • In Windows XP, click Start Œ Programs or All Programs - Lexmark 6570 | User's Guide - Page 153
or All Programs ΠLexmark 6500 Series. 2 Click Wireless Setup Utility. Note: You may be prompted to connect the printer to the computer again using the installation cable as part of the setup process. 3 Follow the instructions on the computer screen. Check printer ports (Windows users only) Make - Lexmark 6570 | User's Guide - Page 154
Print troubleshooting Partial 4 x 6 in. (10 x 15 cm) photo prints when using a PictBridge-enabled digital camera Make sure photo size and paper size are set correctly The printer displays the Paper/Photo Size Error when your chosen photo size does not match the paper size that is set. This typically - Lexmark 6570 | User's Guide - Page 155
Skewed lines • Smudges • Streaks • White lines in print These are possible solutions. Try one or more of the following: Check ink Check the ink levels, and install new print cartridges if necessary. Review steps to improve print quality See "Improving print quality" on page 154. Remove sheets as - Lexmark 6570 | User's Guide - Page 156
Lexmark PerfectFinish Photo Paper or Lexmark Photo Paper. Do not use Lexmark Premium Photo Paper. Your print cartridges are not compatible with this type of paper. Check paper condition Use only new, unwrinkled paper. Removing and reinstalling the software Software may not be installed correctly - Lexmark 6570 | User's Guide - Page 157
. Make sure the paper size matches the printer setting 1 From the software application, click File ΠPrint. 2 Click Properties, Preferences, Options, or Setup. 3 Click Paper Setup. 4 Check the paper size. Print speed is slow These are possible solutions. Try one or more of the following: Maximize - Lexmark 6570 | User's Guide - Page 158
"Installing print cartridges" on page 130. Are the sticker and tape removed from the cartridges? Lift the scanner unit. Press down on the cartridge carrier latches to raise the cartridge carrier lids. Are the cartridges low on ink? 1 Do one of the following: • In Windows Vista, click . • In Windows - Lexmark 6570 | User's Guide - Page 159
of the cartridges. Make sure the cartridges are properly installed With the front of the printer facing you, check for proper print cartridge installation. If you are using a color cartridge, make sure it is properly installed in the right carrier. If you are using a black or photo cartridge, make - Lexmark 6570 | User's Guide - Page 160
In Windows Vista, click Œ Control Panel. • In Windows XP or 2000, click Start. 2 Click Start Œ Programs or All Programs Œ Lexmark 6500 Series. 3 Click Solution Center. 4 If an exclamation point (!) appears on either of the print cartridges, the ink level is low. Install a new cartridge. Glossy photo - Lexmark 6570 | User's Guide - Page 161
the printer software settings, or the problem may be that the printer and the computer are not able to communicate properly. Are the printer and the computer able to communicate data? Check the printer status: 1 Do one of the following: • In Windows Vista, click Œ Control Panel. • In Windows XP or - Lexmark 6570 | User's Guide - Page 162
open, click File Œ Print. 2 Click Properties, Preferences, Options, or Setup. 3 From the Quality/Copies tab, select: • Photo when printing photos • Normal when printing transparencies Align the print cartridges 1 Do one of the following: • In Windows Vista, click Œ Control Panel. • In Windows XP - Lexmark 6570 | User's Guide - Page 163
on the print catridges You may need to clean the print cartridge nozzles. Checking the printer status Windows Vista users only 1 Click ŒControl Panel Œ Printer. 2 Make sure: • The printer icon does not say Paused. If the printer is paused, right-click the icon, and then click Resume Printing - Lexmark 6570 | User's Guide - Page 164
Do one of the following: • In Windows Vista, click . • In Windows XP and earlier, click Start. 2 Click Start Œ Programs or All Programs Œ Lexmark 6500 Series. 3 Click Solution Center. If an exclamation point (!) appears on either of the print cartridges, the ink level is low. Install a new cartridge - Lexmark 6570 | User's Guide - Page 165
are open. Is the problem with the program? Try printing a different image. If it prints correctly, the problem may be with the program you are using. For more information, see the program documentation. Printing a test page 1 Do one of the following: • In Windows Vista, click . • In Windows XP and - Lexmark 6570 | User's Guide - Page 166
the scanner unit. 2 Remove the print cartridges from the print cartridge carrier. 3 Make sure the sticker and tape are removed from the bottom and back of the print cartridges. Try printing a test page again 1 Do one of the following: • In Windows Vista, click Œ Control Panel. • In Windows XP or - Lexmark 6570 | User's Guide - Page 167
external device connected between the computer and the printer, make sure it supports bidirectional communication. Disconnect the printer from the external device, and connect it directly to the computer. If the printer works, there may be a problem with the print server. See the documentation that - Lexmark 6570 | User's Guide - Page 168
. • The host computer can print to the printer. • The printer is shown as Shared in the Printers and Faxes folder (Windows XP and Windows 2000) or Printers folder (Windows Vista) on the host computer. Check the printer status Windows Vista users: 1 Click: • (default Start menu) • (Classic Start - Lexmark 6570 | User's Guide - Page 169
the host computer, but you still cannot print, try to locate the printer from the remote computer. Windows 2000, Windows XP, or Windows Vista users: 1 Open the Printers or Printers and Faxes folder. 2 Right-click the Lexmark 6500 Series icon. 3 Click Properties. 4 Click the Ports tab, and then click - Lexmark 6570 | User's Guide - Page 170
help attaching the printer. Updating the printer software The printer software needs to be updated to run properly. 1 Start Windows. 2 When the desktop appears, insert the software CD for Windows. The installation screen appears. 3 Click Install. 4 When the Existing Printer Driver Found dialog - Lexmark 6570 | User's Guide - Page 171
together Cannot print to the network printer These are possible solutions. Try one or more of the following: Check print server setup documentation See the print server documentation for setup instructions if: • The lights of the print server are not on. • The installation cable is not connected to - Lexmark 6570 | User's Guide - Page 172
. If any photos are on the applications that support the desired file formats. Resetting the printer to factory default settings You can reset your printer to the original settings without using the printer printer, lift the scanner unit to open the printer. 2 Pull the paper out. 3 Close the scanner - Lexmark 6570 | User's Guide - Page 173
manually 1 Press to turn off the printer. 2 Firmly grasp the paper, and gently pull it out. 3 Press to turn the printer back on. Paper jam in the paper support 1 Press to turn off the printer per paper type • Specific loading instructions for supported paper and specialty media Remove each page - Lexmark 6570 | User's Guide - Page 174
" on page 60. • Try loading one page, envelope, or sheet of specialty media at a time. Check printer default and pause settings 1 In Windows Vista, click Œ Control Panel Œ Printers (under Hardware and Sound). In Windows XP, click Start Œ Settings ŒPrinters and Faxes. 2 Double-click the print queue - Lexmark 6570 | User's Guide - Page 175
3 Select the Paper Setup tab. 4 From the Paper Size area, select Banner. 5 Select Letter Banner or A4 Banner as the paper size. 6 Select Portrait or Landscape. 7 Click OK. 8 Click OK or Print. Paper continues to jam Are you using paper designed for an inkjet printer? Check the type of paper you are - Lexmark 6570 | User's Guide - Page 176
175. Make sure the duplex unit is properly installed Remove the duplex unit and reinstall it. For more information, see "Paper jam in the duplex unit" on page 175. Memory card troubleshooting Memory card cannot be inserted These are possible solutions. Try one or more of the following: Check memory - Lexmark 6570 | User's Guide - Page 177
you have more than one printer and use Windows, you must select your wireless network printer. 1 Do one of the following: • In Windows Vista, click Œ Control Panel Œ Printers. • In Windows XP and earlier, click Start Œ Settings Œ Printers and Faxes. 2 From the list shown, select the printer on your - Lexmark 6570 | User's Guide - Page 178
and active. Note: If your wireless connection is down, use your configuration cable to connect your printer to your computer. Copy troubleshooting Copier does not respond These are possible solutions. Try one or more of the following: Check messages Resolve all error messages. Check power If the - Lexmark 6570 | User's Guide - Page 179
is displayed, see "Error messages on the computer screen" on page 197. Check ink Check the ink levels, and install a new print cartridge if necessary. Clean the scanner glass If the scanner glass is dirty, gently wipe it with a clean, lint-free cloth dampened with water. Review steps to improve - Lexmark 6570 | User's Guide - Page 180
the lower right corner of the scanner glass. Scan troubleshooting Scanner does not respond These are possible solutions. Try one or more of the following: Check messages Resolve all error messages. Check power If the light is not on, make sure the printer is plugged into a properly grounded outlet - Lexmark 6570 | User's Guide - Page 181
default and pause settings 1 Do one of the following: • In Windows Vista, click Œ Control Panel. • In Windows XP, click Start. 2 Click Printer or Printers and Faxes. 3 Double-click the printer you want to check. 4 Click Printer. 5 Make sure no check mark appears next to Pause Printing. If a check - Lexmark 6570 | User's Guide - Page 182
These are possible solutions. Try one or more of the following: Check messages If an error message is displayed, see "Error messages on the printer display" on page 191. Clean the scanner glass If the scanner glass is dirty, gently wipe it with a clean, lint-free cloth dampened with water. Adjust - Lexmark 6570 | User's Guide - Page 183
Fax troubleshooting Cannot send or receive a fax These are possible solutions. Try one of the following: Check messages If an error message is displayed, follow the instructions on the display. Check power If the light is not on, see "Power button is not lit" on page 138. Check cable connections - Lexmark 6570 | User's Guide - Page 184
Mail service? Voice Mail offered through your local telephone company may disrupt fax transmissions. To enable both Voice Mail and the printer to region where you are operating the printer: 1 From the control panel, press Settings. 2 Press or repeatedly until Device Setup appears. 3 Press . 4 Press - Lexmark 6570 | User's Guide - Page 185
the distinctive ring" on page 127. Check ink Check the ink levels, and install a new cartridge if necessary. Check whether Fax Forwarding is selected 1 From the control panel, press Fax Mode. 2 Press . 3 Press or repeatedly until Fax Setup appears. 4 Press . 5 Press or repeatedly until Ringing - Lexmark 6570 | User's Guide - Page 186
setting 1 From the control panel, press Fax Mode. 2 Press . 3 Press or repeatedly until Fax Setup appears. 4 Press . 5 Press or 128. • As an alternative, dial the telephone number manually. Be sure the printer is detecting a dial tone • See "Sending a fax while listening to a call (On Hook Dial)" - Lexmark 6570 | User's Guide - Page 187
have been a problem with the quality of the telephone line connection. • Increase the fax scan resolution. Check ink Check the ink levels, and install a new print cartridge if necessary. Clean scan lens and white roller 1 Unplug the power cord and the phone line from the wall. 2 Open the control - Lexmark 6570 | User's Guide - Page 188
appears. b Press to save the setting. Fax Error The fax machines have stopped communicating. Resend the fax. There may have been a problem with the quality of the telephone line connection. Fax Mode Unsupported The receiving fax machine does not support the type of fax you attempted to send. If it - Lexmark 6570 | User's Guide - Page 189
and solutions. Try one or more of the following: Check phone line Resend the fax. There may have been a problem with the quality of the telephone line connection. Lower the transmission speed 1 From the control panel, press Fax Mode. 2 Press . 3 Press or repeatedly until Fax Setup appears. 4 Press - Lexmark 6570 | User's Guide - Page 190
solutions. Try one or more of the following: Use phone line checklist • Resend the fax. There may have been a problem with the printer hangs up without dialing, this means it did not recognize the dial tone. 2 From the control panel, press Fax Mode. 3 Press . 4 Press or repeatedly until Fax Setup - Lexmark 6570 | User's Guide - Page 191
hardware are secure, if applicable: • Power supply • Telephone • Handset • Answering machine Error messages on the printer display Alignment Error These are possible solutions. Try one or more of the following: Remove tape from print cartridge 1 Remove the print cartridge. 2 Make sure the sticker - Lexmark 6570 | User's Guide - Page 192
unit. 9 If the error reappears, replace the color print cartridge with a new one, close the cartridge carrier lid, and close the scanner unit. Black Ink Low / Color Ink Low / Photo Ink Low 1 Check the indicated ink level or levels, and install a new print cartridge or cartridges if necessary. To - Lexmark 6570 | User's Guide - Page 193
unit. 5 Press . Cover Open Make sure that the scanner unit is closed. Error 1104 1 Remove the print cartridges. 2 Reinstall the black cartridge or the photo cartridge in the left carrier. 3 Reinstall the color cartridge in the right carrier. Left Cartridge Error / Right Cartridge Error This message - Lexmark 6570 | User's Guide - Page 194
only the black cartridge installed. • You cannot copy or print when only the photo cartridge is installed. • To remove the error message, press . Memory Failure These are possible solutions. Try one or more of the following: Reduce memory use If applicable: • Print pending received faxes. • Send - Lexmark 6570 | User's Guide - Page 195
placed on the scanner glass is not a valid proof sheet. For more information, see "Printing photos stored on the Photo Size Error There are one or more photos larger than the paper size you selected on the printer menu. 1 Press to clear the error message. 2 Press or repeatedly until Paper Setup - Lexmark 6570 | User's Guide - Page 196
"Printing photos stored on the memory device using the proof sheet" on page 93. Problems reading the memory card • See "Memory card cannot be inserted" on page 176. • See "Nothing happens when memory card is inserted" on page 177. 2-Sided Paper Type Error The paper type loaded in the printer is - Lexmark 6570 | User's Guide - Page 197
dialog box appears. 2 Follow the instructions on the Canceling Printing dialog box. Left/Right Cartridge Missing ? This message indicates that one of the necessary cartridges is missing. You need to install a print cartridge. Communication not available The printer and computer may not be able to - Lexmark 6570 | User's Guide - Page 198
1 Load paper. 2 Press to continue printing. Note: Do not force paper into the printer. Fixing a printing failure Follow the instructions on the computer screen. If the printer still does not print: 1 Do one of the following: • In Windows Vista, click . • In Windows XP and earlier, click Start. 198 - Lexmark 6570 | User's Guide - Page 199
information on supported file types, see the User's Guide on the CD that came with your printer. Paper Jam The printer has a paper jam, and you must clear the paper path. Note: To avoid paper jams, do not force paper into the printer. Multiple All-In-Ones found Multiple Lexmark printers, attached - Lexmark 6570 | User's Guide - Page 200
include technical inaccuracies or typographical errors. Changes are periodically made services, except those expressly designated by the manufacturer, are the user's responsibility. For Lexmark technical support, visit support.lexmark.com. For information on supplies and downloads, visit www.lexmark - Lexmark 6570 | User's Guide - Page 201
your product hardware or software. CAUTION: A CAUTION Lexmark Technology & Services Lexmark International, Inc. 740 West New Circle Road Lexington, KY 40550 (859) 232-3000 Exposure to radio frequency radiation The following notice is applicable if your printer has a wireless network card installed - Lexmark 6570 | User's Guide - Page 202
and Technical Support, Lexmark International, Inc., S.A., Boigny, France. This product satisfies the Class B limits of EN 55022 and safety requirements of EN 60950. European EC directives conformity The following notices are applicable if your printer has a wireless network card installed This - Lexmark 6570 | User's Guide - Page 203
. A declaration of conformity with the requirements of the directives is available from the Director of Manufacturing and Technical Support, Lexmark International, S. A., Boigny, France. The following restrictions apply: Country/region Restriction All countries/regions This product is for indoor - Lexmark 6570 | User's Guide - Page 204
. Norsk Lexmark International, Lexmark Lexmark Slovensky Lexmark International Slovensko Lexmark International intygar Lexmark International, lexmark.com for current values. Product disposal Do not dispose of the printer RJ-11C Universal Service Order Code (USOC comply with the applicable FCC Part 68 - Lexmark 6570 | User's Guide - Page 205
service. If you experience trouble with this equipment, for repair or warranty information, contact Lexmark International, Inc. at www.lexmark.com or your Lexmark problem. It is recommended that the customer install an or other electronic device, including fax machines, to send any message unless - Lexmark 6570 | User's Guide - Page 206
for the Facsimile User Instructions. The grant of a services. This equipment shall not be set up to make automatic calls to the Telecom's 111 Emergency Service seconds between the end of one call attempt and the beginning (nº de référence Lexmark : 14B5123) devant être installé sur toute ligne - Lexmark 6570 | User's Guide - Page 207
the power switch is turned off. 0.5 The power consumption levels listed in the previous table represent time-averaged measurements. Instantaneous power draws higher than the average. Values are subject to change. See www.lexmark.com for current values. Power Saver This product is designed with - Lexmark 6570 | User's Guide - Page 208
warranty period. For products no longer covered by a Lexmark warranty, technical support may not be available or only be available for a fee. Extent of limited warranty We do not warrant uninterrupted or error-free operation of any product. Warranty service does not include repair of failures caused - Lexmark 6570 | User's Guide - Page 209
or its suppliers, governs your use of any Software Program installed on or provided by Lexmark for use in connection with your Lexmark product. The term "Software Program" includes machine-readable instructions, audio/visual content (such as images and recordings), and associated media, printed - Lexmark 6570 | User's Guide - Page 210
terms and conditions of this License Agreement: a Use. You may Use one (1) copy of the Software Program. The term "Use" means storing, loading, installing, executing, or displaying the Software Program. If Lexmark has licensed the Software Program to you for concurrent use, you must limit the number - Lexmark 6570 | User's Guide - Page 211
age of majority in the place you sign this License Agreement and, if applicable, you are duly authorized by your employer or principal to enter into by you and Lexmark relating to your Use of the Software Program). To the extent any Lexmark policies or programs for support services conflict with the - Lexmark 6570 | User's Guide - Page 212
server infrastructure mode installation cable internal wireless print server IP (Internet Protocol) address ipconfig MAC (Media Access Control) address MAC filtering network adapter/card network hub network name ping printer nickname router security key signal strength SSID (Service Set Identifier - Lexmark 6570 | User's Guide - Page 213
WEP (Wired Equivalent Privacy) wireless access point wireless router Wi-Fi WPA (Wi-Fi Protected Access) WPA2 An address assigned to a network printer or print server by the manufacturer. To find the UAA, print a network setup page and look for the UAA listing. A lightweight, flexible cable that - Lexmark 6570 | User's Guide - Page 214
wireless network adding a printer using Windows 59 creating using Windows 57 adjusting brightness automatically 88, 90 adjusting the hue of a photo 89 adjusting the saturation of a photo 89 Advanced button 45 aligning print cartridges 133 alignment error 191 answering machine receiving a fax with - Lexmark 6570 | User's Guide - Page 215
of the printer 135 cleaning print cartridge nozzles 133 collating copies 103 color effects applying 90 color effects, applying to photos 96 color ink low 192 colors on paper do not match colors on the screen 160 communication not available error 197 communication problems establishing bidirectional - Lexmark 6570 | User's Guide - Page 216
198 problem reading memory card 196 remote fax error 189 right cartridge error 193 right cartridge incorrect 193 right cartridge missing 194 some photos removed from card by host 196 unsupported file types found on memory card 199 unsupported paper size 197 error messages troubleshooting cover open - Lexmark 6570 | User's Guide - Page 217
quickly 159 ink low error 198 inserting flash drives 79 memory cards 78 PictBridge-enabled digital camera 95 installing network printer 54 print cartridges 130 printer on a network 55 printer software 43, 141 software and sharing printer on network 55 internal wireless print server installing 47 IP - Lexmark 6570 | User's Guide - Page 218
print server 47 installing printer 55 IP addresses 54 using a print server 52 using the peer-to-peer method 56 using the point-and-print method 56 using wireless network connection 53 newspapers, loading on the scanner glass 63 no images selected error 194 no photo/paper size error 195 no proof - Lexmark 6570 | User's Guide - Page 219
connect to wireless network 150 printer does not feed paper, envelopes, or specialty media 174 printer plugged in but does not print 167 printer receives blank fax 187 printer software installing 43 reinstalling 141 removing 141 updating 170 printer status checking 163 printing all photos from - Lexmark 6570 | User's Guide - Page 220
an image 103 reports fax activity 129 fax confirmation 129 reverse page order 69 right cartridge error 193 right cartridge incorrect 193 right cartridge missing 194 ring patterns, setting 127 RJ11 adapter 27 rotating photo 87 run the Wireless Setup Utility (Windows) 153 S safety information - Lexmark 6570 | User's Guide - Page 221
photo copies 180 poor copy quality 179 scanner unit does not close 178 troubleshooting, error messages 2-sided paper type error 196 alignment error 191 black ink low 192 cartridge error 192 clear carrier jam 192 color ink low 192 could not detect a proof sheet 195 cover open 193 error 1104 193 error - Lexmark 6570 | User's Guide - Page 222
not lit 138 software does not install 138 troubleshooting, wireless changing wireless settings after installation 149 check printer ports (Windows) 153 checking network name (Windows) 151 network printer does not show up in printer selection list during installation (Windows) 144 photos do not print - Lexmark 6570 | User's Guide - Page 223
communicate with printer during installation 151 wireless troubleshooting changing wireless settings after installation 149 check printer ports (Windows) 153 checking network name (Windows) 151 network printer does not show up in printer selection list during installation (Windows) 144 photos do not
-
 1
1 -
 2
2 -
 3
3 -
 4
4 -
 5
5 -
 6
6 -
 7
7 -
8
-
9
-
10
-
11
-
12
-
13
-
14
-
15
-
16
-
17
-
18
-
19
-
20
-
21
-
22
-
23
-
24
-
25
-
26
-
27
-
28
-
29
-
30
-
31
-
32
-
33
-
34
-
35
-
36
-
37
-
38
-
39
-
40
-
41
-
42
-
43
-
44
-
45
-
46
-
47
-
48
-
49
-
50
-
51
-
52
-
53
-
54
-
55
-
56
-
57
-
58
-
59
-
60
-
61
-
62
-
63
-
64
-
65
-
66
-
67
-
68
-
69
-
70
-
71
-
72
-
73
-
74
-
75
-
76
-
77
-
78
-
79
-
80
-
81
-
82
-
83
-
84
-
85
-
86
-
87
-
88
-
89
-
90
-
91
-
92
-
93
-
94
-
95
-
96
-
97
-
98
-
99
-
100
-
101
-
102
-
103
-
104
-
105
-
106
-
107
-
108
-
109
-
110
-
111
-
112
-
113
-
114
-
115
-
116
-
117
-
118
-
119
-
120
-
121
-
122
-
123
-
124
-
125
-
126
-
127
-
128
-
129
-
130
-
131
-
132
-
133
-
134
-
135
-
136
-
137
-
138
-
139
-
140
-
141
-
142
-
143
-
144
-
145
-
146
-
147
-
148
-
149
-
150
-
151
-
152
-
153
-
154
-
155
-
156
-
157
-
158
-
159
-
160
-
161
-
162
-
163
-
164
-
165
-
166
-
167
-
168
-
169
-
170
-
171
-
172
-
173
-
174
-
175
-
176
-
177
-
178
-
179
-
180
-
181
-
182
-
183
-
184
-
185
-
186
-
187
-
188
-
189
-
190
-
191
-
192
-
193
-
194
-
195
-
196
-
197
-
198
-
199
-
200
-
201
-
202
-
203
-
204
-
205
-
206
-
207
-
208
-
209
-
210
-
211
-
212
-
213
-
214
-
215
-
216
-
217
-
218
-
219
-
220
-
221
-
222
-
223
 |
 |
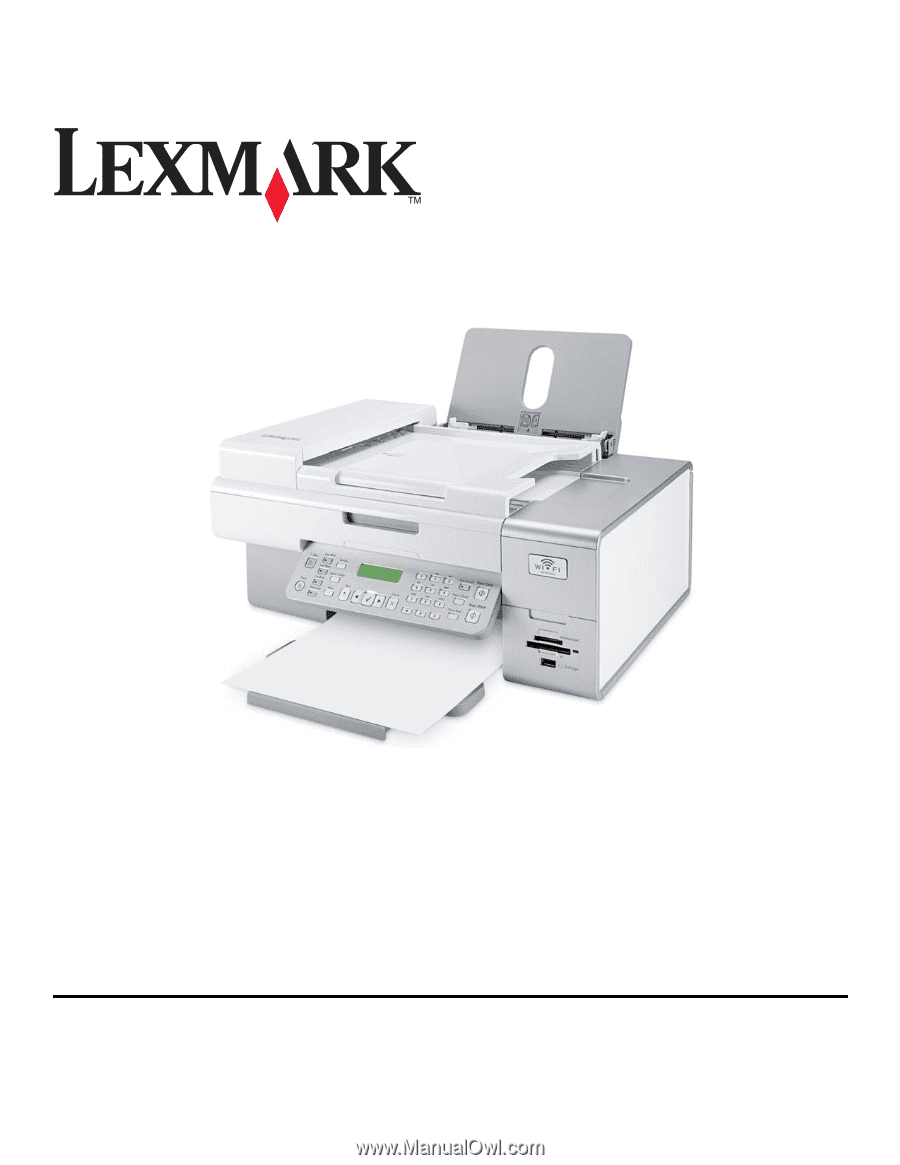
6500 Series User's Guide
May 2007
www.lexmark.com