Lexmark 6570 User's Guide - Page 124
Setting Auto Answer to on, Setting up a fax footer using the control panel, Productivity Studio
 |
UPC - 734646047951
View all Lexmark 6570 manuals
Add to My Manuals
Save this manual to your list of manuals |
Page 124 highlights
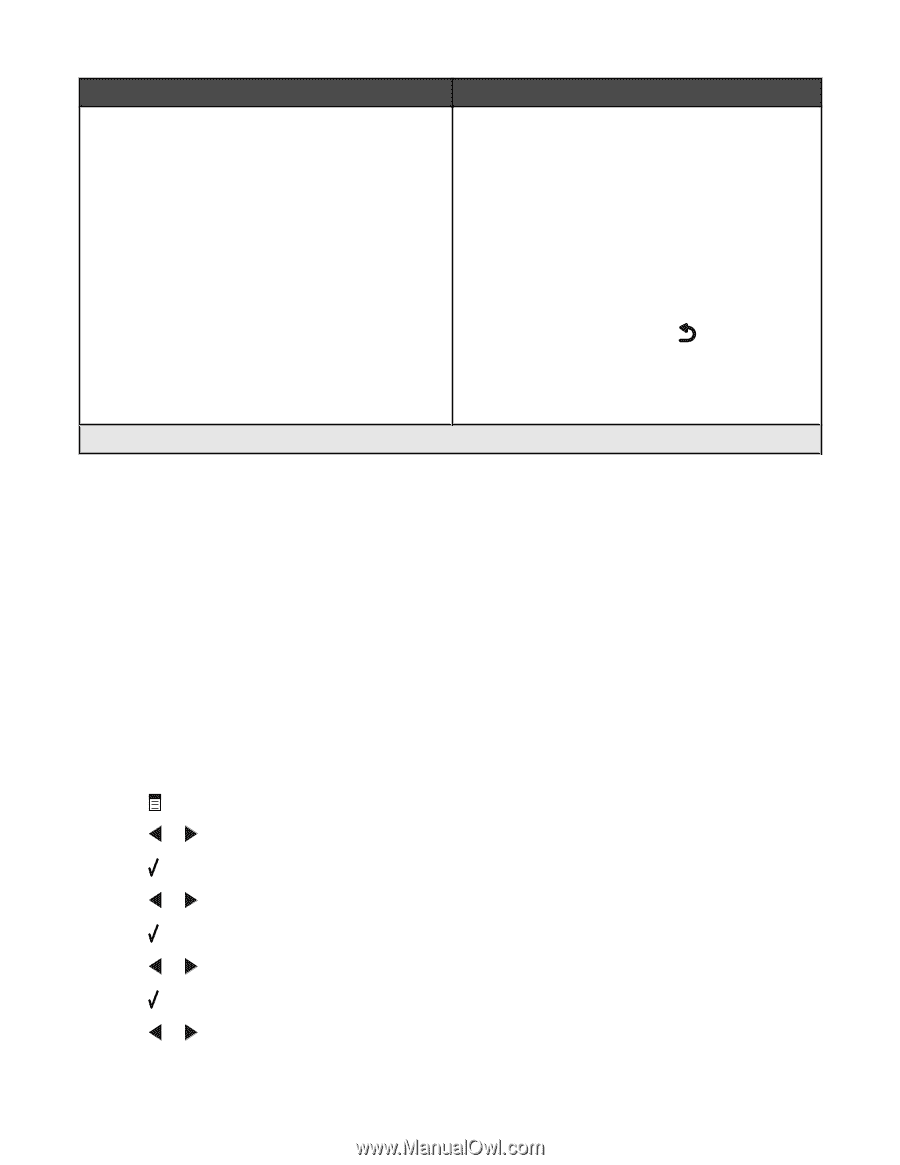
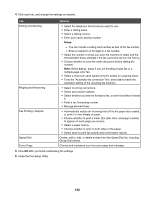
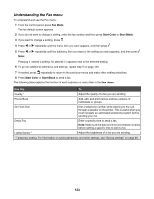
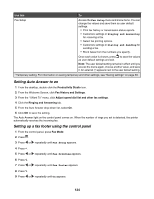
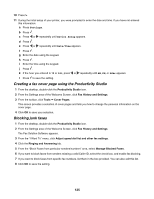
Use this To Fax Setup Access the Fax Setup menu and menu items. You can change the values and save them as user default settings. • Print fax history or transmission status reports. • Customize settings in Ringing and Answering for receiving a fax. • Select fax printing options. • Customize settings in Dialing and Sending for sending a fax. • Block faxes from the numbers you specify. Once each value is chosen, press to save the values as user default settings and exit. Note: The user default setting remains in effect until you access the menu again, choose another value, and save it. An asterisk (*) appears next to the user default setting. 1 Temporary setting. For information on saving temporary and other settings, see "Saving settings" on page 39. Setting Auto Answer to on 1 From the desktop, double-click the Productivity Studio icon. 2 From the Welcome Screen, click Fax History and Settings. 3 From the "I Want To" menu, click Adjust speed dial list and other fax settings. 4 Click the Ringing and Answering tab. 5 From the Auto Answer drop-down list, select On. 6 Click OK to save the setting. The Auto Answer light on the control panel comes on. When the number of rings you set is detected, the printer automatically receives the incoming fax. Setting up a fax footer using the control panel 1 From the control panel, press Fax Mode. 2 Press . 3 Press or repeatedly until Fax Setup appears. 4 Press . 5 Press or repeatedly until Fax Printing appears. 6 Press . 7 Press or repeatedly until Fax Footer appears. 8 Press . 9 Press or repeatedly until On appears. 124
-
 1
1 -
2
-
3
-
4
-
5
-
6
-
7
-
8
-
9
-
10
-
11
-
12
-
13
-
14
-
15
-
16
-
17
-
18
-
19
-
20
-
21
-
22
-
23
-
24
-
25
-
26
-
27
-
28
-
29
-
30
-
31
-
32
-
33
-
34
-
35
-
36
-
37
-
38
-
39
-
40
-
41
-
42
-
43
-
44
-
45
-
46
-
47
-
48
-
49
-
50
-
51
-
52
-
53
-
54
-
55
-
56
-
57
-
58
-
59
-
60
-
61
-
62
-
63
-
64
-
65
-
66
-
67
-
68
-
69
-
70
-
71
-
72
-
73
-
74
-
75
-
76
-
77
-
78
-
79
-
80
-
81
-
82
-
83
-
84
-
85
-
86
-
87
-
88
-
89
-
90
-
91
-
92
-
93
-
94
-
95
-
96
-
97
-
98
-
99
-
100
-
101
-
102
-
103
-
104
-
105
-
106
-
107
-
108
-
109
-
110
-
111
-
112
-
113
-
114
-
115
-
116
-
117
-
118
-
 119
119 -
 120
120 -
 121
121 -
 122
122 -
 123
123 -
 124
124 -
 125
125 -
 126
126 -
 127
127 -
 128
128 -
 129
129 -
130
-
131
-
132
-
133
-
134
-
135
-
136
-
137
-
138
-
139
-
140
-
141
-
142
-
143
-
144
-
145
-
146
-
147
-
148
-
149
-
150
-
151
-
152
-
153
-
154
-
155
-
156
-
157
-
158
-
159
-
160
-
161
-
162
-
163
-
164
-
165
-
166
-
167
-
168
-
169
-
170
-
171
-
172
-
173
-
174
-
175
-
176
-
177
-
178
-
179
-
180
-
181
-
182
-
183
-
184
-
185
-
186
-
187
-
188
-
189
-
190
-
191
-
192
-
193
-
194
-
195
-
196
-
197
-
198
-
199
-
200
-
201
-
202
-
203
-
204
-
205
-
206
-
207
-
208
-
209
-
210
-
211
-
212
-
213
-
214
-
215
-
216
-
217
-
218
-
219
-
220
-
221
-
222
-
223
 |
 |