Lexmark 734DN Printing Guide - Page 2
Printing guide
 |
UPC - 734646086059
View all Lexmark 734DN manuals
Add to My Manuals
Save this manual to your list of manuals |
Page 2 highlights
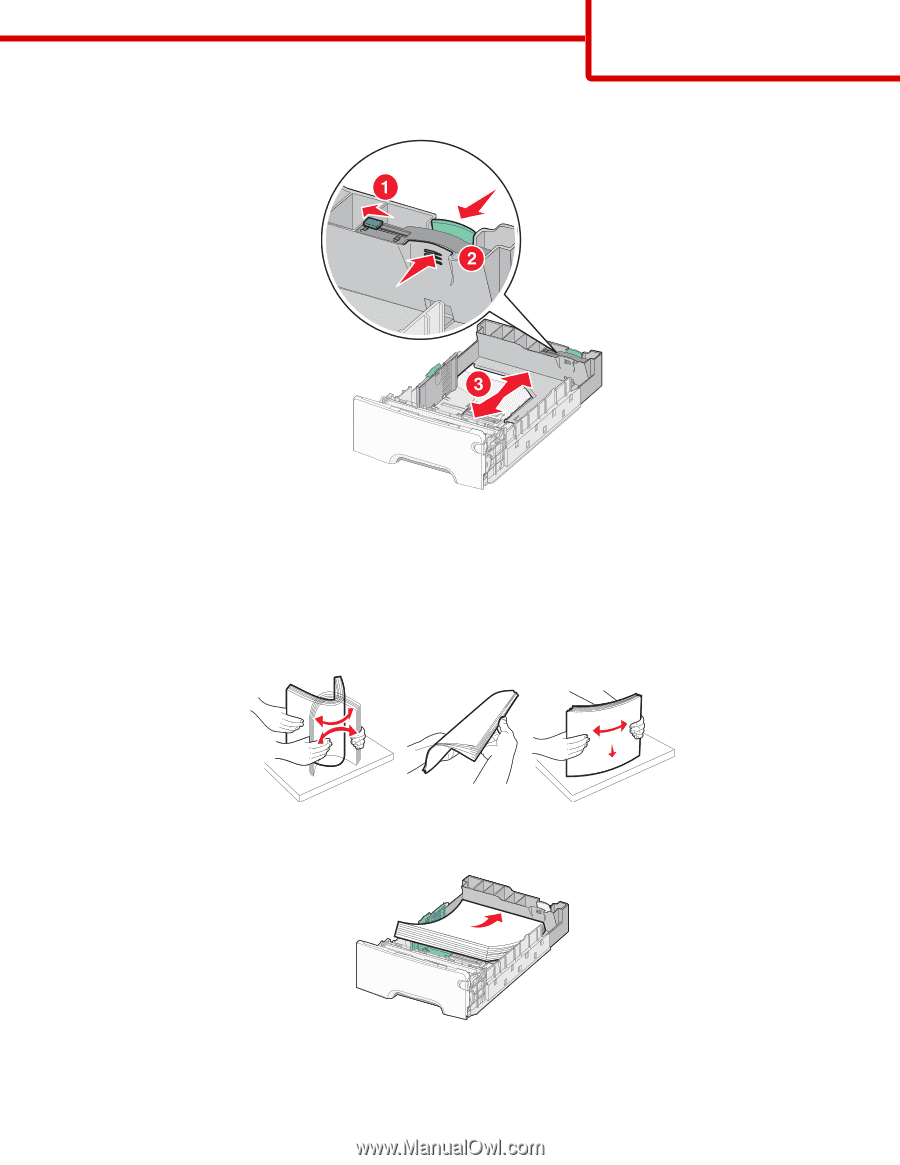
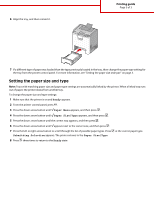
Printing guide Page 2 of 3 2 Squeeze the width guide tabs as shown, and then slide the guide to the correct position for the size of paper being loaded. Notice the load line on the left side of the paper tray: it indicates the maximum height for loading paper. 3 Squeeze the length guide tabs together, and then slide the length guide to the correct position for the size of paper being loaded. Note: The length guide has a locking device. To unlock the tray, slide the button on top of the length guide to the left as shown. To lock the tray once a length has been selected, slide the button back to the right. 4 Flex a stack of paper back and forth to loosen the sheets, and then fan them. Do not fold or crease the paper. Straighten the edges on a level surface. 5 Load the paper stack with the recommended print side faceup. Load the stack toward the back of the tray as shown. When loading preprinted letterhead for simplex printing, place the header toward the front of the tray. ABC
-
 1
1 -
 2
2 -
 3
3
 |
 |