Lexmark E323 Quick Reference - Page 1
Lexmark E323 - Printer - B/W Manual
 |
UPC - 734646384216
View all Lexmark E323 manuals
Add to My Manuals
Save this manual to your list of manuals |
Page 1 highlights
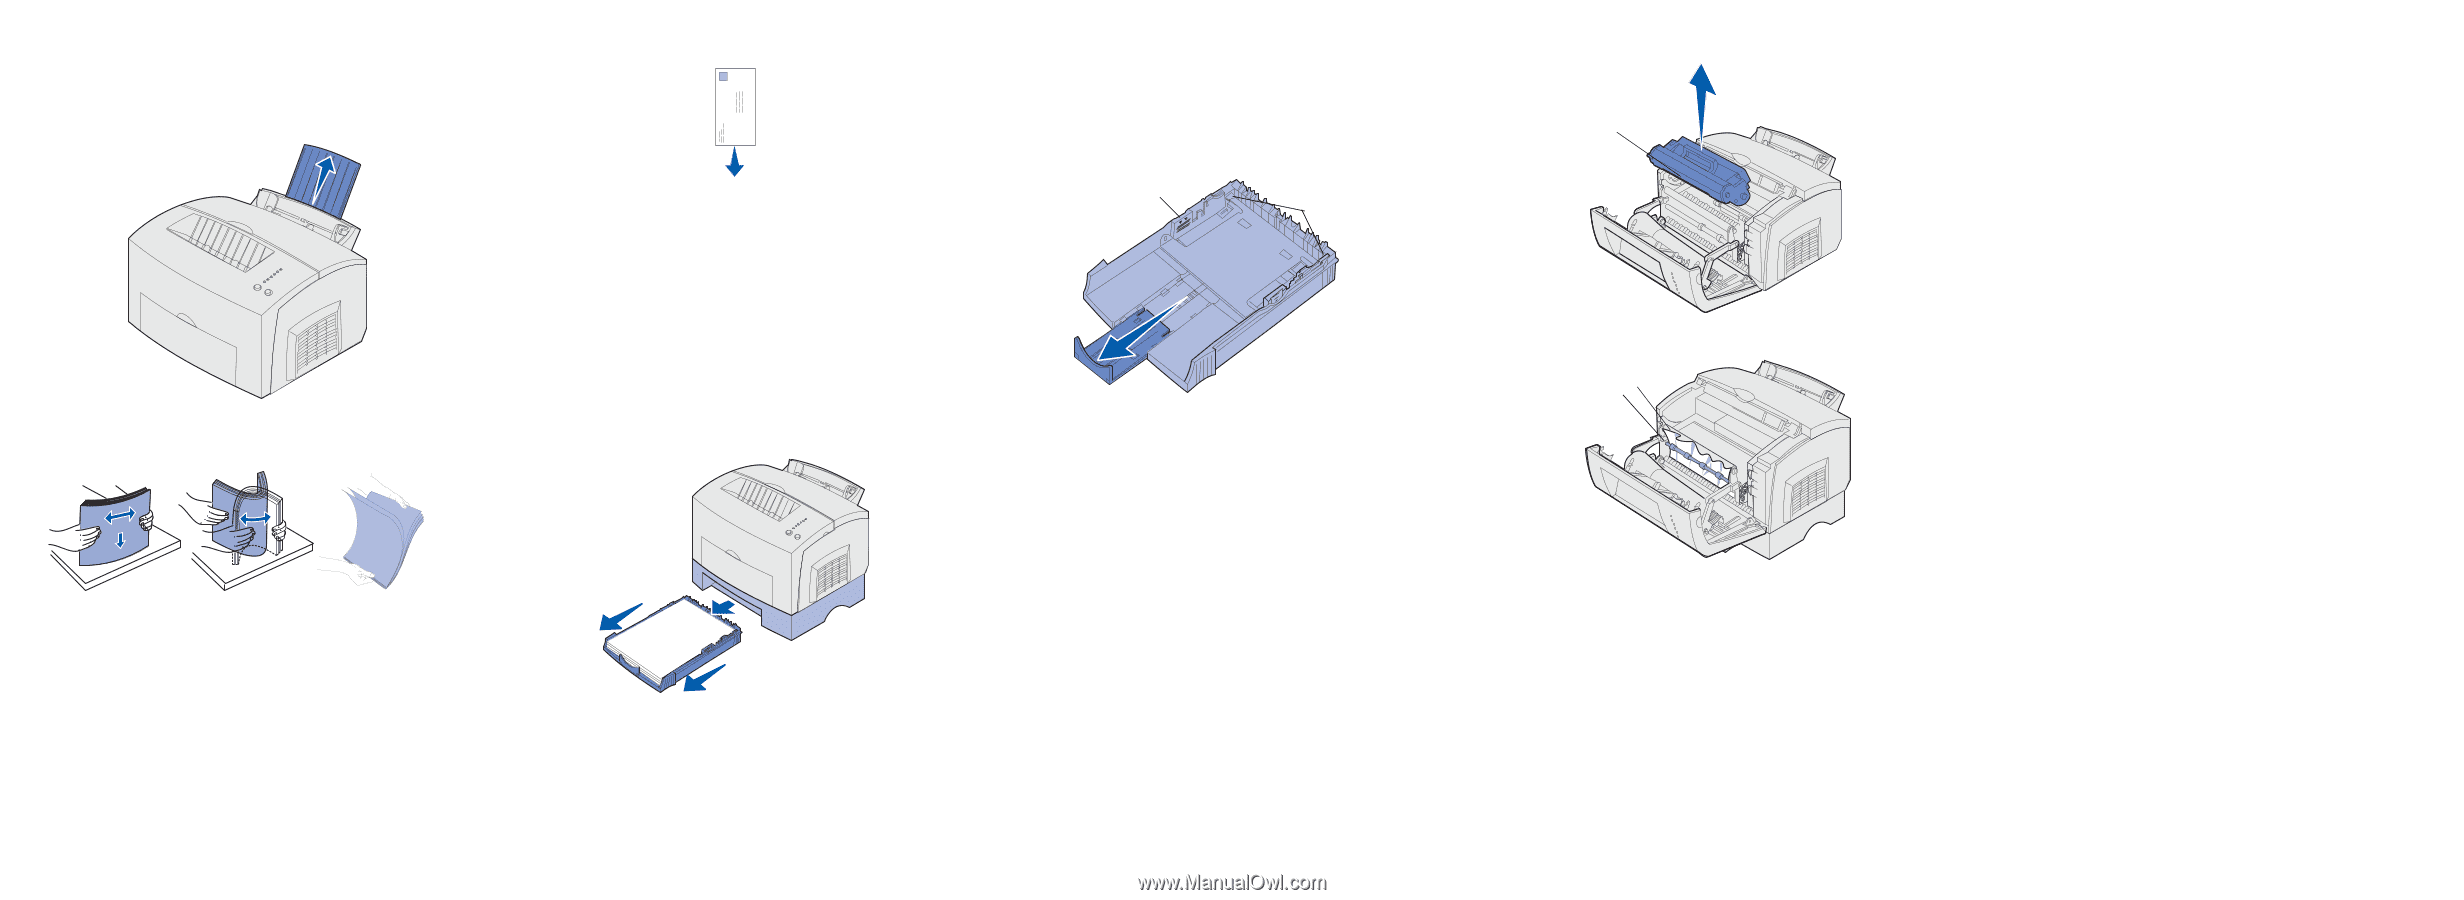
Quick Reference Loading tray 1 1 Extend the rear paper support until you hear a click. 2 Straighten the edges on a level surface. Flex the sheets back and forth to loosen them, fan the sheets on all four sides, and flex them again. Note: Not flexing and fanning the media may cause feed problems and jams. 3 Load: • letterhead paper with the top of the page pointing down, facing you. • envelopes in the center of the tray. Load them vertically, flap side down, with the stamp area in the top left corner. 4 Extend the front paper support on the top output bin. 5 Slide the paper guides flush against the edges of the media. 6 Open the front output door if you are printing on special media. 7 Choose the paper size and type from your software application. 8 Start your print job. Loading the optional 250-sheet tray Grasp the tabs on either side of the paper tray and pull it completely out of the printer. Note: After the paper tray is inserted, the metal plate springs back up so the paper can feed into the printer. 3 Do not exceed the stack height indicator; overfilling the tray may cause jams. 4 Slide the paper guides against the edges of the paper. 5 Make sure the paper is under both corner bucklers and is flat in the tray. Stack height indicator Corner bucklers 6 Reinstall the tray, making sure the tray is pushed all the way in. 7 Select the paper size and type from your software application. 8 Start your print job. Clearing jams The Paper Jam light prompts you to clear the paper path. 1 Open the printer cover. 2 Remove the print cartridge (it may be warm) and cover it. 1 If loading: • letterhead paper, insert letterhead face down with the top of the page entering the printer first. • A4 or legal size paper, extend the paper support. 2 Make sure the metal plate is pressed down before inserting the paper tray into the printer. Warning! Exposing the photoconductor to light may damage the print cartridge. Photoconductor 3 Gently pull out the media. Fuser Roller If the jam occurs as it exits the optional 250-sheet tray into the printer: 1 Open the printer cover. 2 Remove the print cartridge (the print cartridge may be warm). 3 Gently pull the paper toward you. 4 Reinstall the print cartridge. 5 Close the printer cover to resume printing. 6 Press Continue to clear the message. If you cannot reach the paper easily: 1 Turn off the printer. (You will lose the rest of the print job.) 2 Lift the printer off the drawer. 3 Remove the paper. 4 Reinstall the drawer. 5 Turn on the printer. 6 Resend your print job. If the jam occurs just after the paper feeds from the optional 250sheet tray: 1 Pull the tray all the way out. 2 Gently pull the paper toward you. 3 Reinstall the tray to resume printing. 4 Press Continue to clear the message. CAUTION! The fuser may be hot! 4 If the media is jammed tightly behind the roller, or if you cannot get a grip on it, close the cover, open the front output door, and pull out the paper. 5 Make sure there is no more media in the printer. 6 Reinstall the print cartridge. 7 Close the printer cover to resume printing. 8 Press Continue to clear the message.
-
 1
1 -
 2
2
 |
 |