Lexmark E360 Clearing Jams Guide - Page 3
paper jam, paper jam - fuser
 |
View all Lexmark E360 manuals
Add to My Manuals
Save this manual to your list of manuals |
Page 3 highlights
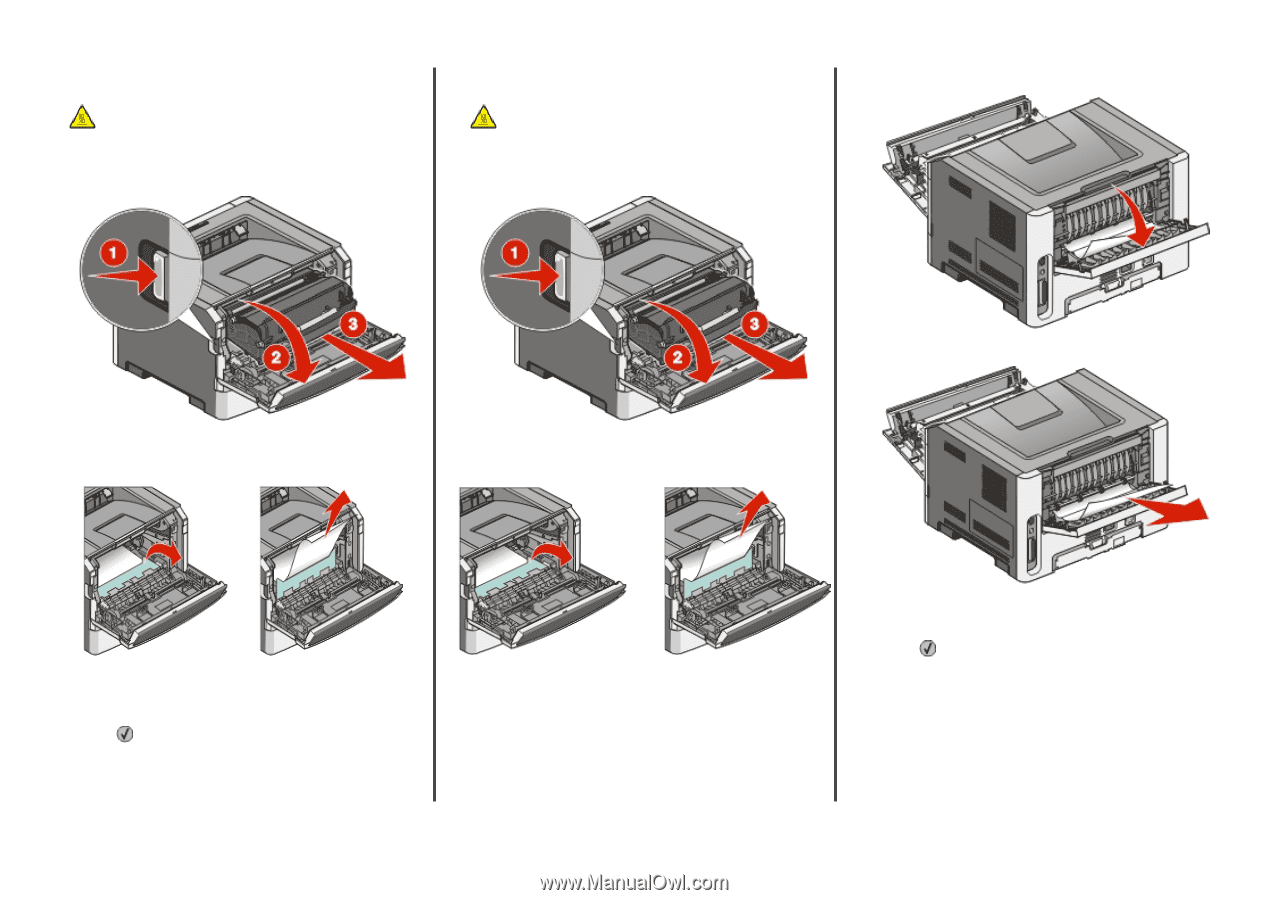
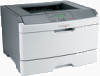
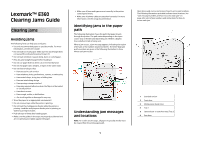
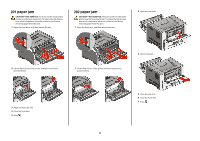
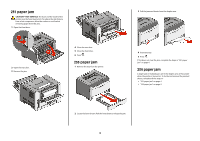
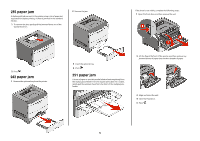
201 paper jam CAUTION-HOT SURFACE: The fuser and the inside of the printer near the fuser may be hot. To reduce the risk of injury from a hot component, allow the surface to cool before removing paper from this area. 1 Open the front door, and then remove the unit. 202 paper jam CAUTION-HOT SURFACE: The fuser and the inside of the printer near the fuser may be hot. To reduce the risk of injury from a hot component, allow the surface to cool before removing paper from this area. 1 Open the front door, and then remove the unit. 3 Open the rear door. 2 Lift the flap in front of the printer, and then remove any jammed sheets. 2 Lift the flap in front of the printer, and then remove any jammed sheets. 4 Remove the jam. 3 Align and insert the unit. 4 Close the front door. 5 Press . 5 Close the rear door. 6 Close the front door. 7 Press . 3
-
 1
1 -
 2
2 -
 3
3 -
 4
4 -
 5
5
 |
 |