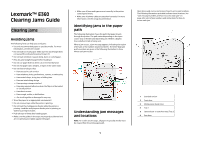
Lexmark E360DN Clearing Jams Guide - Page 4
paper jam, paper jam, paper jam
 |
UPC - 734646084475
View all Lexmark E360DN manuals
Add to My Manuals
Save this manual to your list of manuals |
Page 4 highlights
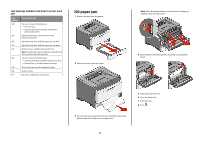
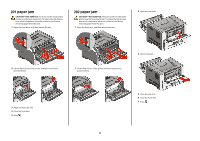
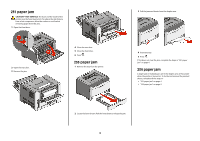
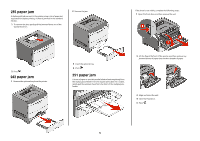
231 paper jam CAUTION-HOT SURFACE: The fuser and the inside of the printer near the fuser may be hot. To reduce the risk of injury from a hot component, allow the surface to cool before removing paper from this area. 1 Open the front door. 2 Open the rear door. 3 Remove the jam. 4 Close the rear door. 5 Close the front door. 6 Press . 233 paper jam 1 Remove the tray from the printer. 3 Pull the jammed sheets from the duplex area. 4 Insert the tray. 5 Press . If this does not clear the jam, complete the steps in "231 paper jam" on page 4. 234 paper jam A single jam or multiple jams are in the duplex area of the printer when the printer is turned on. To locate and remove the jammed sheets, complete all the steps in: • "231 paper jam" on page 4 • "233 paper jam" on page 4 2 Locate the lever shown. Pull the level down to release the jam. 4
-
 1
1 -
 2
2 -
 3
3 -
 4
4 -
 5
5
 |
 |
