Lexmark E460DW Printing guide - Page 2
Printing guide
 |
UPC - 734646083669
View all Lexmark E460DW manuals
Add to My Manuals
Save this manual to your list of manuals |
Page 2 highlights
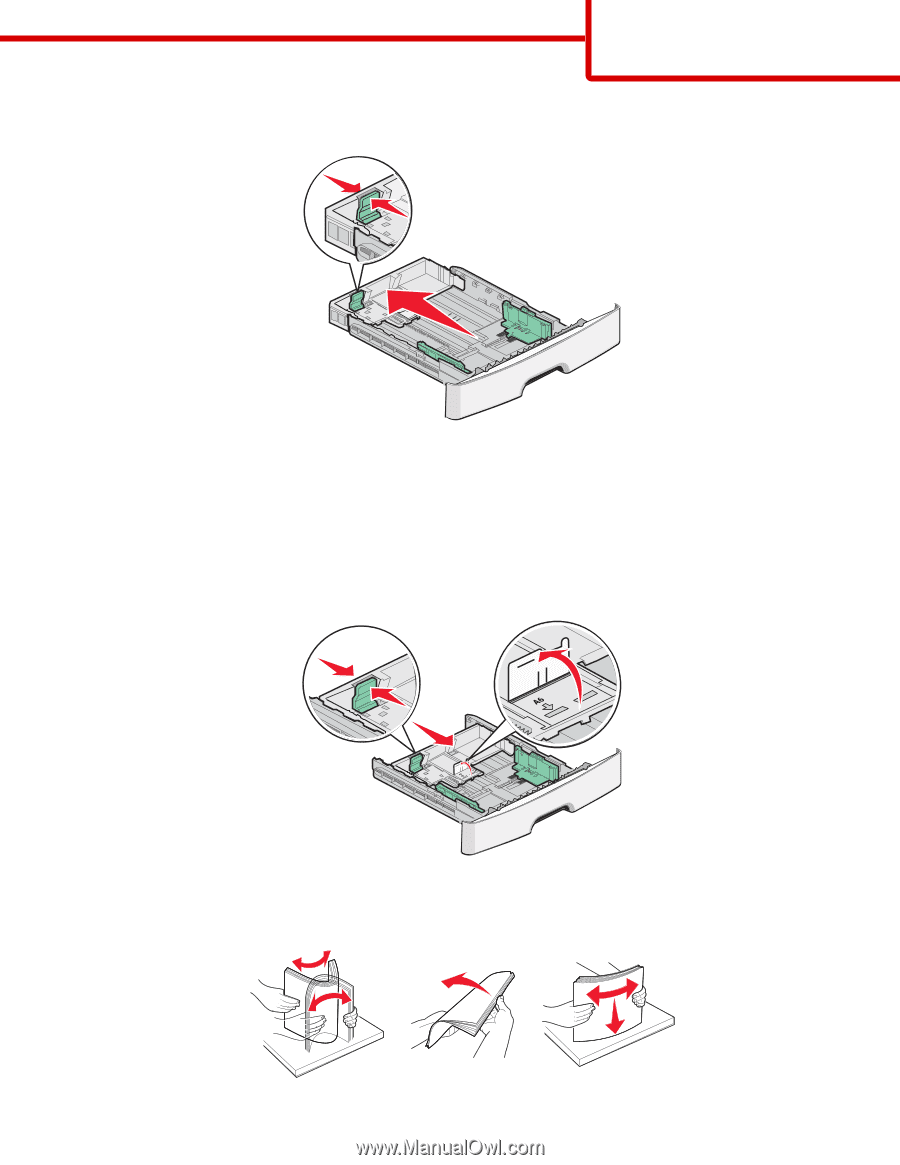
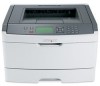
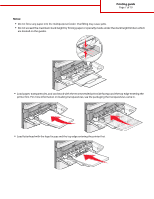
Printing guide Page 2 of 10 For long paper like A4 or legal, squeeze and slide the length guide backwards to accommodate the length of paper you are loading. If you are loading A6-size paper: a Squeeze and slide the length guide toward the center of the tray to the A5 size position. b Raise the A6 backstop. Notes: • Tray 1 accommodates only 150 sheets of A6-size paper. Notice the maximum fill line on the A6 backstop which indicates the maximum height for loading A6-size paper. Do not try to overload the tray. • A6-size paper cannot be loaded in tray 2. Note: Use the size indicators on the bottom of the tray to help position the guide. 3 Flex a stack of paper back and forth to loosen the sheets, and then fan them. Do not fold or crease the paper. Straighten the edges on a level surface.
-
 1
1 -
 2
2 -
 3
3 -
 4
4 -
 5
5 -
 6
6 -
 7
7 -
 8
8 -
9
-
10
 |
 |