Lexmark Interpret S409 Quick Reference Guide
Lexmark Interpret S409 Manual
 |
View all Lexmark Interpret S409 manuals
Add to My Manuals
Save this manual to your list of manuals |
Lexmark Interpret S409 manual content summary:
- Lexmark Interpret S409 | Quick Reference Guide - Page 1
Lexmark Interpret S400 Series Quick Reference Guide April 2009 www.lexmark.com - Lexmark Interpret S409 | Quick Reference Guide - Page 2
are properly handled with zero waste to landfills. Go to www.lexmark.com/recycle. Follow instructions to request postage-paid bags. Bags usually arrive within 7-10 days. Place the empty Lexmark-branded inkjet cartridge(s) in the postage-paid return bag, and then seal the bag. If you're sending - Lexmark Interpret S409 | Quick Reference Guide - Page 3
printhead without the CD...14 Ordering and replacing ink cartridges 16 Ordering ink cartridges...16 Replacing ink cartridges...17 Maintaining ink cartridges...18 Using the printer software 20 Minimum system requirements...20 Installing the printer software...20 Using the Windows printer software - Lexmark Interpret S409 | Quick Reference Guide - Page 4
Scanning 29 Tips for scanning...29 Scanning to a local or network computer...29 Scanning to a flash drive or memory card...30 Scanning directly to e-mail using the printer software 30 Scanning to a PDF...31 Canceling scan jobs...31 Troubleshooting 32 Notices 39 Edition notice...39 Contents 4 - Lexmark Interpret S409 | Quick Reference Guide - Page 5
-support.lexmark.com online technical support, and telephone support 1 Available on the installation software CD and on the Lexmark Web site at www.lexmark.com/publications/. 2 Refer to this section if you are installing the printhead without the installation software CD. Minimizing your printer - Lexmark Interpret S409 | Quick Reference Guide - Page 6
. These features clean the printhead nozzles to improve the quality of your prints. Recycling • Return ink cartridges for reuse or recycling through the Lexmark Cartridge Collection Program. To return an ink cartridge, go to www.lexmark.com/recycle. Follow the instructions to request a postage-paid - Lexmark Interpret S409 | Quick Reference Guide - Page 7
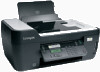
puts the printer into Power Saver mode after 10 minutes of inactivity. Understanding the parts of the printer Use the 1 Paper support 2 Paper guide adjustment lever 3 Wi-Fi indicator 4 Memory card slots 5 PictBridge and USB port To Load paper. Adjust the paper guides. Check wireless status. Insert - Lexmark Interpret S409 | Quick Reference Guide - Page 8
feed guard Prevent items from falling into the paper slot. 14 Paper guides Keep paper straight when feeding. Use the To 1 Top cover Access the scanner glass. 2 Scanner glass Scan and copy photos and documents. 3 Power supply with port Connect the printer to a power source. About your - Lexmark Interpret S409 | Quick Reference Guide - Page 9
. Note: The carrier moves to the printhead access area when no printhead is installed on the printer. For more information, see "Installing the printhead without the CD" on page 14. Install, replace, or remove ink cartridges. • Access the ink cartridges and printhead. • Remove paper jams. Using the - Lexmark Interpret S409 | Quick Reference Guide - Page 10
and send faxes. 5 Photo button Access the photo menu and print photos. 6 Display View: Note: The display is turned off in Power Saver mode. • Printer status • Messages • Menus 7 Arrow buttons Choose a menu or submenu item that appears on the display. 8 Select button • Select menu options - Lexmark Interpret S409 | Quick Reference Guide - Page 11
Back button 10 Setup button To • Return to the previous screen. • Exit from one menu level to a higher one. Access the setup menu and change printer settings. the last five numbers dialed. 3 Dialtone Dial the telephone number manually using the keypad before sending the fax. 4 Color/Black Switch - Lexmark Interpret S409 | Quick Reference Guide - Page 12
. • If necessary, connect the memory card to the adapter that came with it. • Make sure that the memory card inserted is supported by the printer. For more information, see "Supported memory cards and file types" on page 13. • The flash drive uses the same port that is used for a PictBridge camera - Lexmark Interpret S409 | Quick Reference Guide - Page 13
Card Detected or Storage Device Detected on the display. Notes: • If the printer does not recognize the memory device, then remove and reinsert it. • If on the display prompting you to choose which memory device to use. Supported memory cards and file types Memory Card File Type • Secure Digital ( - Lexmark Interpret S409 | Quick Reference Guide - Page 14
Installing the printhead without the CD 1 Open the printer, and then remove the packaged printhead from the printer. 2 Raise the printer control panel, and then remove the ink cartridges from the paper exit tray. 3 Connect the power cord, and then turn on the printer. Warning-Potential Damage: Read - Lexmark Interpret S409 | Quick Reference Guide - Page 15
remove any tape from the latch. 5 Lift the latch. 6 Remove the printhead from the disposable container. 7 Insert the printhead, and then close the latch until it clicks. 8 Close the printer. 9 Install the ink cartridges. For more information, see "Replacing ink cartridges" on page 17. About your - Lexmark Interpret S409 | Quick Reference Guide - Page 16
Ordering and replacing ink cartridges Ordering ink cartridges Page yields available at www.lexmark.com/pageyields. For best results, use only Lexmark ink cartridges. Lexmark S400 Series models (except Lexmark S408) Item Black cartridge High yield black cartridge Yellow color cartridge High yield - Lexmark Interpret S409 | Quick Reference Guide - Page 17
the old ones or the ink remaining in the printhead nozzles may dry out. 1 Turn on your printer. 2 Open the printer. Note: The printhead moves to the cartridge installation position. 3 Press the release tab, and then remove the used ink cartridge or cartridges. 4 Install each ink cartridge. Use two - Lexmark Interpret S409 | Quick Reference Guide - Page 18
the Printer Utility dialog, click Print Alignment Page. 5 Follow the instructions on the computer screen. If you aligned the cartridges to improve print quality, then print your document again. If print quality has not improved, then clean the printhead nozzles. Ordering and replacing ink cartridges - Lexmark Interpret S409 | Quick Reference Guide - Page 19
to clean the printhead nozzles. A cleaning page prints. Using the printer software For Windows users 1 Click or Start. 2 Click All Programs or Programs, and then select the printer program folder from the list. 3 Select Printer Home. 4 From the Maintenance tab, click Clean Cartridges. For Macintosh - Lexmark Interpret S409 | Quick Reference Guide - Page 20
LTS and 8.10 (Web only) • Linux OpenSUSE 11.0 and 11.1 (Web only) • Linux Fedora 10 (Web only) Installing the printer software Note: If you installed the printer software on this computer before but need to reinstall the software, then uninstall the current software first. For Windows users 1 Close - Lexmark Interpret S409 | Quick Reference Guide - Page 21
site at www.lexmark.com. 2 From the Drivers & Downloads menu, click Driver Finder. 3 Select your printer, and then select your operating system. 4 Download the driver and install the printer software. Using the Windows printer software Software installed during printer installation When you set - Lexmark Interpret S409 | Quick Reference Guide - Page 22
wireless printer on a wireless network. • Change the wireless settings of the printer. Note: This program is installed automatically with the printer software if the printer has wireless capability. • Troubleshoot the printer. • Access the printer maintenance functions. • Contact technical support - Lexmark Interpret S409 | Quick Reference Guide - Page 23
Utility) • Get help with cartridge installation. • Print a test page. • Print an alignment page. • Clean the printhead nozzles. • Order ink or supplies. • Register the printer. • Contact technical support. Lexmark Wireless Setup Assistant Set up the printer on a wireless network. (referred to as - Lexmark Interpret S409 | Quick Reference Guide - Page 24
print job: For Windows users a With a document open, click File Print. b Click Properties, Preferences, Options, or Setup. c Select the print quality, the number of copies to print, the type of paper to use, and how the pages should print. d Click OK to close any printer software dialogs. e Click - Lexmark Interpret S409 | Quick Reference Guide - Page 25
on. • The memory card or flash drive must contain document files that are supported by the printer. For more information, see "Supported memory cards and file types" on page 13. • The computer must contain applications that support the file types in the memory device. 1 Insert a memory card or flash - Lexmark Interpret S409 | Quick Reference Guide - Page 26
a PIN to the computer, see the Help for the printer software associated with your operating system. Canceling print jobs To cancel a print job from the printer control panel, press . To cancel a print job from the computer, do the following: For Windows users 1 Click , or click Start and then click - Lexmark Interpret S409 | Quick Reference Guide - Page 27
clippings). Tips for copying • When using the ADF, adjust the paper guide on the ADF to the width of the original document. • When using document faceup into the ADF or facedown on the scanner glass. 3 From the printer control panel, press . 4 Press the arrow buttons to select the number of - Lexmark Interpret S409 | Quick Reference Guide - Page 28
3 From the printer control panel, press . 4 Press until Photo Reprint appears. 5 Press the arrow buttons to scroll to Yes, and then press before stacking, displaying, or storing. Canceling copy jobs To cancel a copy job, press . Scanning stops and the printer returns to the previous menu. Copying 28 - Lexmark Interpret S409 | Quick Reference Guide - Page 29
magazine clippings). Tips for scanning • When using an ADF, adjust the paper guide on the ADF to the width of the original document. • When using the see the Help for the printer software associated with your operating system. 5 Wait until the printer has finished downloading a list of the scan - Lexmark Interpret S409 | Quick Reference Guide - Page 30
control panel indicating that the file you scanned has been saved. Scanning directly to e-mail using the printer software For Windows users 1 Load an original document faceup into the ADF or facedown on the scanner glass. 2 Click or Start. 3 Click All Programs or Programs, and then - Lexmark Interpret S409 | Quick Reference Guide - Page 31
From the Finder desktop, double-click the printer program folder. 3 Double-click the printer Center to open the All-In-One Center. 4 From the "What is being send it through e-mail as an attachment. Scanning to a PDF For Windows users 1 Load an original document faceup into the ADF or facedown on the - Lexmark Interpret S409 | Quick Reference Guide - Page 32
install new cartridges if necessary. • Use the Service Center to locate and solve the problem (Windows only). • Turn the printer off, wait about 10 seconds, and then turn the printer back on. Using the Service Center to solve printer problems The Service Center provides step-by-step troubleshooting - Lexmark Interpret S409 | Quick Reference Guide - Page 33
press and release to turn the printer on. Note: Do not release and until Language appears on the display, indicating that the printer has been reset. 3 Complete the initial printer setup. Printhead errors If the "Before you troubleshoot" checklist does not solve the problem, then try the following - Lexmark Interpret S409 | Quick Reference Guide - Page 34
REINSERT THE PRINTHEAD 1 Open the printer and lift the latch. 2 Remove the printhead. 3 Wipe the printhead contacts using a clean, lint-free cloth. 4 Reinsert the printhead. Note: If removing and reinserting the printhead does not resolve the error, then contact technical support. Troubleshooting 34 - Lexmark Interpret S409 | Quick Reference Guide - Page 35
the "Before you troubleshoot" checklist does not solve the problem, then try one or more of the following: MAKE SURE THE INK CARTRIDGES ARE INSERTED CORRECTLY 1 Turn the printer on, and then open the printer. 2 Make sure the cartridges are inserted correctly. The cartridges should click firmly into - Lexmark Interpret S409 | Quick Reference Guide - Page 36
. REMOVE AND REINSTALL THE PRINTER SOFTWARE Printer is printing blank pages Blank pages may be caused by improperly installed ink cartridges. REINSTALL THE INK CARTRIDGES AND DEEP CLEAN AND ALIGN THE PRINTHEAD 1 Reinstall the ink cartridges, see "Replacing ink cartridges" on page 17 for more - Lexmark Interpret S409 | Quick Reference Guide - Page 37
then reset the power: 1 Unplug the power cord from the wall outlet, and then wait 10 seconds. 2 Insert the power cord into the wall outlet, and then turn on the printer. If this problem persists, then check our Web site for updates for your printer software or firmware. RECONNECT THE PRINTER POWER - Lexmark Interpret S409 | Quick Reference Guide - Page 38
trouble setting up your printer on a network, print a network setup page, and then see the complete network troubleshooting information in the Network Getting Started Guide or the comprehensive User's Guide available on the installation software CD. Printing a network setup page A network setup - Lexmark Interpret S409 | Quick Reference Guide - Page 39
in conjunction with other products, programs, or services, except those expressly designated by the manufacturer, are the user's responsibility. For Lexmark technical support, visit support.lexmark.com. For information on supplies and downloads, visit www.lexmark.com. If you don't have access to - Lexmark Interpret S409 | Quick Reference Guide - Page 40
received, including interference that may cause undesired operation. Any questions on this statement should be directed to: Director of Lexmark Technology & Services Lexmark International, Inc. 740 West New Circle Road Lexington, KY 40550 (859) 232-3000 For additional compliance information, see the
-
 1
1 -
 2
2 -
 3
3 -
 4
4 -
 5
5 -
 6
6 -
 7
7 -
8
-
9
-
10
-
11
-
12
-
13
-
14
-
15
-
16
-
17
-
18
-
19
-
20
-
21
-
22
-
23
-
24
-
25
-
26
-
27
-
28
-
29
-
30
-
31
-
32
-
33
-
34
-
35
-
36
-
37
-
38
-
39
-
40
 |
 |

Lexmark Interpret S400 Series Quick
Reference Guide
April 2009
www.lexmark.com