Lexmark MX611 Fax Guide
Lexmark MX611 Manual
 |
View all Lexmark MX611 manuals
Add to My Manuals
Save this manual to your list of manuals |
Lexmark MX611 manual content summary:
- Lexmark MX611 | Fax Guide - Page 1
scanner glass. • The ADF indicator light comes on when the paper is loaded properly. 2 If you are loading a document into the ADF tray, then adjust the paper guides. 3 From the printer support person. 1 Load an original document faceup, short edge first into the ADF tray or facedown on the scanner - Lexmark MX611 | Fax Guide - Page 2
paper guides. driver instead of the printer control panel. 1 With a document open, click File > Print. 2 Select the printer, and then navigate to: Properties > Fax tab > Enable fax 3 Enter the recipient fax number or numbers in the "Fax number(s)" field. Note: Fax numbers can be entered manually image - Lexmark MX611 | Fax Guide - Page 3
Fax Guide Page 3 of 4 Select from the following content sources: • Black/White Laser-The original document was printed using a mono laser printer. • Color Laser-The original document was printed using a color laser printer. • Inkjet-The original document was printed using an inkjet printer. • - Lexmark MX611 | Fax Guide - Page 4
, leaving nothing on that portion of the scan. • Transmission Log-This prints the transmission log or transmission error log. • Fix Scan Skew-This straightens scanned images that are slightly skewed when received from the ADF tray. Note: This option is supported only in select printer models.
-
 1
1 -
 2
2 -
 3
3 -
 4
4
 |
 |

Fax Guide
The fax function lets you scan items and fax them to one or more recipients. You can send a fax from the printer by typing the
fax number, using a shortcut number, or using the address book.
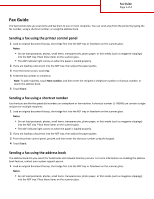
Sending a fax using the printer control panel
1
Load an original document faceup, short edge first into the ADF tray or facedown on the scanner glass.
Notes:
•
Do not load postcards, photos, small items, transparencies, photo paper, or thin media (such as magazine clippings)
into the ADF tray. Place these items on the scanner glass.
•
The ADF indicator light comes on when the paper is loaded properly.
2
If you are loading a document into the ADF tray, then adjust the paper guides.
3
From the home screen, touch
Fax
.
4
Enter the fax number or a shortcut.
Note:
To add recipients, touch
Next number
, and then enter the recipient's telephone number or shortcut number, or
search the address book.
5
Touch
Fax It
.
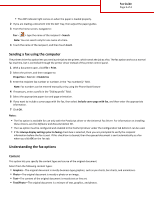
Sending a fax using a shortcut number
Fax shortcuts are like the speed dial numbers on a telephone or fax machine. A shortcut number (1–99999) can contain a single
recipient or multiple recipients.
1
Load an original document faceup, short edge first into the ADF tray or facedown on the scanner glass.
Notes:
•
Do not load postcards, photos, small items, transparencies, photo paper, or thin media (such as magazine clippings)
into the ADF tray. Place these items on the scanner glass.
•
The ADF indicator light comes on when the paper is loaded properly.
2
If you are loading a document into the ADF tray, then adjust the paper guides.
3
From the printer control panel, press
#
, and then enter the shortcut number using the keypad.
4
Touch
Fax It
.
Sending a fax using the address book
The address book lets you search for bookmarks and network directory servers. For more information on enabling the address
book feature, contact your system support person.
1
Load an original document faceup, short edge first into the ADF tray or facedown on the scanner glass.
Notes:
•
Do not load postcards, photos, small items, transparencies, photo paper, or thin media (such as magazine clippings)
into the ADF tray. Place these items on the scanner glass.
Fax Guide
Page 1 of 4