Lexmark Monochrome Laser Connectivity guide - Page 4
Macintosh instructions for network-attached printers - printer mac
 |
View all Lexmark Monochrome Laser manuals
Add to My Manuals
Save this manual to your list of manuals |
Page 4 highlights
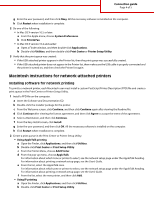
Connection guide Page 4 of 5 g Enter the user password, and then click Okay. All the necessary software is installed on the computer. h Click Restart when installation is complete. 2 Do one of the following: • In Mac OS X version 10.5 or later: a From the Apple menu, choose System Preferences. b Click Print & Fax. • In Max OS X version 10.4 and earlier: a Open a Finder window, and then double-click Applications. b Double-click Utilities, and then double-click Print Center or Printer Setup Utility. 3 Verify that the print queue was created: • If the USB-attached printer appears in the Printer list, then the print queue was successfully created. • If the USB-attached printer does not appear in the Printer list, then make sure the USB cable is properly connected and the printer is turned on, and then check the Printer list again. Macintosh instructions for network-attached printers Installing software for network printing To print to a network printer, each Macintosh user must install a custom PostScript Printer Description (PPD) file and create a print queue in the Print Center or Printer Setup Utility. 1 Install a PPD file on the computer. a Insert the Software and Documentation CD. b Double-click the installer package for the printer. c From the Welcome screen, click Continue, and then click Continue again after viewing the Readme file. d Click Continue after viewing the license agreement, and then click Agree to accept the terms of the agreement. e Select a Destination, and then click Continue. f From the Easy Install screen, click Install. g Enter the user password, and then click OK. All the necessary software is installed on the computer. h Click Restart when installation is complete. 2 Create a print queue in the Print Center or Printer Setup Utility. • Using AppleTalk printing a Open the Finder, click Applications, and then click Utilities. b Double-click Print Center or Print Setup Utility. c From the Printer Menu, choose Add Printer. d From the pop-up menu, choose AppleTalk. For information about which zone or printer to select, see the network setup page under the AppleTalk heading. For information about printing a network setup page, see the User's Guide. e From the list, select the AppleTalk zone. For information about which zone or printer to select, see the network setup page under the AppleTalk heading. For information about printing a network setup page, see the User's Guide. f From the list, select the new printer, and then click Add. • Using IP printing a Open the Finder, click Applications, and then click Utilities. b Double-click Print Center or Print Setup Utility.
-
 1
1 -
 2
2 -
 3
3 -
 4
4 -
 5
5
 |
 |
