Lexmark P350 Getting Started
Lexmark P350 Manual
 |
View all Lexmark P350 manuals
Add to My Manuals
Save this manual to your list of manuals |
Lexmark P350 manual content summary:
- Lexmark P350 | Getting Started - Page 1
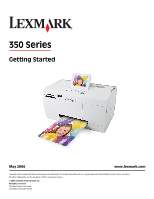
350 Series Getting Started May 2006 www.lexmark.com Lexmark and Lexmark with diamond design are trademarks of Lexmark International, Inc., registered in the United States and/or other countries. All other trademarks are the property of their respective owners. © 2006 Lexmark International, Inc. - Lexmark P350 | Getting Started - Page 2
any obligation to you. To obtain additional copies of publications related to this product, visit the Lexmark Web site at www.lexmark.com. References in this publication to products, programs, or services do not imply that the manufacturer intends to make these available in all countries in which it - Lexmark P350 | Getting Started - Page 3
cartridge for better print quality 9 Checking the box contents...9 Learning about the printer 11 Understanding the parts of the printer...11 Using the control panel buttons...12 Using the control panel menus...13 Learning about the software 18 Loading paper 19 Loading paper...19 Using supported - Lexmark P350 | Getting Started - Page 4
35 Setting the Bluetooth mode...35 Printing using Bluetooth...35 Troubleshooting 37 Setup troubleshooting...37 Print troubleshooting...39 Jams and misfeeds troubleshooting...41 Device troubleshooting...42 Error messages troubleshooting...43 Removing and reinstalling the software...45 Notices 46 - Lexmark P350 | Getting Started - Page 5
) and some basic instructions for using the printer. You can find this document in the printer box or on the Lexmark Web site at www.lexmark.com. Note: If your printer supports Macintosh operating systems, see the Mac Help: 1 From the Finder desktop, double-click the Lexmark 350 Series folder - Lexmark P350 | Getting Started - Page 6
All Programs Œ Lexmark • Loading paper 350 Series. • Printing 2 Click User's Guide. • Working with photos If the link to the User's Guide is not on your desktop, follow • Scanning (if supported by your printer) these instructions: • Making copies (if supported by your printer) 1 Insert the - Lexmark P350 | Getting Started - Page 7
notice. For the most recent phone numbers available, see the printed warranty statement that shipped with your printer. E-mail support For e-mail support, visit our Web site: www.lexmark.com. E-mail support varies by country or region, and may not be available in some instances. 1 Click CUSTOMER - Lexmark P350 | Getting Started - Page 8
Record the following information (located on the store receipt and the back of the printer), and have it ready when you contact us so that we may serve you faster: • Machine Type number • Serial number • Date purchased • Store where purchased Finding information about the printer 8 - Lexmark P350 | Getting Started - Page 9
. To set up the printer, see the Setup sheet that came with the product. Aligning the print cartridge for better print quality 1 Load photo paper, with the glossy or printable side facing you. (If you are not sure which side is the printable side, see the instructions that came with the paper - Lexmark P350 | Getting Started - Page 10
Printed booklet that serves as a guide Note: The complete User's Guide can be found on the installation software CD that shipped with the printer. 5 Setup Instructions sheet Instructions on setting up printer hardware and software, and information on setup troubleshooting 6 4 x 6 in. (10 x 15 cm - Lexmark P350 | Getting Started - Page 11
Understanding the parts of the printer Use the To 1 Paper guide Keep paper straight when feeding. 2 Paper support Load paper. 3 Handle Carry the printer. 4 Access cover Access the print cartridge. 5 Paper exit tray Hold paper as it exits. 6 PictBridge port Connect a PictBridge-enabled - Lexmark P350 | Getting Started - Page 12
a computer using a USB cable. Using the control panel buttons Press To 1 Turn the printer on and off. 2 Apply red-eye reduction to the photo on the display when it is again to cancel the correction. 3 Start a color print job using the current settings. Learning about the printer 12 - Lexmark P350 | Getting Started - Page 13
on page 21. 2 Press or repeatedly until View and Select appears on the display. 3 Press . 4 Follow the instructions on the display. From here You can View and Select • Select one or more photos for viewing and/or printing , paper type, and passport photo print settings. Learning about the printer 13 - Lexmark P350 | Getting Started - Page 14
can transfer photos from a memory card to a flash drive or a computer (if the printer is attached to a computer). The photos on the memory card are retained. 1 Insert Computer (if the printer is attached to a computer). 6 Press . 7 Follow the instructions on the printer display. Learning about the - Lexmark P350 | Getting Started - Page 15
you want to move to the previous or next photo manually, press or . 6 Use any of the following ink level in the print cartridge. For more information, see "Viewing the ink level" in the "Maintaining the printer" chapter of the User's Guide on the CD. • Clean Cartridge to clean the print cartridge - Lexmark P350 | Getting Started - Page 16
, see "Adding frames to photos" on page 32. Using the PictBridge menu The PictBridge default settings menu allows the selection of printer settings if no selections were specified on your digital camera beforehand. To make camera selections, see the camera documentation. 1 Connect a PictBridge - Lexmark P350 | Getting Started - Page 17
size. Photo Size Select a photo size. Layout Select a photo layout. Print Quality Select a print quality. Paper Type Select a paper type. For more information, see "Using supported paper types" on page 19. 4 Press or to make a selection. 5 Press to print. Learning about the - Lexmark P350 | Getting Started - Page 18
up the printer with a computer, see the Setup sheet that came with the product. Use this The Solution Center To Opening the software Find troubleshooting, maintenance, and cartridge ordering information. From the desktop: 1 Click Start ΠPrograms or All Programs ΠLexmark 350 Series. 2 Select - Lexmark P350 | Getting Started - Page 19
• Photo/glossy paper Notes: • For best results, use Lexmark Perfectfinish Photo Paper or Lexmark Photo Paper. • Do not use Lexmark Premium Photo Paper. Your print cartridge is not compatible with this type of paper. Your printer supports the following paper sizes: • A6 card: 4.1 x 5.8 inches (105 - Lexmark P350 | Getting Started - Page 20
, and print photos stored on a memory card. For more information, see "Printing photos" on page 24 or "Editing photos" on page 29. The printer also lets you transfer photos: • From a memory card to a computer. For more information, see "Transferring photos from a memory device to a computer" on page - Lexmark P350 | Getting Started - Page 21
use and remove the other one. Inserting a flash drive A flash drive can be used to store photos taken using a digital camera or camera phone. The printer lets you view, edit, and print photos stored on a flash drive. For more information, see "Printing photos" on page 24 or "Editing photos" on page - Lexmark P350 | Getting Started - Page 22
Camera User Manual for further information. If you want to use the camera to control printing photos, refer to the instructions in the camera documentation. 4 If no selections were specified on your digital camera beforehand, you can use the printer to control printing - Lexmark P350 | Getting Started - Page 23
Viewing photos Viewing a photo slideshow on the control panel display If you want to see a slideshow of the photos on a memory card or flash drive, see "Using the Slideshow menu" on page 15. Viewing photos 23 - Lexmark P350 | Getting Started - Page 24
printer: • Lexmark Perfectfinish Photo Paper • Lexmark Photo Paper • Photo/glossy paper Notes: • For best results, use Lexmark Perfectfinish Photo Paper or Lexmark Photo Paper. • Do not use Lexmark Premium Photo Paper. Your print cartridge printable side, see the instructions that came with the paper - Lexmark P350 | Getting Started - Page 25
the paper exit tray, and allow the prints to dry at least 24 hours before stacking, displaying, or storing. Printing photos by date Use these instructions to print photos taken within certain dates. 1 Load photo paper with the glossy or printable side facing you. (If you are not sure which side - Lexmark P350 | Getting Started - Page 26
the paper exit tray, and allow the prints to dry at least 24 hours before stacking, displaying, or storing. Printing photos by range Use these instructions to select the first and last photos in a range to be printed. 1 Load photo paper with the glossy or printable side facing you. (If you - Lexmark P350 | Getting Started - Page 27
Printing an index page of photos Use these instructions to print thumbnail images of all photos stored available on some digital cameras. If your camera supports DPOF, you can specify which photos to print, the size of the paper loaded in the printer is not smaller than the size you specified in - Lexmark P350 | Getting Started - Page 28
, and use the PictBridge menu on the printer to print photos. 1 Load photo paper, with the glossy or printable side facing you. (If you are not sure which side is the printable side, see the instructions that came with the paper.) For more information, see "Loading paper" on page 19. 2 Connect - Lexmark P350 | Getting Started - Page 29
following paper types with your printer: • Lexmark Perfectfinish Photo Paper • Lexmark Photo Paper • Photo/glossy paper Notes: • For best results, use Lexmark Perfectfinish Photo Paper or Lexmark Photo Paper. • Do not use Lexmark Premium Photo Paper. Your print cartridge is not compatible with this - Lexmark P350 | Getting Started - Page 30
photos 1 Load photo paper with the glossy or printable side facing you. (If you are not sure which side is the printable side, see the instructions that came with the paper.) For more information, see "Loading paper" on page 19. 2 Insert a memory card or flash drive. For more information, see - Lexmark P350 | Getting Started - Page 31
automatically 1 Load photo paper with the glossy or printable side facing you. (If you are not sure which side is the printable side, see the instructions that came with the paper.) For more information, see "Loading paper" on page 19. 2 Insert a memory card or flash drive. For more information, see - Lexmark P350 | Getting Started - Page 32
photo. 1 Load photo paper, with the glossy or printable side facing you. (If you are not sure which side is the printable side, see the instructions that came with the paper.) For more information, see "Loading paper" on page 19. 2 Insert a memory card or flash drive. For more information, see - Lexmark P350 | Getting Started - Page 33
Gray. 1 Load photo paper with the glossy or printable side facing you. (If you are not sure which side is the printable side, see the instructions that came with the paper.) For more information, see "Loading paper" on page 19. 2 Insert a memory card or flash drive. For more information, see - Lexmark P350 | Getting Started - Page 34
computer screen. 3 From the Fast Pics dialog, click Save Photos to PC. The light on the printer blinks to indicate the memory card is transmitting data to the computer. 4 Follow the instructions on the computer screen to specify where you want to save the images. Transferring photos from a memory - Lexmark P350 | Getting Started - Page 35
If you are not sure which side is the printable side, see the instructions that came with the paper.) For more information, see "Loading paper" on . 2 Make sure that the Bluetooth Enable and Discovery Mode selections on your printer are set to On. For more information, see "Setting the Bluetooth mode - Lexmark P350 | Getting Started - Page 36
detects the Bluetooth adapter, the following message appears on the printer display for five seconds: Bluetooth Dongle Connected. 5 To print photos from your Bluetooth-enabled device, see the documentation that came with the product. Note: To - Lexmark P350 | Getting Started - Page 37
all the way into the power supply port on the printer. 2 Plug the cord into an electrical outlet that other electrical devices have been using. 3 If the light is not on, press . Software does not install The following operating systems are supported: • Windows 2000 • Windows XP Troubleshooting 37 - Lexmark P350 | Getting Started - Page 38
printer software CD. The CD icon is created on the desktop. 6 Follow the instructions on the computer screen to install the software. SOLUTION 2 1 Remove the printer Reinsert the printer software CD. 5 Follow the instructions on the connect the cable to the printer and the computer. Cannot print - Lexmark P350 | Getting Started - Page 39
quality is still not satisfactory, replace the print cartridge. For more information, see "Ordering supplies" in the "Maintaining the printer" chapter of the User's Guide on the CD. Photo does not print SOLUTION 1 If an error message is displayed, see "Error messages troubleshooting" on page 43 - Lexmark P350 | Getting Started - Page 40
ink level, and install a new print cartridge if necessary. For more information, see "Installing the print cartridge" in the "Maintaining the printer" chapter of the User's Guide on the CD. SOLUTION 5 If the printer 4 Remove as many unused fonts as possible from your system. Troubleshooting 40 - Lexmark P350 | Getting Started - Page 41
, visit our Web site at www.lexmark.com to check for the latest software. a In all countries or regions except the United States, select your country or region. b Click the links for drivers and downloads. c Select your printer family. d Select your printer model. e Select your operating system - Lexmark P350 | Getting Started - Page 42
Paper jam in the paper support 1 Press to turn off the printer. 2 Firmly grasp the paper, and gently pull it out. 3 Press to turn the printer back on. Device troubleshooting Device cannot be inserted Make sure that the type of memory card, flash drive, PictBridge camera, or Bluetooth adapter you - Lexmark P350 | Getting Started - Page 43
. 3 Reinsert the print cartridge. 4 Press to align the cartridge. SOLUTION 2 Load photo paper, with the glossy or printable side facing you. (If you are not sure which side is the printable side, see the instructions that came with the paper.) Load new paper only. The printer will read any markings - Lexmark P350 | Getting Started - Page 44
messages and percentages may not apply to the starter cartridge that shipped with your printer. 1 Install a new print cartridge if necessary. To order supplies, see "Ordering supplies" in the "Maintaining the printer" chapter of the User's Guide on the CD. 2 Press to continue. Troubleshooting 44 - Lexmark P350 | Getting Started - Page 45
when you try to use the printer, you may need to remove and reinstall the printer software. 1 Click Start ΠPrograms or All Programs ΠLexmark 350 Series. 2 Select Uninstall. 3 Follow the instructions on the computer screen to remove the printer software. 4 Restart the computer before reinstalling - Lexmark P350 | Getting Started - Page 46
received, including interference that may cause undesired operation. Any questions on this statement should be directed to: Director of Lexmark Technology & Services Lexmark International, Inc. 740 West New Circle Road Lexington, KY 40550 (859) 232-3000 For additional compliance information, see the - Lexmark P350 | Getting Started - Page 47
all print cartridges, programs, data, and removable storage media (unless directed otherwise by Lexmark). For further explanation of your warranty alternatives and the nearest Lexmark authorized servicer in your area, contact Lexmark at (800) 332-4120, or on the World Wide Web at support.lexmark.com - Lexmark P350 | Getting Started - Page 48
purchased for your use, and not for resale, from Lexmark Canada, Inc. ("Lexmark") or a Lexmark remarketer, referred to in this statement as "Remarketer." Warranty Lexmark warrants that this product: -Is manufactured from new parts, or new and serviceable used parts, which perform like new parts -Is - Lexmark P350 | Getting Started - Page 49
). For further explanation of your warranty alternatives and the nearest Lexmark authorized servicer in your area, please contact Lexmark at 1-800-539-6275, or on the World Wide Web at www.lexmark.com/support. Remote technical support is provided for this product throughout its warranty period. For - Lexmark P350 | Getting Started - Page 50
to real property or tangible personal property. In no event will Lexmark be liable for any special or indirect damages, lost profits, lost you followed the setup instructions. -See your User's Guide. -Visit our Web site at www.lexmark.com/support. -Call Lexmark Customer Service at 1-800-539-6275. - Lexmark P350 | Getting Started - Page 51
43 cartridge error 44 cartridge missing error 44 cartridge, print ink level 44 inserting Bluetooth adapter 35 flash drives 21 memory cards 20 installing printer software 45 invalid device 44 invalid image file 44 J jams and misfeeds troubleshooting paper jam in paper support 42 paper jam in printer - Lexmark P350 | Getting Started - Page 52
paper guide 11 paper support 11 PictBridge cartridge error 44 cartridge missing 44 cover open 44 ink level 44 invalid device 44 invalid image file 44 paper jam 45 paper out 45 PictBridge error 45 troubleshooting, jams and misfeeds paper jam in paper support 42 paper jam in printer 41 troubleshooting - Lexmark P350 | Getting Started - Page 53
U USB port 12 using supported paper types 19, 24, 29 V View and Select menu 13 View Slideshow menu 15 viewing slideshow 23 W Web site finding 5 Index 53
-
 1
1 -
 2
2 -
 3
3 -
 4
4 -
 5
5 -
 6
6 -
 7
7 -
8
-
9
-
10
-
11
-
12
-
13
-
14
-
15
-
16
-
17
-
18
-
19
-
20
-
21
-
22
-
23
-
24
-
25
-
26
-
27
-
28
-
29
-
30
-
31
-
32
-
33
-
34
-
35
-
36
-
37
-
38
-
39
-
40
-
41
-
42
-
43
-
44
-
45
-
46
-
47
-
48
-
49
-
50
-
51
-
52
-
53
 |
 |
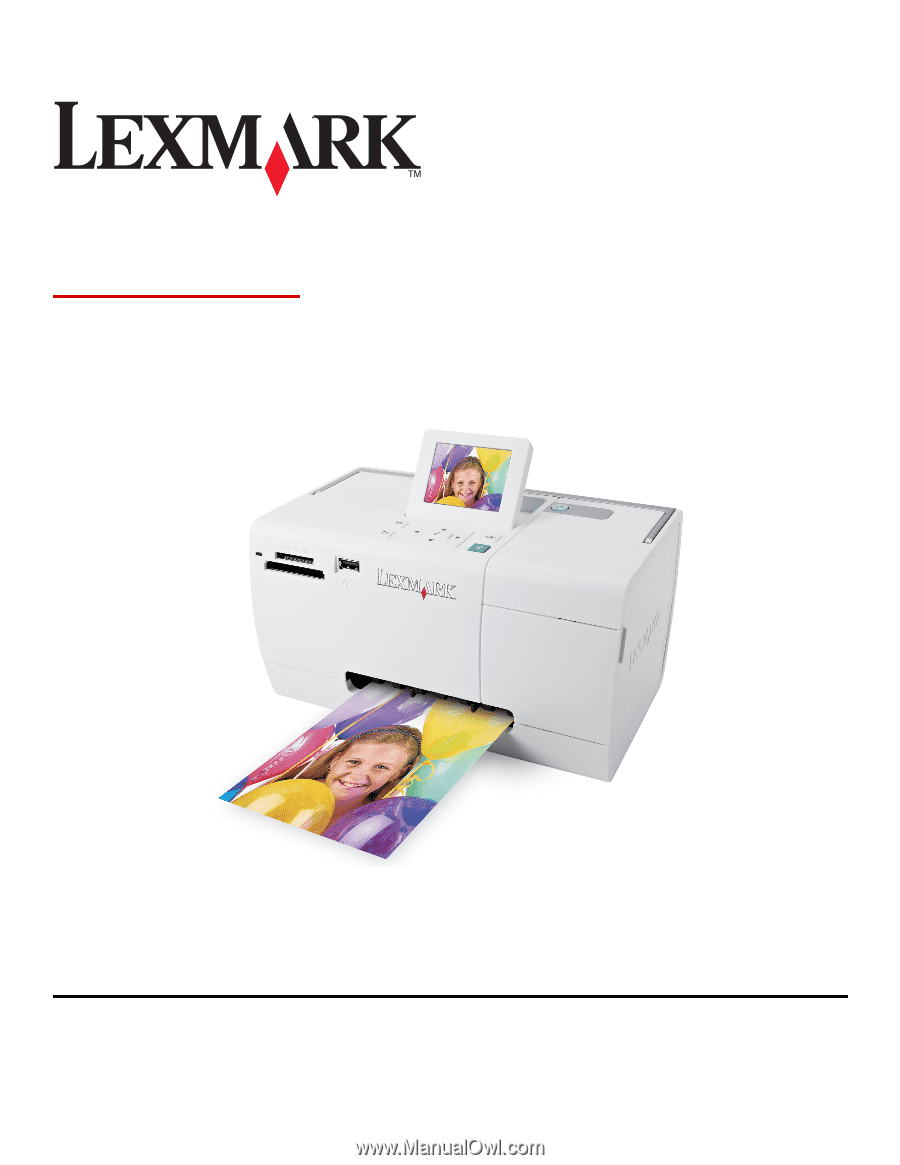
350 Series
Getting Started
May 2006
www.lexmark.com
Lexmark and Lexmark with diamond design are trademarks of Lexmark International, Inc., registered in the United States and/or other countries.
All other trademarks are the property of their respective owners.
© 2006 Lexmark International, Inc.
All rights reserved.
740 West New Circle Road
Lexington, Kentucky 40550