Lexmark Prestige Pro805 Quick Reference - Page 6
Using the printer control panel, Warning-Potential Damage - ink cartridges
 |
View all Lexmark Prestige Pro805 manuals
Add to My Manuals
Save this manual to your list of manuals |
Page 6 highlights
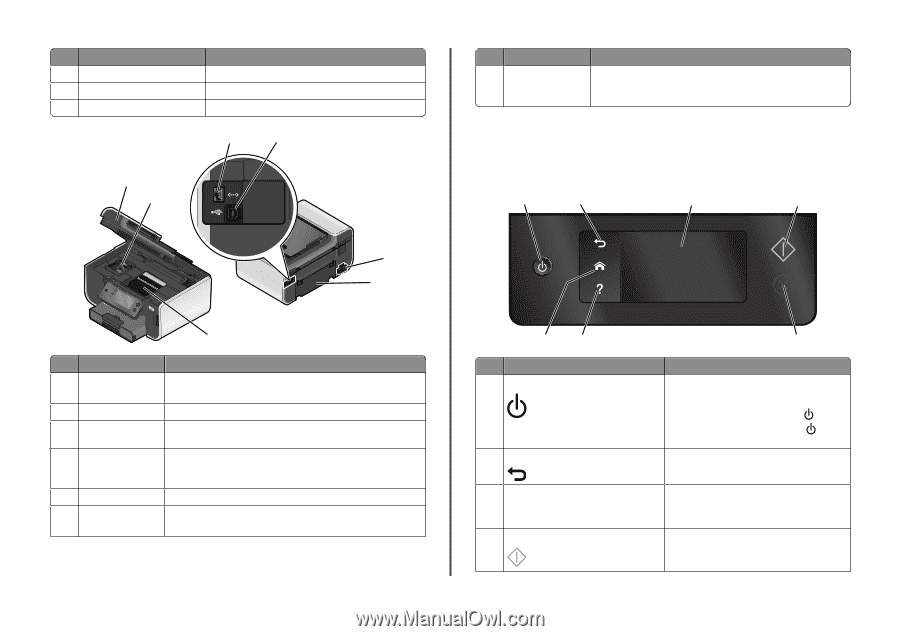
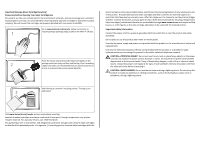
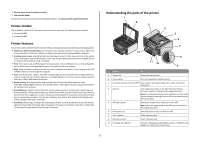
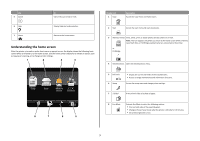
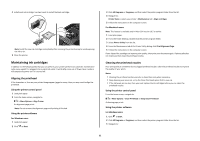
Use the 10 Printer control panel 11 Paper tray 12 Paper exit tray 1 2 To Operate the printer. Load paper. Hold paper as it exits. 3 4 5 6 7 Use the To 1 Scanner unit • Access the ink cartridges and printhead. • Remove paper jams. 2 Ink cartridge access Install, replace, or remove ink cartridges. 3 Ethernet port Connect your printer to a computer, a local network, an external DSL, or a cable modem. 4 USB port Connect the printer to a computer using a USB cable. Warning-Potential Damage: Do not touch the USB port except when plugging in or removing a USB cable or installation cable. 5 Power supply with port Connect the printer to a power source. 6 Duplex unit • Print on both sides of a sheet of paper. • Remove paper jams. Use the 7 Printhead access To Install the printhead. Note: The carrier moves to the printhead access area when no printhead is installed in the printer. Using the printer control panel The following diagrams explain the sections of the printer control panel: Note: The icons are displayed when they are selectable on the current screen. If an icon is not displayed, then the function is not available. 1 2 3 4 7 6 5 Use 1 Power 2 Back To • Turn the printer on and off. • Switch to Power Saver mode. Note: When the printer is on, press to Power Saver mode. Press and hold seconds to turn off the printer. to switch for three • Return to the previous screen. • Exit from one menu level to a higher one. 3 Touch screen display • Navigate the printer menus. Note: The display is turned off in Power Saver • Change settings. mode. • View printer messages and animation. 4 Start Start a job, depending on which mode is selected. 6
-
 1
1 -
 2
2 -
 3
3 -
 4
4 -
 5
5 -
 6
6 -
 7
7 -
 8
8 -
 9
9 -
 10
10 -
 11
11 -
 12
12 -
13
-
14
-
15
-
16
-
17
-
18
-
19
-
20
-
21
-
22
-
23
-
24
-
25
 |
 |