Lexmark T612n Setup Guide (1.4 MB) - Page 10
Attaching the Paper Bail, Attaching Decals to Paper Trays
 |
UPC - 734646282406
View all Lexmark T612n manuals
Add to My Manuals
Save this manual to your list of manuals |
Page 10 highlights
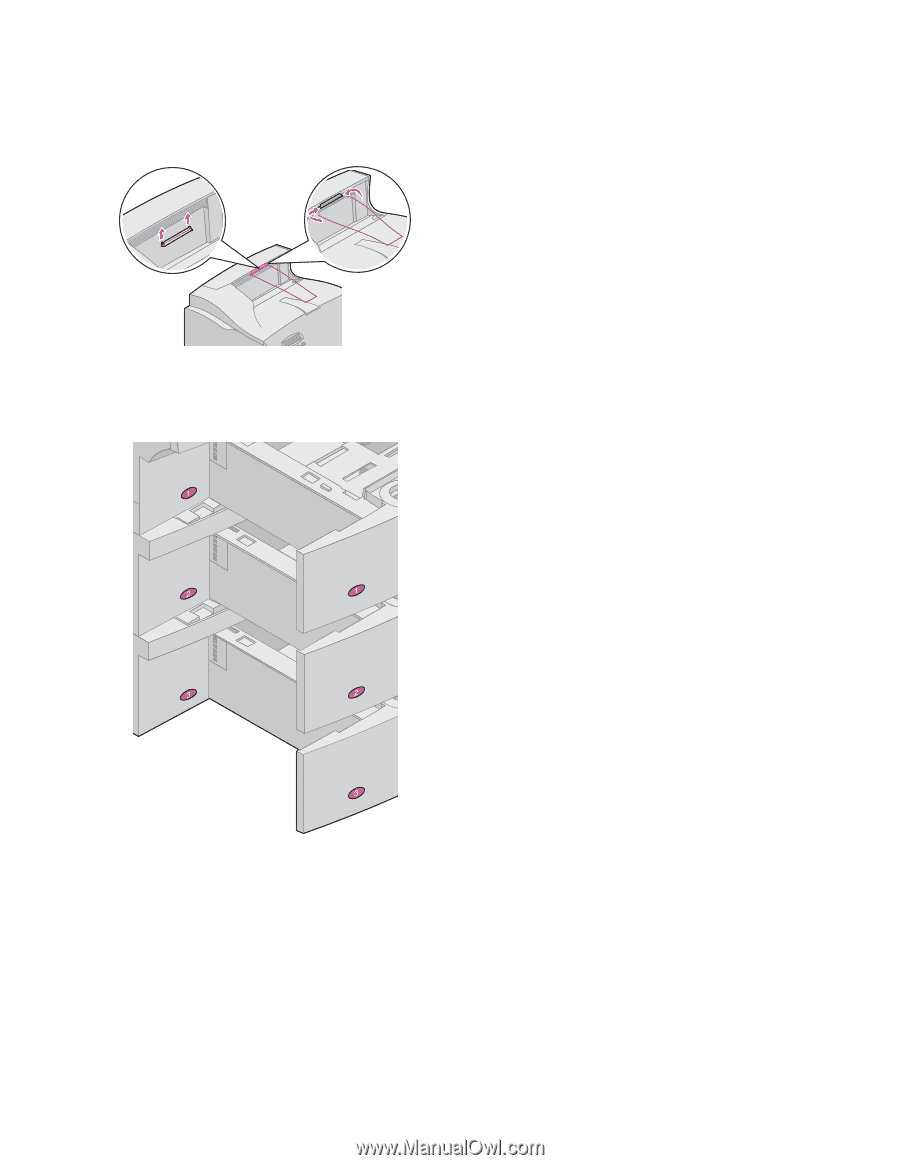
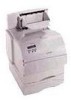
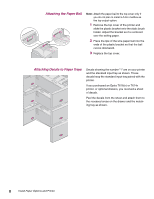
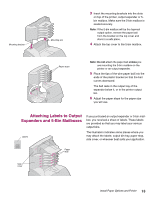
Attaching the Paper Bail Note: Attach the paper bail to the top cover only if you do not plan to install a 5-bin mailbox as the top output option. 1 Remove the top cover of the printer and slide the plastic bracket onto the static brush holder. Adjust the bracket so it is centered over the exiting paper. 2 Place the tips of the wire paper bail into the ends of the plastic bracket so that the bail curves downward. 3 Replace the top cover. Attaching Decals to Paper Trays Decals showing the number "1" are on your printer and the standard input tray as shown. These decals keep the standard input tray paired with the printer. If you purchased an Optra T616(n) or T614n printer, or optional drawers, you received a sheet of decals. Peel the decals from the sheet and attach them to the recessed areas on the drawer and the matching tray as shown. 8 Install Paper Options and Printer
-
 1
1 -
2
-
3
-
4
-
 5
5 -
 6
6 -
 7
7 -
 8
8 -
 9
9 -
 10
10 -
 11
11 -
 12
12 -
 13
13 -
 14
14 -
 15
15 -
16
-
17
-
18
-
19
-
20
-
21
-
22
-
23
-
24
-
25
-
26
-
27
-
28
-
29
-
30
-
31
-
32
-
33
-
34
-
35
-
36
-
37
 |
 |