Lexmark X2350 User's Guide
Lexmark X2350 Manual
 |
View all Lexmark X2350 manuals
Add to My Manuals
Save this manual to your list of manuals |
Lexmark X2350 manual content summary:
- Lexmark X2350 | User's Guide - Page 1
2300 Series All-In-One User's Guide May 2005 www.lexmark.com Lexmark and Lexmark with diamond design are trademarks of Lexmark International, Inc., registered in the United States and/or other countries. © 2005 Lexmark International, Inc. All rights reserved. 740 West New Circle Road Lexington, - Lexmark X2350 | User's Guide - Page 2
or repairs, other than those described in the user documentation, to a professional service person. CAUTION: Do not set up this product or make any electrical or cabling connections, such as the power supply cord or telephone, during a lightning storm. Conventions Note: A note identifies something - Lexmark X2350 | User's Guide - Page 3
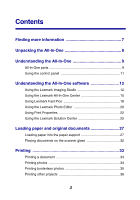
the Lexmark Photo Editor 20 Using Print Properties 22 Using the Lexmark Solution Center 25 Loading paper and original documents 27 Loading paper into the paper support 27 Placing documents on the scanner glass 32 Printing 33 Printing a document 33 Printing photos 34 Printing borderless - Lexmark X2350 | User's Guide - Page 4
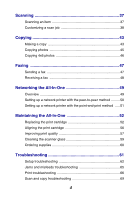
52 Replacing the print cartridge 52 Aligning the print cartridge 56 Improving print quality 57 Cleaning the scanner glass 59 Ordering supplies 60 Troubleshooting 61 Setup troubleshooting 62 Jams and misfeeds troubleshooting 65 Print troubleshooting 66 Scan and copy troubleshooting 69 4 - Lexmark X2350 | User's Guide - Page 5
Error messages troubleshooting 71 Notices 72 Index 75 5 - Lexmark X2350 | User's Guide - Page 6
6 - Lexmark X2350 | User's Guide - Page 7
you install the All-In-One software, click Start Æ Programs Æ Lexmark 2300 Series Æ Readme. http://support.lexmark.com Information on: • Upgrades-Software upgrade information • Customer Support-Contact information, order status, and warranty • Downloads-Drivers • Solutions-Troubleshooting hints - Lexmark X2350 | User's Guide - Page 8
the instructions on the Lexmark 2300 Series Setup sheet. If problems occur, see "Setup troubleshooting" on page 62. Opening the box These items are in the box with the All-In-One: Note: A USB cable may or may not be included. 5 1 2 43 1 Power supply cord 2 USB cable 3 Print cartridge 4 Setup - Lexmark X2350 | User's Guide - Page 9
3 2 Use this 1 Paper support 2 Control panel 3 Paper exit tray 4 Top cover 5 Paper guide 6 Scanner glass To Load paper. Operate the All-In-One. Hold paper as it exits. Lift to place or remove an item on the scanner glass. Make sure paper feeds correctly. Scan, copy, or remove an item - Lexmark X2350 | User's Guide - Page 10
To 1 Scanner support Hold up the scanner lid. 2 Print cartridge carrier Install, replace, or remove a print cartridge. 3 Scanner unit Raise to access the print cartridge carrier. 4 Power supply Supply power to the All-In-One. Note: Insert the power supply cord into the power supply before - Lexmark X2350 | User's Guide - Page 11
Using the control panel 1 2 3 Use this button 1 To Make a color copy. 2 Open the All-In-One Center to preview the scan on the computer screen. 3 • Turn the All-In-One on or off. • Cancel a print job. • Reset the All-In-One. 11 - Lexmark X2350 | User's Guide - Page 12
) • Print Properties (for changing printer settings) • Lexmark Solution Center (for troubleshooting, maintenance, and cartridge ordering information) Using the Lexmark Imaging Studio There are several ways to open the Lexmark Imaging Studio: • Click Start Æ Programs Æ Lexmark 2300 Series Æ Lexmark - Lexmark X2350 | User's Guide - Page 13
Imaging Studio task buttons These buttons can be used to go directly to the Lexmark All-In-One Center. Click To Browse & Print Photos Share Photos Scan & Edit Text (OCR) Scan Details Opens the Lexmark All-In-One Center to the Saved Images tab so you can locate and select photos to reorganize - Lexmark X2350 | User's Guide - Page 14
select whether you want to scan and send a fax, or receive a fax or view settings/history. For more information, see "Sending a fax" on page 47 or "Receiving a fax" on page 48. To Find out more about what you can do with the software. Use the tools in the Lexmark Solution Center to keep - Lexmark X2350 | User's Guide - Page 15
Lexmark All-In-One Center: • Through the Lexmark Imaging Studio. For more information, see "Using the Lexmark Imaging Studio" on page 12. • Click Start Æ Programs Æ Lexmark 2300 Series Æ All-In-One Center. • Right-click the Lexmark computer screen), and select Lexmark 2300 Series All-In-One Center. - Lexmark X2350 | User's Guide - Page 16
an image of what will be printed or copied. • Select a program to which you want to send the scanned images. • Click Scan Now to begin scanning. • Click See More Scan Settings to view all settings: - Select what type of image is being scanned. - Select a scan quality. - Select to Display Advanced - Lexmark X2350 | User's Guide - Page 17
an album page with photos of various sizes. • Enlarge or reduce an image. • Print an image as a multiple-page poster. • E-mail an image. • Fax using a PC modem. • Edit text found in a scanned document. • Modify an image with a photo editor. Note: For more information about the Saved Images tab - Lexmark X2350 | User's Guide - Page 18
provides you with direct access to the Lexmark Solution Center. Clicking Maintain/Troubleshoot lets you choose from these topics: • Maintain or fix quality problems • Troubleshoot All-In-One problems • Device status and ink levels • More printing ideas and how-to's • Contact information • Advanced - Lexmark X2350 | User's Guide - Page 19
Fast Pics to print photos 1 Open Lexmark Fast Pics. For more information, see "Using Lexmark Fast Pics" on page 18. 2 If necessary, click Change Folder to browse to the folder where your photos are stored. 3 Click to place a check mark next to each photo you want to print. 4 If you would like - Lexmark X2350 | User's Guide - Page 20
Select a Paper size in printer. 10 Select the Number of copies. 11 Click the Print Now button to print the photos. Using the Lexmark Photo Editor To open the Lexmark Photo Editor, click Start Æ Programs Æ Lexmark 2300 Series Æ Lexmark Photo Editor. You can also open the Lexmark Photo Editor from the - Lexmark X2350 | User's Guide - Page 21
Lexmark Photo Editor task menus From Quick Fixes Image Adjust Image Size Drawing Tools You can • Remove red eye caused by light reflection. • Fix the photo with one click. • Crop the image. • Rotate the image. • Flip the image. • Adjust the color depth. • Adjust the color balance. • Colorize - Lexmark X2350 | User's Guide - Page 22
Print Properties Print Properties is the software that controls the printing function. You can change the settings in Print Properties based on the type of project you want to create. You can open Print Properties from almost any program: 1 From the program "File" menu, click Print. 2 From the Print - Lexmark X2350 | User's Guide - Page 23
folder without opening any other program: 1 Select Start Æ Settings Æ Printers or Printers and Faxes. or Select Start Æ Control Panel Æ Printers and Other Hardware Æ Printers and Faxes. 2 Right-click Lexmark 2300 Series, and select Printing Preferences. 3 Make the changes you want, and click OK - Lexmark X2350 | User's Guide - Page 24
settings are on the three main tabs of the Print Properties software: Quality/Copies, Paper Setup, and Print Layout. Quality/Copies tab From Select Quality/Speed Quick Print, Normal, or Photo, depending on the quality of output you want. Quick Print is the fastest option. Paper Type Your paper - Lexmark X2350 | User's Guide - Page 25
, N-up, Poster, Booklet or Borderless • Two-Sided to print the document on both sides of the page • Side Flip the Lexmark Solution Center To open the Lexmark 2300 Series Solution Center (LSC): • Click Start Æ Programs Æ Lexmark 2300 Series Æ Lexmark Solution Center. • Right-click the Lexmark Imaging - Lexmark X2350 | User's Guide - Page 26
All-In-One. • Solve All-In-One problems. • Install a new print cartridge. • View shopping options for new cartridges. • Print a test page. • Clean to fix horizontal streaks. • Align to fix blurry edges. • Troubleshoot other ink problems. Learn how to contact Lexmark on the Web and by phone. • Change - Lexmark X2350 | User's Guide - Page 27
the thickness of the paper. 1 Place the paper against the right side of the paper support. Note: Do not force the paper into the All-In-One. 2 1 2 Squeeze the release tab, and slide the paper guide to the right until it rests against the edge of the paper. Note: If you are - Lexmark X2350 | User's Guide - Page 28
glossy paper • You use photo paper that is made for inkjet printers. • If the paper came with instructions, you read them carefully. • You load the photo paper vertically against the right side of the paper support. • The paper guide rests against the edge of the photo paper. Note: To prevent - Lexmark X2350 | User's Guide - Page 29
the right side of the support, as shown. • You squeeze and slide the paper guide to the left edge of the banner paper. Up to 25 sheets of • If the cards came with instructions, you read them greeting card stock, carefully. postcards, or photo cards • The print side is facing you. • The - Lexmark X2350 | User's Guide - Page 30
as it exits, and allow it to dry to avoid ink smudging. Up to 100 sheets of • If the paper came with instructions, you read them coated or premium paper carefully. • You load the paper vertically against the right side of the paper support. • If there is a watermark on the paper, you place - Lexmark X2350 | User's Guide - Page 31
Load Up to 10 envelopes Make sure • The print side is facing you. • The envelopes are loaded vertically against the right side of the paper support. • The stamp location is in the upper left corner. • The paper guide rests against the edge of the envelopes. Note: Do not load envelopes with: • - Lexmark X2350 | User's Guide - Page 32
item you want to scan or copy face down on the glass. Make sure the longer edge of the document is parallel to the front of the All-In-One. Note: Make sure the corner of the document fits securely in the front right corner of the scanner glass. 3 Close the top - Lexmark X2350 | User's Guide - Page 33
a document 1 Load paper. For more information, see "Loading paper into the paper support" on page 27. 2 With the document open, click File Æ Print. If you want to change print settings, see "Changing print settings" on page 33. 3 Click Properties, Preferences, Options, or Setup, and select the - Lexmark X2350 | User's Guide - Page 34
. 2 With the photo open, click File Æ Print. 3 Click Properties, Preferences, Options, or Setup to customize print settings. The Print Properties dialog appears. Note: If you are using the Lexmark Photo Editor, select View All Printer Settings to view Print Properties. 4 From the Quality/Copies tab - Lexmark X2350 | User's Guide - Page 35
, see "Using the Lexmark All-In-One Center" on page 15. 3 Click the Saved Images tab. 4 From the Creative Tasks section, select Print an album page with a page layout. 10 Drag the photos onto the page. 11 Click Printer Settings. 12 Select the paper size and paper type. 13 From the "Quality" drop- - Lexmark X2350 | User's Guide - Page 36
2 Click Properties, Preferences, Options, or Setup to customize print settings. The Print Properties dialog appears along with the "I Want To" menu. 3 Select one of the available projects, or click See more printing ideas. 4 Follow the instructions on the computer screen to complete the project. 36 - Lexmark X2350 | User's Guide - Page 37
on the All-In-One control panel. The All-In-One Center appears on the computer screen with a preview of the item on the scanner glass. 5 From the "Send scanned image to:" drop-down menu, select a program. 6 Adjust the dotted lines to fit around the portion of the image you want to - Lexmark X2350 | User's Guide - Page 38
All-In-One Center. For more information, see "Using the Lexmark All-In-One Center" on page 15. 2 From the Scanning & Copying tab, click See More Scan Settings. 3 From the What is being scanned? area, select an option. 4 From the "Select Scan Quality" drop-down menu, select an option. 5 Click Display - Lexmark X2350 | User's Guide - Page 39
image. • Select the area to be scanned. • Choose to convert the scanned item to text for editing. • Choose to scan multiple images before output. • Update the list of programs to send scans. • Update the default fax driver. • Straighten images after scan (deskew). • Choose whether to sharpen or - Lexmark X2350 | User's Guide - Page 40
, see "Placing documents on the scanner glass" on page 32. 2 Open the All-In-One Center. For more information, see "Using the Lexmark All-In-One Center" on page 15. The All-In-One Center appears. 3 Make sure the Scanning & Copying tab is selected. 4 From the Scan section, click Preview Now. 5 Adjust - Lexmark X2350 | User's Guide - Page 41
Using the Lexmark Imaging Studio" on page 12. 2 Click the Share Photos button. 3 Select Scan and e-mail a photo. 4 Follow the instructions on the Click Hide Folders to close the folder window. 6 Select the photo(s) you want to send. 7 Follow the instructions on the computer screen to prepare the - Lexmark X2350 | User's Guide - Page 42
glass. For more information, see "Placing documents on the scanner glass" on page 32. 2 Open the Lexmark Imaging Studio. For more information, see "Using the Lexmark Imaging Studio" on page 12. 3 Click the Scan and Edit Text (OCR) button. The Edit text in a document feature appears. You can preview - Lexmark X2350 | User's Guide - Page 43
Making a copy 1 Open the top cover of the All-In-One. 2 Place the item you want to copy on the scanner glass. For more information, see "Placing documents on the scanner glass" on page 32. 3 Close the top cover. 4 Change copy settings as needed. For more information, see "Changing copy settings - Lexmark X2350 | User's Guide - Page 44
Imaging Studio. For more information, see "Using the Lexmark Imaging Studio" on page 12. 2 Click the Copy button. 3 Select a copy quantity and color. 4 Click See More Copy Settings to: • Choose a copy quality. • Select the - Lexmark X2350 | User's Guide - Page 45
to process for Best quality or Best speed. - Select whether you are scanning a newspaper, magazine, or lithograph. - Control the darkness of the edges on the scanner glass. For more information, see "Placing documents on the scanner glass" on page 32. 2 Load photo paper with the print side facing - Lexmark X2350 | User's Guide - Page 46
Lexmark All-In-One Center" on page 15. 4 From the Scanning & Copying tab, click Preview Now. 5 Adjust the dotted lines to fit around the part of the image you want to print scanner glass. For more information, see "Placing documents on the scanner glass" on page 32. 2 Load photo paper with the print - Lexmark X2350 | User's Guide - Page 47
information, see "Placing documents on the scanner glass" on page 32. 1 Open the Lexmark Imaging Studio. For more information, see "Using the Lexmark Imaging Studio" on page 12. 2 Click the Fax button. The Fax dialog appears. 3 Click Scan and send a fax. The Lexmark All-In-One Center appears on the - Lexmark X2350 | User's Guide - Page 48
button. The Fax dialog appears. 3 Click Receive a fax or view settings/history to open the fax software. Note: Faxes can be received only when the fax software is open. When a fax is received, you can double-click the fax in the status window to view it. 4 Click the printer icon to print the fax. 48 - Lexmark X2350 | User's Guide - Page 49
Note: The All-In-One cannot scan across a network. Peer-to-peer Requirements: • You must install the driver software on all computers that will use the All-In-One. • The host computer must be on any time the client wants to print. See "Setting up a network printer with the peer-to-peer method - Lexmark X2350 | User's Guide - Page 50
this method, the printer driver is fully installed on each client computer. Network clients retain control of driver modifications. The client computer handles the print job processing. 1 Follow the instructions on the Lexmark 2300 Series Setup sheet to install the hardware and software on the host - Lexmark X2350 | User's Guide - Page 51
method, the printer driver is partially installed on each of the client computers networked to the host computer. The host computer controls driver changes and handles print job processing. 1 Follow the instructions on the Lexmark 2300 Series Setup sheet to install hardware and software on the host - Lexmark X2350 | User's Guide - Page 52
Your All-In-One uses the following cartridge: Print cartridge part number •1 •2 Removing a used cartridge Note: Make sure the All-In-One is on. 1 Lift the scanner unit. 2 Snap the scanner support into position to hold up the scanner unit. The print cartridge carrier moves and stops at the loading - Lexmark X2350 | User's Guide - Page 53
3 Press down on the cartridge lever to raise the cartridge lid. 1 4 Remove the old cartridge, and dispose of it. For more information, see "Recycling Lexmark products" on page 60. 1 1 53 - Lexmark X2350 | User's Guide - Page 54
Installing the print cartridge 1 If you are installing a new print cartridge, remove the sticker and transparent tape from the back and bottom of the cartridge. 1 1 1 2 Warning: Do not touch the gold contact area on the cartridges. 2 Unless it is already open, press down on the cartridge lever to - Lexmark X2350 | User's Guide - Page 55
4 Snap the lid closed. 5 While lifting the scanner unit, press the scanner support back until it slides into the slot, and close the scanner unit. Note: The scanner unit must be closed to start a new print, scan, or copy job. 55 - Lexmark X2350 | User's Guide - Page 56
instructions on the computer screen. To align the cartridge from the control panel: 1 Load plain paper. For more information, see "Loading paper into the paper support" on page 27. 2 Press and hold the button for three seconds. An alignment page prints. 3 Place the alignment page onto the scanner - Lexmark X2350 | User's Guide - Page 57
print cartridge nozzles 1 Load paper. For more information, see "Loading paper into the paper support" on page 27. 2 Click Start Æ Programs Æ Lexmark 2300 Series Æ Lexmark Solution Center. 3 From the Maintenance tab, click Clean to fix horizontal streaks. 4 Click Print. A page prints, forcing ink - Lexmark X2350 | User's Guide - Page 58
then wipe in the direction shown. 5 With another clean section of the cloth, repeat steps 3 through 4. 6 Let the nozzles and contacts dry completely. 7 Reinsert the print cartridge. For more information, see "Installing the print cartridge" on page 54. 8 Print the document again. 58 1 - Lexmark X2350 | User's Guide - Page 59
use of refilled cartridges. Refilling cartridges can affect print quality and cause damage to the All-In-One. For best results, use Lexmark supplies. Cleaning the scanner glass 1 Dampen a clean, lint-free cloth with water. 2 Gently wipe the scanner glass. Note: Make sure all ink or corrective fluid - Lexmark X2350 | User's Guide - Page 60
, visit the Lexmark Web site at www.lexmark.com. The Lexmark 2300 Series All-In-One is designed to print using these parts: Print cartridge part number •1 •2 USB cable part number 12A2405 Lexmark offers premium photo paper, optimized for Lexmark inkjet printers and inks: Lexmark photo paper types - Lexmark X2350 | User's Guide - Page 61
describes the type of problem you are having. Turn to the page listed, and use the table to find solutions to specific symptoms. • "Setup troubleshooting" on page 62 • "Jams and misfeeds troubleshooting" on page 65 • "Print troubleshooting" on page 66 • "Scan and copy troubleshooting" on page 69 - Lexmark X2350 | User's Guide - Page 62
Setup troubleshooting Symptom The Power light is not lit Software will not install Solution 1 Disconnect the power supply cord from the wall outlet, and then from the All-In-One. 2 Plug the cord all the way into the power supply on the All-In-One. 3 Plug the cord into an electrical outlet that - Lexmark X2350 | User's Guide - Page 63
Symptom Software will not install Page will not print Solution 1 Check the USB cable for any obvious damage. 2 Firmly plug the rectangular end of the USB cable into the USB port of the computer. The USB port is marked with the USB symbol. 3 Firmly plug the square end of the USB cable into the back - Lexmark X2350 | User's Guide - Page 64
Start Æ Programs Æ Lexmark 2300 Series Æ Uninstall. 2 Follow the instructions on the computer screen to remove the All-In-One software. 3 Restart the computer. 4 Click Cancel on any Add New Hardware screens. 5 Eject and reinsert the software CD. If the All-In-One software installation screen does - Lexmark X2350 | User's Guide - Page 65
scanner unit. 2 Snap the scanner support into position to hold up the scanner unit. 3 Firmly grasp the paper, and gently pull it out. 4 While lifting the scanner unit, press the scanner support loading instructions for supported paper and specialty media Load paper with the print side facing - Lexmark X2350 | User's Guide - Page 66
scan or copy features, see "Scan and copy troubleshooting" on page 69. Check the ink levels, and install a new print cartridge if necessary. See "Improving print quality" on page 57. To avoid ink paper or specialty media. For photo printing, we recommend Lexmark photo paper. Use only new, unwrinkled - Lexmark X2350 | User's Guide - Page 67
the software" on page 64. See "Checking the All-In-One status" on page 68. 1 Turn the printer off by pressing the button. 2 Disconnect the power supply cord from the electrical outlet. 3 Gently remove the power supply from the printer. 4 Reconnect the power supply to the printer. 5 Plug the power - Lexmark X2350 | User's Guide - Page 68
the status: 1 Click Start Æ Settings Æ Printers and Faxes or Printers. or Click Start Æ Control Panel Æ Printers and Other Hardware Æ Printers and Faxes. 2 Double-click the Lexmark 2300 Series icon. 3 Click Printer, and make sure no check mark appears next to Pause Printing. 4 Make sure a check mark - Lexmark X2350 | User's Guide - Page 69
Scan and copy troubleshooting Symptom Scanner or copier does not respond Scanner unit does not close Solution If the button light is not on, see "The Power light is not lit" on page 62. Make sure the computer is on. 1 Check the USB cable for any obvious damage. 2 Firmly plug the rectangular end of - Lexmark X2350 | User's Guide - Page 70
scanner glass with a damp, clean, lint-free cloth. Try using another version of the document or image. See "Aligning the print cartridge" on page 56. See "Improving print quality" on page 57. Replace the print cartridge with a new cartridge. For more information, see "Replacing the print cartridge - Lexmark X2350 | User's Guide - Page 71
troubleshooting Error Message Ink Low Paper Jam Paper Out Power light blinks twice Solution Check the ink cartridge level, and install a new cartridge if necessary. To check the ink cartridge level, open the Lexmark Solution Center. See "Using the Lexmark Solution Center" on page 25. To install - Lexmark X2350 | User's Guide - Page 72
for USB attach. Use of a substitute cable not properly shielded and grounded may result in a violation of FCC regulations. Any questions regarding this compliance information statement should be directed to: Director of Lexmark Technology & Services Lexmark International, Inc. 740 West New Circle - Lexmark X2350 | User's Guide - Page 73
by the Director of Manufacturing and Technical Support, Lexmark International, S.A., Boigny, France. This . 1-meter average sound pressure, dBA Printing 50 or less Idling 0 ENERGY STAR caused by power generation. Companies participating in this program introduce products that power down when - Lexmark X2350 | User's Guide - Page 74
hard copy output from hard copy originals Product is scanning hard copy documents Product is waiting for a print job All-In-One is plugged into a wall outlet, but switch is turned off Power consumption 12 W 10 W 6.6 W 5 W 4.8 W The power consumption levels listed in the previous table represent - Lexmark X2350 | User's Guide - Page 75
To tab 26 I I Want To menu 23 improving print quality 57 ink low 71 installing print cartridges 54 software 64 iron-on transfers 28 J jams and misfeeds 65 L Lexmark All-In-One Center 15 Lexmark Fast Pics 18 Lexmark Imaging Studio 13 Lexmark Photo Editor 20 Lexmark products ordering 60 recycling 60 - Lexmark X2350 | User's Guide - Page 76
software 64 removing print cartridge 52 software 64 replacing print cartridge 52 S safety information 2 Saved Images tab 17 Scan section 16 scan troubleshooting 69 scanner glass cleaning 59 placing documents on 32 scanner unit 10 scanning 37 sending a fax 47 setup troubleshooting 61 software Lexmark - Lexmark X2350 | User's Guide - Page 77
22 uninstalling software 64 USB cable 60 W Web site, Lexmark 60 wiping print cartridge nozzles 58 T top cover 9 transparencies 30 troubleshooting All-In-One does not print or respond 67 Ink Low message 71 paper jam 65 Paper Out message 71 poor graphic quality 70 power light is not on 62 scanner or
-
 1
1 -
 2
2 -
 3
3 -
 4
4 -
 5
5 -
 6
6 -
 7
7 -
8
-
9
-
10
-
11
-
12
-
13
-
14
-
15
-
16
-
17
-
18
-
19
-
20
-
21
-
22
-
23
-
24
-
25
-
26
-
27
-
28
-
29
-
30
-
31
-
32
-
33
-
34
-
35
-
36
-
37
-
38
-
39
-
40
-
41
-
42
-
43
-
44
-
45
-
46
-
47
-
48
-
49
-
50
-
51
-
52
-
53
-
54
-
55
-
56
-
57
-
58
-
59
-
60
-
61
-
62
-
63
-
64
-
65
-
66
-
67
-
68
-
69
-
70
-
71
-
72
-
73
-
74
-
75
-
76
-
77
 |
 |

www.lexmark.com
May 2005
2300 Series
All-In-One
User’s Guide
Lexmark and Lexmark with diamond design are trademarks of Lexmark
International, Inc., registered in the United States and/or other countries.
© 2005 Lexmark International, Inc. All rights reserved.
740 West New Circle Road
Lexington, Kentucky 40550