Lexmark X651DE IPDS Printer and Host Setup Guide - Page 26
TCP/IP Settings, Parameter, Value, Activate, Address, Netmask, Gateway, Enable DHCP, Enable BOOTP
 |
UPC - 734646093729
View all Lexmark X651DE manuals
Add to My Manuals
Save this manual to your list of manuals |
Page 26 highlights
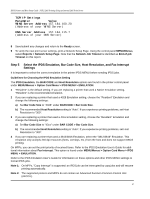
IPDS Printer and Host Setup Guide PSF/2 LAN Printing Using an Internal LAN Print Server Step 4 Configure the Printer's Print Server TCP/IP Settings To enable IPDS printing with a Standard Network port or a MarkNet internal LAN print server, several settings must be verified. You can verify these settings from the printer control panel as shown below. 1 From a Ready state press the MENU button (printers) or touch (Menus on MFPs). 2 Use the navigation buttons or icons to scroll to Network/Ports. 3 Select Network/Ports. TIp: To do this on printers, press the Select button ; on MFPs just touch Network/Ports. 4 Now you will see a list of menus. Select the Standard Network menu. 5 Select Std Network Setup. 6 Select TCP/IP. 7 Use the navigation buttons or icons to scroll through the options. Check each of the following settings and change them as needed to configure TCP/IP communication. TCP/IP Settings Parameter Value Activate On (Printers: Must be "On" to enable TCP/IP communi- cations. MFPs: not displayed.) Address 157.184.67.102 (Address available from your network administrator) Netmask 255.255.255.0 (Appropriate netmask for your network) Gateway 157.184.67.1 (IP address of your IP gateway) Enable DHCP On or Off (On, if you use a DHCP server.) (Off, if you set the IP address another way.) Enable RARP On or Off (On, if you use a RARP server.) (Off, if you set the IP address another way.) Enable BOOTP On or Off (On, if you use a BOOTP server.) (Off, if you set the IP address another way.) Enable AutoIP On or Off (Default is On. This is the recommended setting.) 26
-
 1
1 -
2
-
3
-
4
-
5
-
6
-
7
-
8
-
9
-
10
-
11
-
12
-
13
-
14
-
15
-
16
-
17
-
18
-
19
-
20
-
 21
21 -
 22
22 -
 23
23 -
 24
24 -
 25
25 -
 26
26 -
 27
27 -
 28
28 -
 29
29 -
 30
30 -
 31
31 -
32
-
33
-
34
-
35
-
36
-
37
-
38
-
39
-
40
-
41
 |
 |
