Lexmark X945e FTP guide
Lexmark X945e Manual
 |
View all Lexmark X945e manuals
Add to My Manuals
Save this manual to your list of manuals |
Lexmark X945e manual content summary:
- Lexmark X945e | FTP guide - Page 1
. Place these items on the scanner glass. 2 If you are loading a document into the ADF, adjust the paper guides. 3 On the home screen, touch FTP. 4 Type the FTP address. 5 Touch Send It. Scanning to an FTP address using a shortcut number For information on creating shortcuts, see the section in this - Lexmark X945e | FTP guide - Page 2
Background Removal, Contrast, Shadow Detail, and Mirror Image before you scan the document • Custom Job (Job Build)-Combines multiple scanning jobs into a single job • Transmission Log-Prints the transmission log or transmission error log • Scan Preview-Displays the first pages of an image before it
-
 1
1 -
 2
2
 |
 |

FTP guide
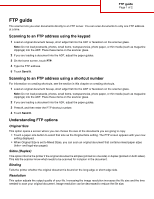
The scanner lets you scan documents directly to an FTP server. You can scan documents to only one FTP address
at a time.
Scanning to an FTP address using the keypad
1
Load an original document faceup, short edge first into the ADF or facedown on the scanner glass.
Note:
Do not load postcards, photos, small items, transparencies, photo paper, or thin media (such as magazine
clippings) into the ADF. Place these items on the scanner glass.
2
If you are loading a document into the ADF, adjust the paper guides.
3
On the home screen, touch
FTP
.
4
Type the FTP address.
5
Touch
Send It
.
Scanning to an FTP address using a shortcut number
For information on creating shortcuts, see the section in this chapter on creating shortcuts.
1
Load an original document faceup, short edge first into the ADF or facedown on the scanner glass.
Note:
Do not load postcards, photos, small items, transparencies, photo paper, or thin media (such as magazine
clippings) into the ADF. Place these items on the scanner glass.
2
If you are loading a document into the ADF, adjust the paper guides.
3
Press
#
, and then enter the FTP shortcut number.
4
Touch
Send It
.
Understanding FTP options
Original Size
This option opens a screen where you can choose the size of the documents you are going to copy.
•
Touch a paper size button to select that size as the Original Size setting. The FTP screen appears with your new
setting displayed.
•
When Original Size is set to Mixed Sizes, you can scan an original document that contains mixed paper sizes
(letter- and legal-size pages).
Sides (Duplex)
This option informs the printer if the original document is simplex (printed on one side) or duplex (printed on both sides).
This lets the scanner know what needs to be scanned for inclusion in the document.
Binding
Tells the printer whether the original document is bound on the long-edge or short-edge side.
Resolution
This option adjusts the output quality of your file. Increasing the image resolution increases the file size and the time
needed to scan your original document. Image resolution can be decreased to reduce the file size.
FTP guide
Page 1 of 2