Lexmark X9575 User's Guide - Page 174
Setting the number of rings before receiving a fax automatically, Setting up Speed Dial
 |
UPC - 734646041348
View all Lexmark X9575 manuals
Add to My Manuals
Save this manual to your list of manuals |
Page 174 highlights
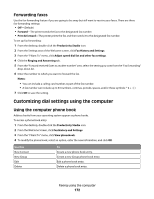
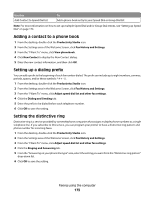
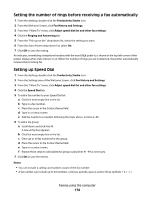
Setting the number of rings before receiving a fax automatically 1 From the desktop, double-click the Productivity Studio icon. 2 From the Welcome Screen, click Fax History and Settings. 3 From the "I Want To" menu, click Adjust speed dial list and other fax settings. 4 Click the Ringing and Answering tab. 5 From the "Pick-up on the" drop-down list, select the setting you want. 6 From the Auto Answer drop-down list, select On. 7 Click OK to save the setting. An indicator, resembling a telephone handset with the word FAX under it, is shown in the top left corner of the printer display when Auto Answer is on. When the number of rings you set is detected, the printer automatically receives the incoming fax. Setting up Speed Dial 1 From the desktop, double-click the Productivity Studio icon. 2 From the Settings area of the Welcome Screen, click Fax History and Settings. 3 From the "I Want To" menu, click Adjust speed dial list and other fax settings. 4 Click the Speed Dial tab. 5 To add a fax number to your Speed Dial list: a Click the next empty line in the list. b Type in a fax number. c Place the cursor in the Contact Name field. d Type in a contact name. e Add fax numbers as needed, following the steps above, on lines 2-89. 6 To add a fax group: a Scroll down and click line 90. A new entry box appears. b Click the next empty line in the list. c Enter up to 30 fax numbers for the group. d Place the cursor in the Contact Name field. e Type in a contact name. f Repeat these steps to add additional groups using lines 91-99 as necessary. 7 Click OK to save the entries. Notes: • You can include a calling card number as part of the fax number. • A fax number can include up to 64 numbers, commas, periods, spaces, and/or these symbols Faxing using the computer 174
-
 1
1 -
2
-
3
-
4
-
5
-
6
-
7
-
8
-
9
-
10
-
11
-
12
-
13
-
14
-
15
-
16
-
17
-
18
-
19
-
20
-
21
-
22
-
23
-
24
-
25
-
26
-
27
-
28
-
29
-
30
-
31
-
32
-
33
-
34
-
35
-
36
-
37
-
38
-
39
-
40
-
41
-
42
-
43
-
44
-
45
-
46
-
47
-
48
-
49
-
50
-
51
-
52
-
53
-
54
-
55
-
56
-
57
-
58
-
59
-
60
-
61
-
62
-
63
-
64
-
65
-
66
-
67
-
68
-
69
-
70
-
71
-
72
-
73
-
74
-
75
-
76
-
77
-
78
-
79
-
80
-
81
-
82
-
83
-
84
-
85
-
86
-
87
-
88
-
89
-
90
-
91
-
92
-
93
-
94
-
95
-
96
-
97
-
98
-
99
-
100
-
101
-
102
-
103
-
104
-
105
-
106
-
107
-
108
-
109
-
110
-
111
-
112
-
113
-
114
-
115
-
116
-
117
-
118
-
119
-
120
-
121
-
122
-
123
-
124
-
125
-
126
-
127
-
128
-
129
-
130
-
131
-
132
-
133
-
134
-
135
-
136
-
137
-
138
-
139
-
140
-
141
-
142
-
143
-
144
-
145
-
146
-
147
-
148
-
149
-
150
-
151
-
152
-
153
-
154
-
155
-
156
-
157
-
158
-
159
-
160
-
161
-
162
-
163
-
164
-
165
-
166
-
167
-
168
-
 169
169 -
 170
170 -
 171
171 -
 172
172 -
 173
173 -
 174
174 -
 175
175 -
 176
176 -
 177
177 -
 178
178 -
 179
179 -
180
-
181
-
182
-
183
-
184
-
185
-
186
-
187
-
188
-
189
-
190
-
191
-
192
-
193
-
194
-
195
-
196
-
197
-
198
-
199
-
200
-
201
-
202
-
203
-
204
-
205
-
206
-
207
-
208
-
209
-
210
-
211
-
212
-
213
-
214
-
215
-
216
-
217
-
218
-
219
-
220
-
221
-
222
-
223
-
224
-
225
-
226
-
227
-
228
-
229
-
230
-
231
-
232
-
233
-
234
-
235
-
236
-
237
-
238
-
239
-
240
-
241
-
242
-
243
-
244
-
245
-
246
-
247
-
248
-
249
-
250
-
251
-
252
-
253
-
254
-
255
-
256
-
257
-
258
-
259
-
260
-
261
-
262
-
263
-
264
-
265
-
266
-
267
-
268
-
269
-
270
-
271
-
272
-
273
-
274
-
275
-
276
-
277
-
278
-
279
-
280
-
281
-
282
-
283
-
284
-
285
-
286
-
287
-
288
-
289
-
290
 |
 |