Lexmark Z65n Information Update (98 KB) - Page 4
Mac OS X version 10.0.3 to 10.1
 |
View all Lexmark Z65n manuals
Add to My Manuals
Save this manual to your list of manuals |
Page 4 highlights
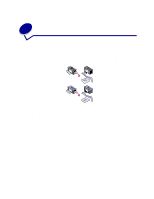
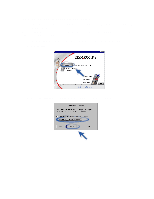
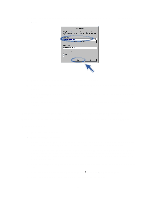
7 Make sure Default is selected. 8 Click Select. 9 From the Cartridge Verification dialog box, choose whether each cartridge is old or new, and then click OK. If you chose old for both cartridges, Click Align Cartridges. 10 From the Alignment Screen, select Automatic Alignment and click Continue. 11 From the Alignment Status dialog box, follow the instructions on the screen. 12 After completing alignment, click the button in the upper left to close the Lexmark Z65 dialog box. Mac OS X version 10.0.3 to 10.1 1 Make sure your computer is on. 2 Disconnect the old printer. 3 Connect the replacement printer to your computer, install the cartridges, and load plain inkjet paper into paper tray 1. For help, refer to the setup sheet that came with your printer. 4 From the Finder, click Applications Utilities, and then double-click Print Center to open the Print Center. 5 Select the old printer to highlight it, and then click Delete. 6 Click Add Printer. 7 Select your replacement printer, and then click Add. 8 From the Printer menu, choose Configure Printer. The Printer Selection dialog appears. 9 Double-click the name of your printer. The Lexmark Z65 Utility opens. 10 From the Cartridge Verification dialog box, choose whether each cartridge is old or new, and then click OK. If you chose old for both cartridges, Click Align Cartridges. 11 From the Cartridge Changed dialog, click Continue to automatically align the cartridges. 12 From the Automatic Alignment Successful dialog, click OK. 13 Click the red close button in the upper left to close the Lexmark Z65 Utility. 14 Click the red close button in the upper left to close the Print Center. © Copyright 2002 Lexmark International, Inc. 4 All rights reserved.
-
 1
1 -
 2
2 -
 3
3 -
 4
4
 |
 |