Lexmark Z65p Photo Guide (1.6 MB)
Lexmark Z65p Manual
 |
View all Lexmark Z65p manuals
Add to My Manuals
Save this manual to your list of manuals |
Lexmark Z65p manual content summary:
- Lexmark Z65p | Photo Guide (1.6 MB) - Page 1
Z65p Photo Jetprinter™ Photo Guide October 2002 www.lexmark.com - Lexmark Z65p | Photo Guide (1.6 MB) - Page 2
products, programs, or services, except those expressly designated by the manufacturer, are the user's responsibility. Lexmark and Lexmark with diamond design are trademarks of Lexmark International, Inc., registered in the United States and/or other countries. Photo Jetprinter is a trademark of - Lexmark Z65p | Photo Guide (1.6 MB) - Page 3
printer 1 Understanding the printer parts 1 Understanding memory cards 3 Using the software to select your printer settings 6 Using the software to meet your printing needs 7 Printing from paper tray 1 8 Printing from paper tray 2 11 Printing photos 14 Printing a digital photo on a photo - Lexmark Z65p | Photo Guide (1.6 MB) - Page 4
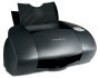
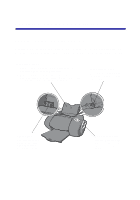
Learning about your printer Understanding the printer parts Printing is easier than ever before. Your printer can automatically align your cartridges and detect the type of paper you have loaded into paper tray 1. Paper tray 1 (front) • Load custom size paper, plain inkjet paper, or specialty - Lexmark Z65p | Photo Guide (1.6 MB) - Page 5
cover Open to install cartridges or clear a paper jam. Paper exit tray Extend to hold paper as it exits. Paper tray 2 (rear) Load A4 or letter size paper. Power button Press to turn the printer on or off. Paper tray buttons • Press once to select paper tray 1 (front) or paper tray 2 (rear). • If - Lexmark Z65p | Photo Guide (1.6 MB) - Page 6
memory cards Most digital cameras use a memory card to store photos. You can insert the memory card into your printer and print your photos or save them on your computer. Inserting a memory card Your printer supports the following digital media: • CompactFlash I and II • IBM Microdrive • Secure - Lexmark Z65p | Photo Guide (1.6 MB) - Page 7
a gold contact area, make sure the contact area faces the side of your printer. • If you are inserting a CompactFlash card, make sure the name label faces away from your printer. • Your printer recognizes one source for photos at a time. Insert only one memory card at a time. When you insert your - Lexmark Z65p | Photo Guide (1.6 MB) - Page 8
the following way to prevent data loss: 1 Double-click the My Computer icon on your desktop. 2 Right-click the icon for the removable disk drive supporting your memory card. The icon looks similar to the one shown. 3 Select Eject from the drop-down menu. 4 Click OK on the Eject dialog box - Lexmark Z65p | Photo Guide (1.6 MB) - Page 9
a memory card, all images are deleted from it. If you are storing photos on your memory card, copy them to another location before you format it. Formatter. 3 Follow the instructions on your screen to format your memory card. Using the software to select your printer settings Print Properties Use - Lexmark Z65p | Photo Guide (1.6 MB) - Page 10
, coated, glossy, or photo Using the software to meet your printing needs Use the Lexmark Z65 Solution Center for: • Aligning and maintaining cartridges • Viewing printer status information, such as the paper type detected in paper tray 1 and ink levels • Troubleshooting • Printing a test page - Lexmark Z65p | Photo Guide (1.6 MB) - Page 11
paper tray 1 From paper tray 1, you can print on any supported paper type, such as plain, coated, photo, photo, or glossy paper into paper tray 1, your printer detects the paper type and automatically adjusts the Paper Type setting in the printer software for you. To print a document from this tray - Lexmark Z65p | Photo Guide (1.6 MB) - Page 12
. For example, A4 and letter size paper should extend beyond the top of paper tray 1. 3 Make sure the paper tray 1 button is selected. Paper tray 1 button 4 Follow these steps to open the printer software and print your document. a With your document open, click File Print Properties or Preferences - Lexmark Z65p | Photo Guide (1.6 MB) - Page 13
c Make sure Paper Source is set to Printer Setting or Tray 1 (Front). Note: Some software applications may override your paper tray selection. You may need to make your paper tray selection within the application. d From the Paper Setup tab, make sure the Paper Type is set to Automatic (if you want - Lexmark Z65p | Photo Guide (1.6 MB) - Page 14
Printing from paper tray 2 From paper tray 2, you can print on A4 or letter size paper. This paper tray does not have a paper type sensor, so you will need to select a paper type in the printer software. To print a document from this tray: 1 Load the paper, with the print side facing you, against - Lexmark Z65p | Photo Guide (1.6 MB) - Page 15
. For example, A4 and letter size paper should extend beyond the top of paper tray 2. 3 Make sure the paper tray 2 button is selected. Paper tray 2 button 4 Follow these steps to open the printer software and print your document. a With your document open, click File Print Properties or Preferences - Lexmark Z65p | Photo Guide (1.6 MB) - Page 16
d Select a paper type. Note: Some software applications may override your paper tray selection. e Click OK. f Click OK or Print. 13 - Lexmark Z65p | Photo Guide (1.6 MB) - Page 17
create projects using the software that came with your printer. Printing a digital photo on a photo card Step 1: Load the paper 1 Load up to 10 photo cards vertically against the right side of paper tray 1. When you load photo cards, make sure: • You carefully read the instructions that came with - Lexmark Z65p | Photo Guide (1.6 MB) - Page 18
2 Squeeze and slide the paper guide to the left edge of the cards. 3 Make sure the paper tray 1 button is selected. Paper tray 1 button 15 - Lexmark Z65p | Photo Guide (1.6 MB) - Page 19
Step 2: Access your photo 1 Insert your memory card into the corresponding memory card slot. For help, see page 3. Note: Insert only one memory card at a time. The Memory Card - Lexmark Z65p | Photo Guide (1.6 MB) - Page 20
appears. d Enter a name for this set of images. e Browse to select a folder on your hard drive where you want to store your photos, and then create a new subfolder. f Click Next. FotoSlate launches. Your photos appear in the left pane. 2 From the toolbar, click Add Page. 3 Select a template for your - Lexmark Z65p | Photo Guide (1.6 MB) - Page 21
are saved to the template only, not to the original photo. Note: You can find more information on editing your photos in the FotoSlate Help or the FotoSlate User Guide. Step 3: Print your photo 1 When you are ready to print your photo, click File Print Properties or Preferences. 2 From the I Want To - Lexmark Z65p | Photo Guide (1.6 MB) - Page 22
From the Paper Setup tab, make sure Paper Source is set to Printer Setting or Tray 1 (Front). 6 From Print Properties, click OK. 7 From the Print screen, click OK or Print. 8 To prevent smudging, remove each photo as it exits the printer and let it dry completely before stacking. Designing pages for - Lexmark Z65p | Photo Guide (1.6 MB) - Page 23
you set Files of Type to All Image Files or All files (*.*). For a list of supported file types, refer to the Appendix of the FotoSlate User Guide. c Click Open. Your photos appear in the left pane. 3 Access photos stored on other memory cards: a Remove the memory card you just inserted. For help - Lexmark Z65p | Photo Guide (1.6 MB) - Page 24
box. 2 Double-click the dark gray box. 3 In the Enter Text dialog box, type the desired text. 4 When you are finished, click OK. Step 5: Organize photos in your layout You can left-click an image on a page and drag it to an image box on another page. If the new image - Lexmark Z65p | Photo Guide (1.6 MB) - Page 25
• Click a picture area or a caption area to resize it. • Add text to a caption area. To add text to a caption area: a Double-click the caption area. b Select Use Content. c Click Define Content, and then type the desired text in the Enter Text dialog box. d Click OK. e Click OK again. 4 Save your - Lexmark Z65p | Photo Guide (1.6 MB) - Page 26
images, select Fill pages with multiple images. Then add other images to your template. For help, see "Step 3: Add photos to your templates" on page 20. 6 Click OK. Cropping photos 1 Double-click a photo in your layout. The photo opens in the Image Editor. 2 Click Crop from the toolbar. An editing - Lexmark Z65p | Photo Guide (1.6 MB) - Page 27
. 4 Click OK. The editing window turns into a dashed box. 5 Click Accept from the toolbar. Personalizing fabric with pictures 1 Open a photo in your photo application. For help, see "Step 2: Access your photo" on page 16. 2 Load up to 25 iron-on transfers into paper tray 1 with the blank side facing - Lexmark Z65p | Photo Guide (1.6 MB) - Page 28
against the right side of the paper support, following the loading instructions on the package. 4 Squeeze and slide the paper guide to the left edge of the From the Paper Setup tab, make sure Paper Source is set to Printer Setting or Tray 1 (Front). 12 From Print Properties, click OK. 13 From the - Lexmark Z65p | Photo Guide (1.6 MB) - Page 29
printer. For help, refer to the Setup Guide. Did you install the printer software correctly? From your desktop, click Start Programs or All Programs. If Lexmark Z65 does not appear in your list of programs, install the printer software (CD-2). Refer to the Setup Guide for installation instructions - Lexmark Z65p | Photo Guide (1.6 MB) - Page 30
list of programs, install the photo software (CD-1). Refer to the Setup Guide for installation instructions. Is your printer connected to your computer through an external device, such as a USB hub, switch box, scanner, or fax machine? If not, refer to the Setup Troubleshooting section of the Setup - Lexmark Z65p | Photo Guide (1.6 MB) - Page 31
statement The Lexmark Z65 Photo Jetprinter has been tested and found to comply with the limits for a Class B digital device, pursuant to Part 15 of installation. This equipment generates, uses and can radiate radio frequency energy and, if not installed and used in accordance with the instructions - Lexmark Z65p | Photo Guide (1.6 MB) - Page 32
they are not being used. This feature will cut the energy used by up to 50 percent. Lexmark is proud to be a participant in this program. As an ENERGY STAR Partner, Lexmark International, Inc. has determined that this product meets the ENERGY STAR guidelines for energy efficiency. Japanese VCCI - Lexmark Z65p | Photo Guide (1.6 MB) - Page 33
by anyone other than Lexmark or a Lexmark authorized servicer • Operation of a product beyond the limit of its duty cycle • Use of printing media outside of Lexmark specifications • Supplies (such as ink) not furnished by Lexmark • Products, components, parts, materials, software, or interfaces not - Lexmark Z65p | Photo Guide (1.6 MB) - Page 34
WILL APPLY AFTER THIS PERIOD. ALL INFORMATION, SPECIFICATIONS, PRICES, AND SERVICES ARE SUBJECT TO CHANGE AT ANY TIME WITHOUT NOTICE. Limitation of actual damages up to the limit set forth in the following paragraph. Lexmark's liability for actual damages from any cause whatsoever will be limited to - Lexmark Z65p | Photo Guide (1.6 MB) - Page 35
Lexmark and Lexmark with diamond design are trademarks of Lexmark International, Inc., registered in the United States and/or other countries. Photo Jetprinter is a trademark of Lexmark International, Inc. © October 2002 Lexmark International, Inc. 740 West New Circle Road Lexington, Kentucky 40550
-
 1
1 -
 2
2 -
 3
3 -
 4
4 -
 5
5 -
 6
6 -
 7
7 -
8
-
9
-
10
-
11
-
12
-
13
-
14
-
15
-
16
-
17
-
18
-
19
-
20
-
21
-
22
-
23
-
24
-
25
-
26
-
27
-
28
-
29
-
30
-
31
-
32
-
33
-
34
-
35
 |
 |

www.lexmark.com
Photo Guide
October 2002
Z65p Photo Jetprinter™